
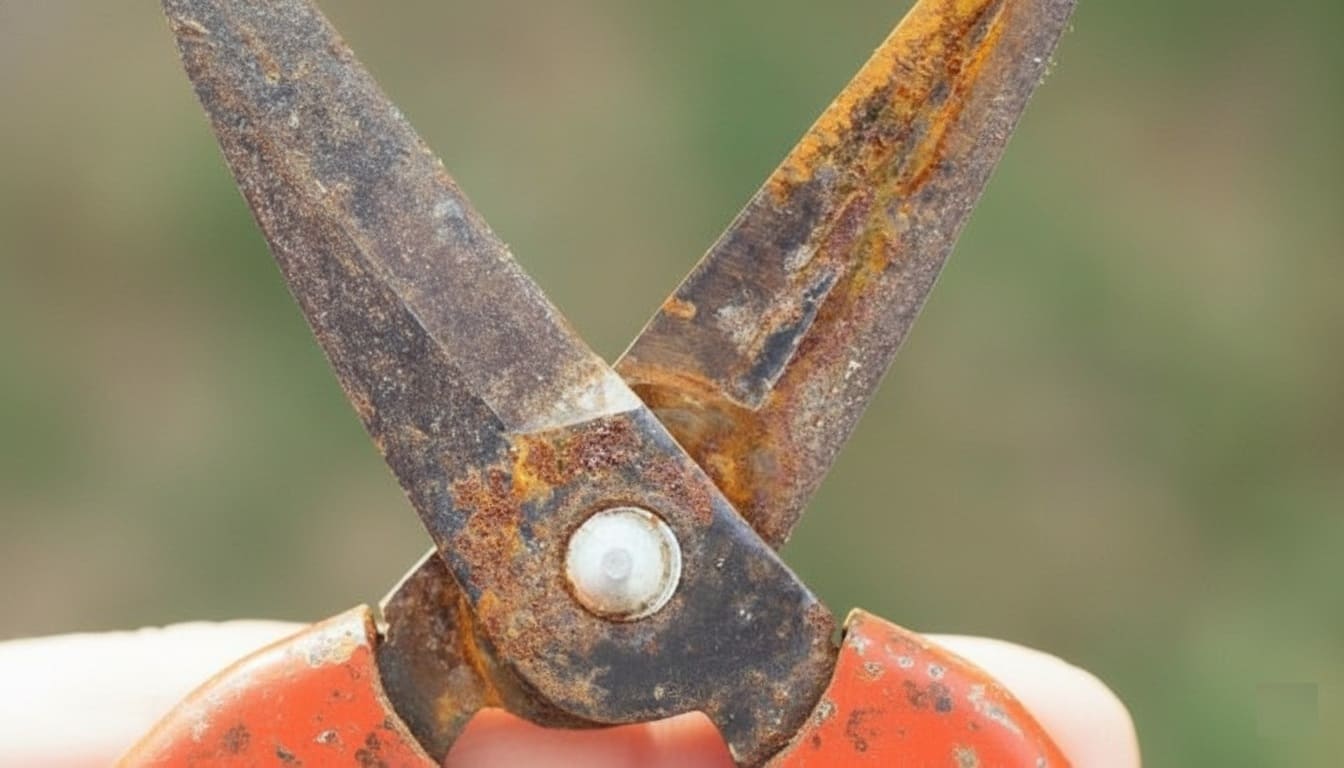
Last spring, I walked into my garden shed and nearly cried. My favorite pruning shears—the ones my grandmother had given me—were covered in orange-brown rust. I’d left them outside after a particularly enthusiastic pruning session, and weeks of rain had done their damage.
But here’s the good news: those shears are now gleaming and sharp, ready for another season. And yours can be too.
Rusty garden tools aren’t just unsightly—they’re actually harmful to both your gardening efficiency and your plants’ health. Rust weakens metal, dulls cutting edges, and can even transfer diseases between plants.
But before you toss those corroded tools and head to the hardware store, know this: most rust can be removed with simple household items you probably already own.
In this guide, you’ll discover multiple proven methods for bringing your tools back to life, understand why rust happens in the first place, and learn how to keep your equipment rust-free for years to come.
Understanding Rust: Your Garden Tool’s Enemy
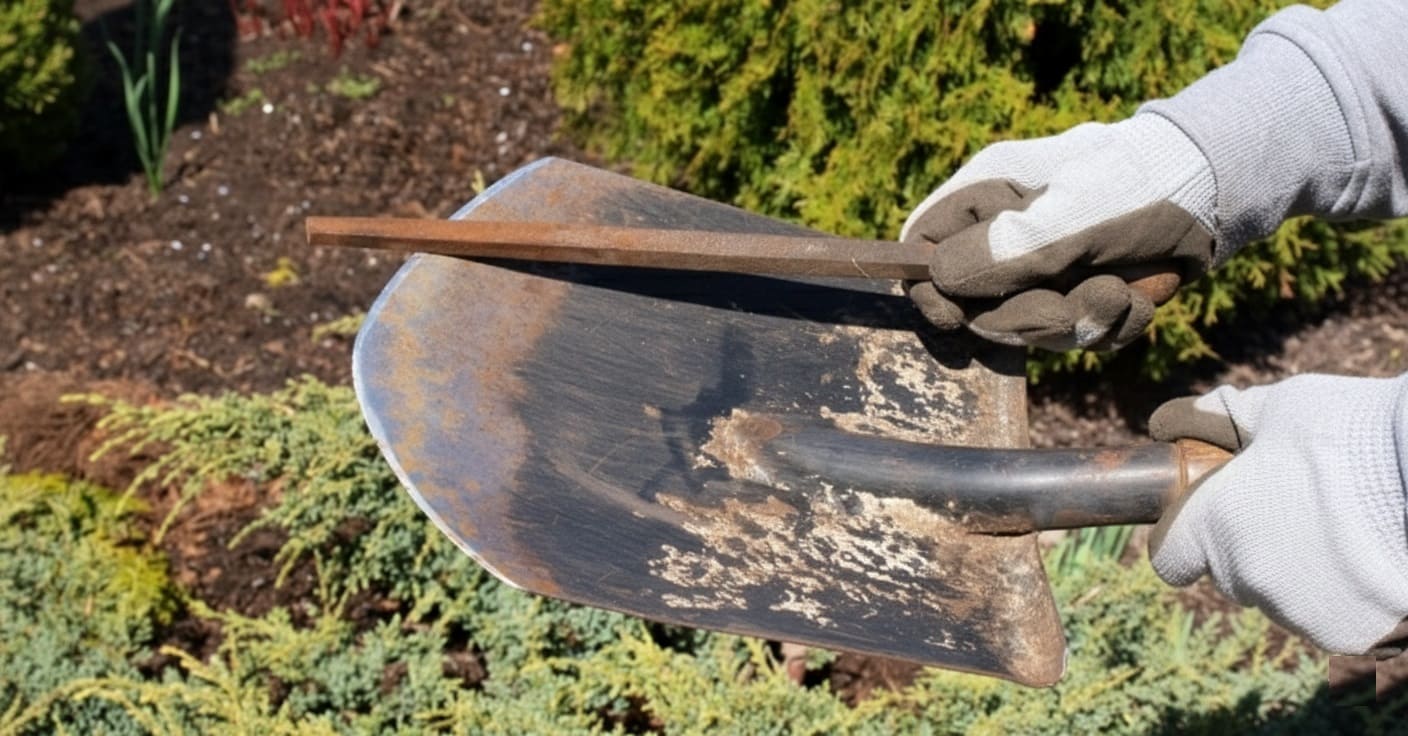
Rust forms through a chemical process called oxidation. When iron or steel comes into contact with oxygen and moisture, they create iron oxide—that flaky, reddish-brown substance that compromises your tools.
Garden tools are particularly vulnerable because they’re constantly exposed to damp soil, morning dew, rain, and humidity from storage in sheds or garages.
The damage goes beyond aesthetics. Rust pits and weakens metal, making tools more likely to break during use. Rusty blades become dull faster and create jagged cuts on plants rather than clean ones. These rough cuts heal slowly and provide entry points for diseases and pests.
Additionally, rust residue can harbor plant pathogens, turning your pruners into disease-spreaders as you move from plant to plant.
Assessing Your Tools: What Level of Intervention Do You Need?
Before starting, spend five minutes evaluating your tools. This assessment determines which method will work best and prevents wasted effort.
- Surface Rust (Light): Orange or brown discoloration on relatively smooth metal. You can easily see the metal underneath. This cosmetic rust hasn’t penetrated deeply. Timeline: 1-2 hours total.
- Moderate Rust: Rough or flaky to the touch with visible texture. Some areas show darker, deeper corrosion. Moving parts feel stiff, but the tool remains structurally sound. Timeline: 4-24 hours soaking, plus 1-2 hours active work.
- Heavy Rust: Thick, crusty buildup covering large areas. Flakes come off when touched. Visible pitting (small craters) where rust has eaten into metal. Moving parts may be frozen. Timeline: 2-3 days with multiple treatments.
- Beyond Saving: Metal feels thin or has holes. The tool flexes abnormally or structural integrity is compromised. Restoration may not be safe or cost-effective.
Using aggressive methods on light rust damages tools unnecessarily, while gentle methods on heavy rust waste time without adequate results.
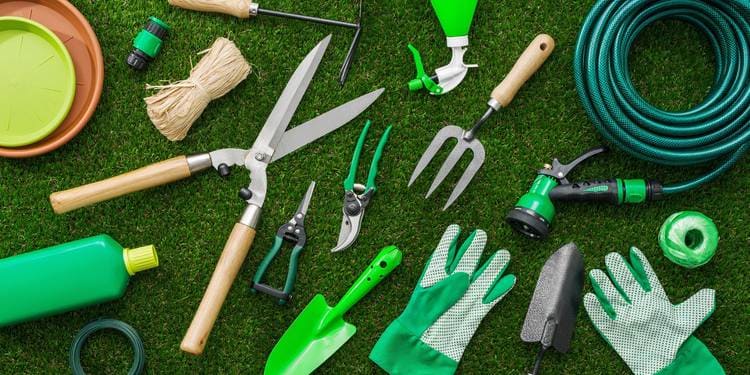
Before You Start: Gathering Your Supplies
The beauty of rust removal is that you don’t need expensive specialty products. Most methods use items from your kitchen or garage:
For Cleaning:
- Warm water and dish soap
- Stiff bristle brush or old toothbrush
- Clean rags or old towels
- Bucket or plastic container
For Rust Removal:
- White vinegar or cleaning vinegar
- Baking soda
- Salt
- Lemon or lime juice
- Steel wool or wire brush
- Sandpaper (various grits from 80 to 220)
For Protection:
- Mineral oil, linseed oil, or multi-purpose lubricant
- Clean cloth for application
Safety First:
- Work gloves
- Safety glasses
- Dust mask (for sanding)
The Foundation: Proper Cleaning Before Rust Removal
You cannot effectively remove rust from dirty tools. Soil and grime create barriers that prevent rust removers from reaching oxidation.
Remove loose debris with a stiff brush. Old toothbrushes excel at crevices and bolts. For dried sap or resin (common after pruning evergreens), use paint thinner, mineral spirits, or cooking oil on a rag. Work in a ventilated area with solvents.
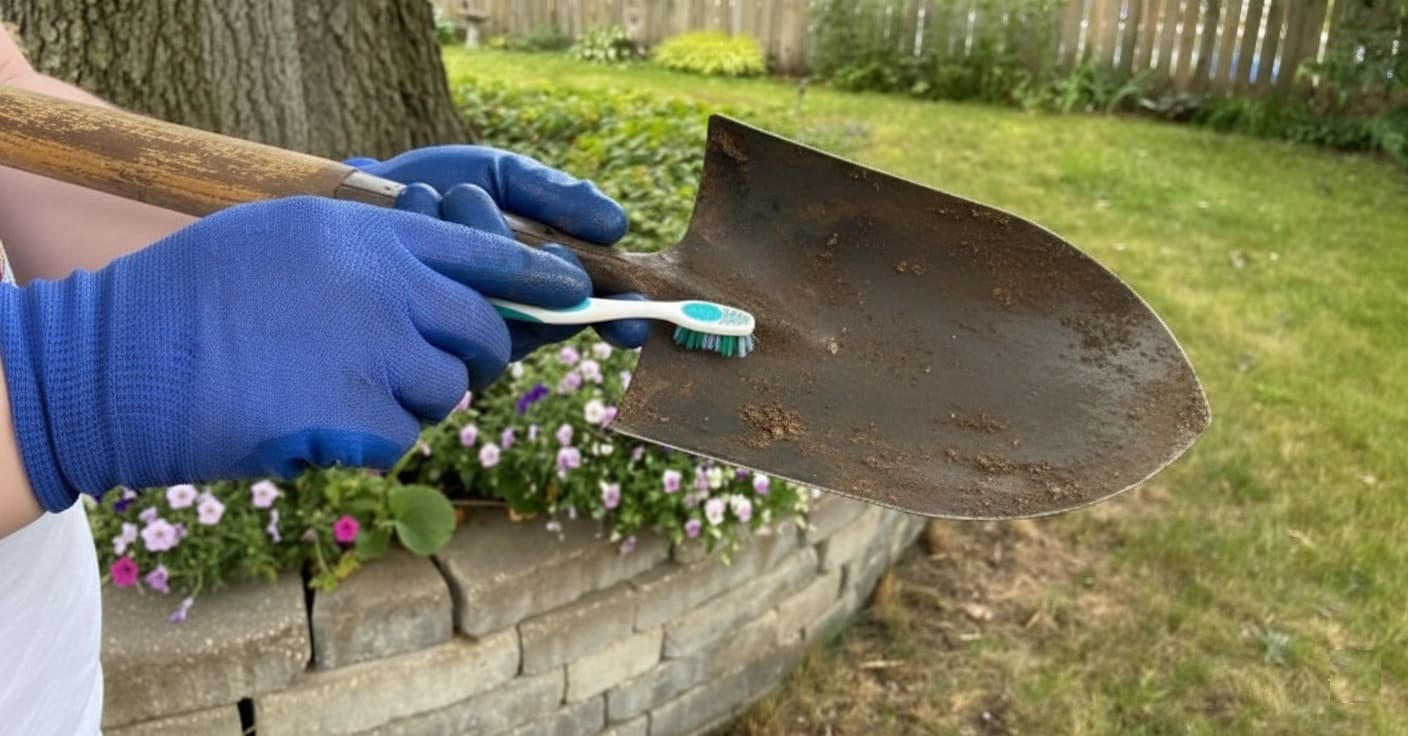
For general grime, use warm water and dish soap. Scrub with a sponge or brush, then dry completely—moisture dilutes rust removers and promotes more rust. Wipe with old towels, then air dry for at least an hour. Pay special attention to joints, springs, and recessed areas where water hides.
Important: Never submerge wooden handles in water. Prolonged soaking causes wood to swell and crack. Wipe wooden parts with a damp cloth and dry immediately.
Disassembly: Getting to Hidden Rust
Rust hides in crevices, under bolts, and between moving parts. These hidden areas become rust factories that continuously spread corrosion to cleaned surfaces.
For pruning shears, loppers, and similar tools with moving parts, disassembly takes fifteen minutes but makes the difference between surface improvement and thorough restoration.
Lay a clean towel on your work surface. As you remove pieces—springs, screws, washers, bolts—place them in order on the towel. This creates a visual map for reassembly.
Most pruners disassemble with a screwdriver or Allen wrench. The central bolt holds blades together with a spring providing tension. Note washer orientation. Springs can fly across the room as you release tension, so cup your hand over the area while loosening.
Once disassembled, you can address every surface, including inner blade faces where rust establishes stubborn colonies. You’ll also discover whether rust has compromised bolt threads or created buildup in spring mechanisms.
For solid tools like shovels or hoes, skip this step. But for anything with hinges, springs, or adjustable parts, disassembly is essential.
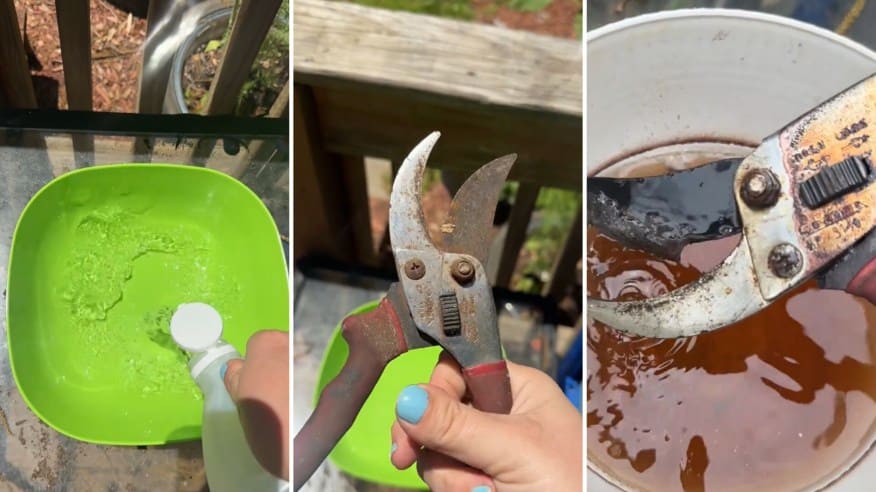
Method 1: The Vinegar Soak—The Gold Standard
Vinegar consistently ranks as the most effective and economical rust remover among gardeners and professionals alike. The acetic acid in vinegar reacts with iron oxide, converting rust into a water-soluble salt that easily washes away.
Step-by-Step Process:
- Initial Cleaning: Remove loose dirt and debris with a stiff brush and water. This prevents soil from turning into muddy sludge during soaking.
- Prepare Your Soak: Pour white vinegar into a container large enough to hold your tool. Cleaning vinegar (6% acidity) works faster than regular white vinegar (5% acidity), but both are effective. For heavily rusted tools, use full-strength vinegar. For lighter rust, a 50-50 mixture of vinegar and water works well.
- Submerge and Wait: Place your tool in the vinegar, ensuring all rusted parts are covered. Small items like pruners can soak for 4-12 hours. Moderately rusted tools benefit from overnight soaking. Extremely corroded pieces may need up to 24 hours.
- Scrub Away: After soaking, you’ll notice the rust has loosened considerably. Use steel wool, a wire brush, or even crumpled aluminum foil to scrub in circular motions. The rust should come off with minimal effort.
- Rinse and Neutralize: Wash the tool thoroughly with clean water to remove all vinegar residue. Vinegar is acidic, and leaving it on metal can eventually cause corrosion. Dry immediately and completely with a clean towel.
- Protect: Apply a thin coat of oil to prevent new rust from forming.
Pro Tips:
- For tools too large to submerge, soak a cloth in vinegar and wrap it tightly around the rusted area. Place the wrapped tool in a plastic bag to prevent dripping and keep the cloth from drying out.
- If you encounter stubborn spots after the first soak, repeat the process rather than scrubbing aggressively, which can damage the metal.
- Never soak tools with wooden handles completely—just the metal parts. Prolonged water exposure causes wood to swell and crack.
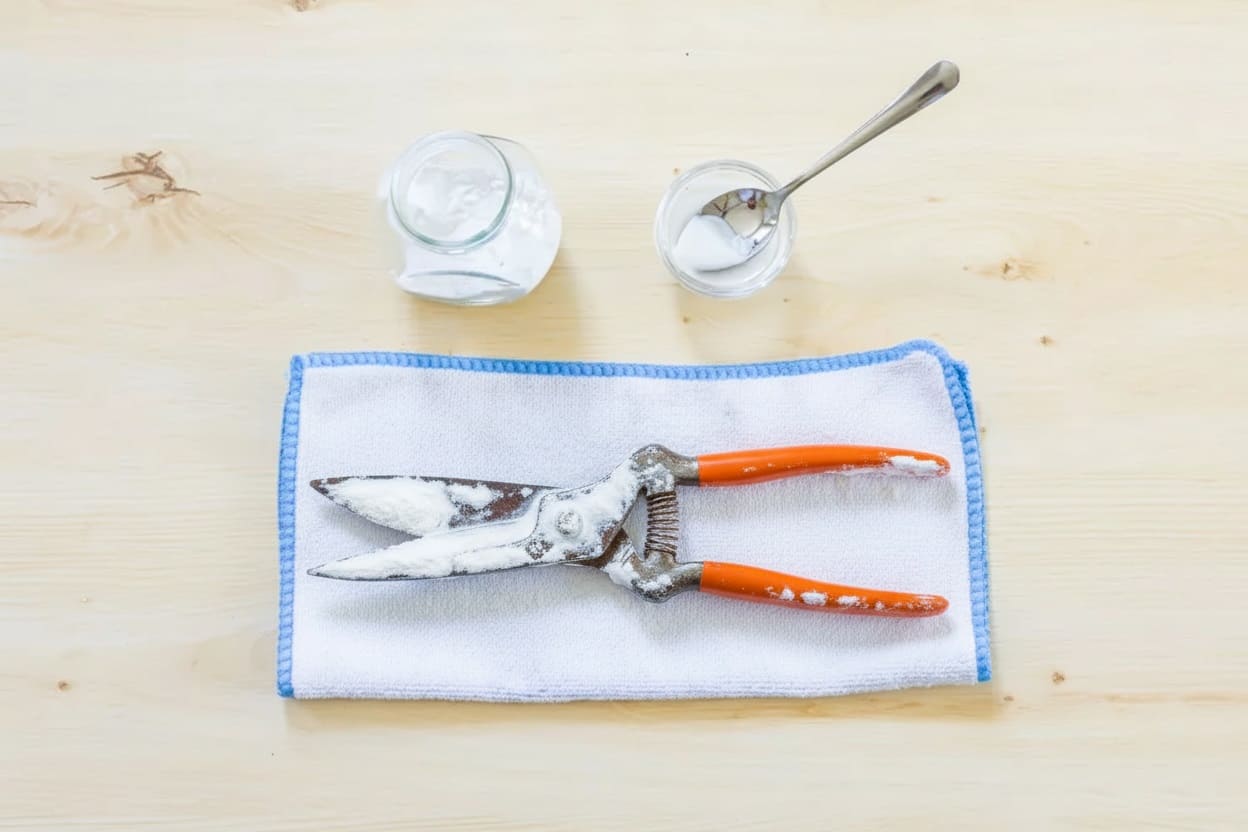
Method 2: Baking Soda Paste for Spot Treatment
When you’re dealing with small rust spots rather than extensive corrosion, baking soda offers a gentler, faster solution. This mild abrasive works through both physical and chemical action.
How to Use It:
- Mix Your Paste: Combine baking soda with water in roughly a 3:1 ratio until you achieve a thick, spreadable consistency similar to toothpaste.
- Apply Generously: Spread the paste over all rusted areas. Don’t be shy—a thick layer works better than a thin one.
- Let It Work: Allow the paste to sit for 1-2 hours. For light rust, even 30 minutes may suffice.
- Scrub: Use a brush, steel wool, or scouring pad to work the paste into the rust with circular motions.
- Rinse and Dry: Wash off all residue and dry thoroughly.
This method shines for maintenance cleaning and catching rust early before it becomes problematic. It’s also excellent for delicate tools or situations where you need results quickly without overnight soaking.
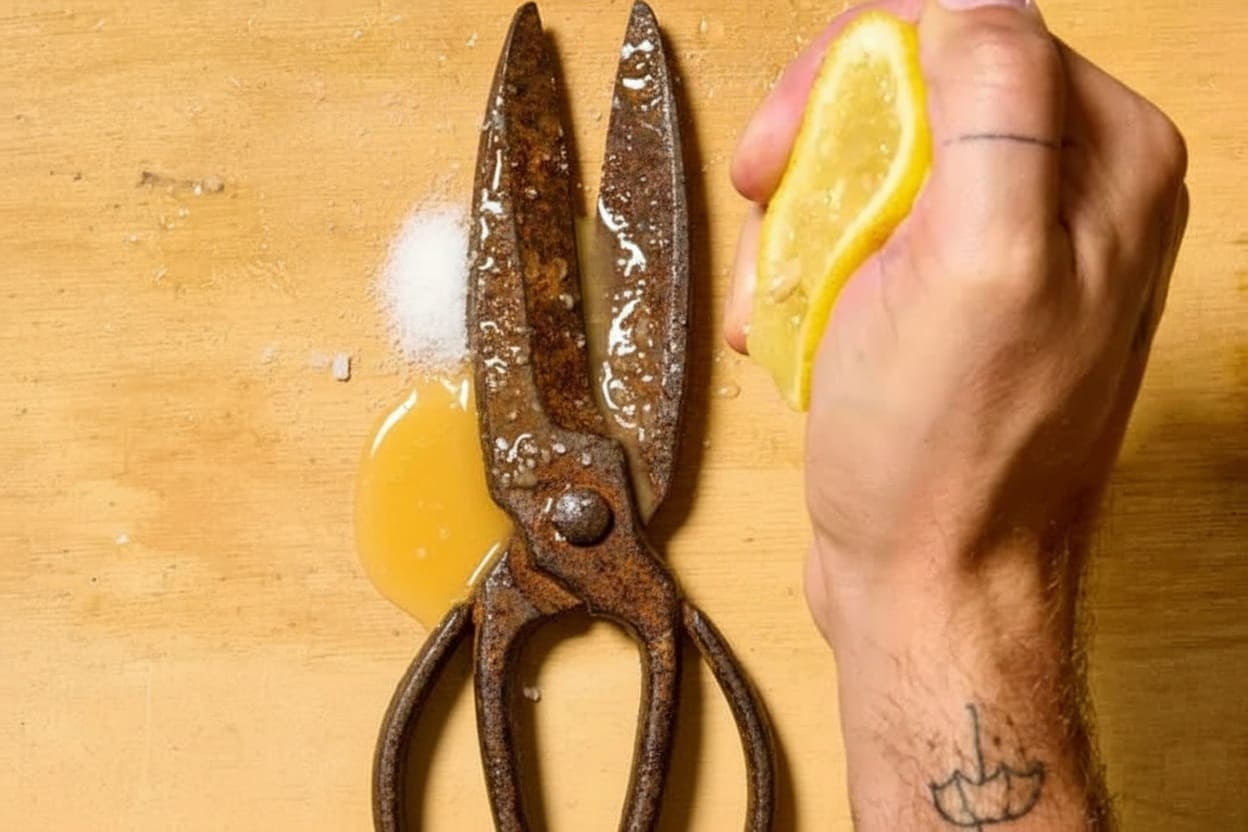
Method 3: Lemon and Salt—Nature’s Rust Fighter
The combination of citric acid from lemons and the abrasive action of salt creates a surprisingly effective rust treatment that smells infinitely better than vinegar.
Application:
- Season the Rust: Sprinkle a generous amount of salt (table salt, kosher salt, or sea salt all work) over the rusted areas.
- Add Acid: Squeeze fresh lemon or lime juice over the salt until it’s saturated. Alternatively, create a paste by mixing equal parts lemon juice, salt, and water.
- Wait Patiently: Let the mixture sit for 2-3 hours. The citric acid needs time to break down the rust.
- Scrub with the Rind: Here’s a clever trick—use the leftover lemon rind as your scrubbing tool. The rind provides gentle abrasion while adding more acid to stubborn spots.
- Rinse Thoroughly: Remove all residue and dry completely.
This method works particularly well on hand tools with intricate shapes where larger scrubbing tools can’t reach easily. The natural acids are also food-safe, making this ideal for tools that contact edible plants.
Method 4: The Coca-Cola Controversy
You’ve probably seen viral videos of people using cola to remove rust. It works—phosphoric acid in cola does dissolve rust. However, there’s an important caveat.
While cola can remove rust, it leaves behind a sticky, sugary residue that’s difficult to clean completely from hinges, joints, and crevices. This residue can attract dirt, gum up moving parts, and potentially foster mold growth. It also offers no protective benefits once the rust is gone.

- If you choose this method: Soak the tool for several hours to overnight, scrub with a wire brush, then wash extremely thoroughly with dish soap and water to remove all sugar residue. Rinse multiple times and dry completely before oiling.
- The verdict: Cola works, but vinegar is cheaper, easier to clean up, and doesn’t leave problematic residue. Save your soda for drinking.
Method 5: Power Tools for Heavy Rust
When rust has penetrated deeply or covers large surface areas, manual scrubbing becomes exhausting. Power tools can speed the process significantly.
Options:
- Wire Wheel Attachment: Mount a wire wheel on a bench grinder or drill to quickly strip away heavy rust from shovels, hoes, and other large implements.
- Rotary Tool: A Dremel or similar rotary tool with a wire brush attachment excels at reaching tight spots and intricate areas.
- Orbital Sander: For flat surfaces with extensive rust, start with coarse-grit sandpaper (80-grit) to remove the bulk, then progress through finer grits (120, 180, 220) for a smooth finish.
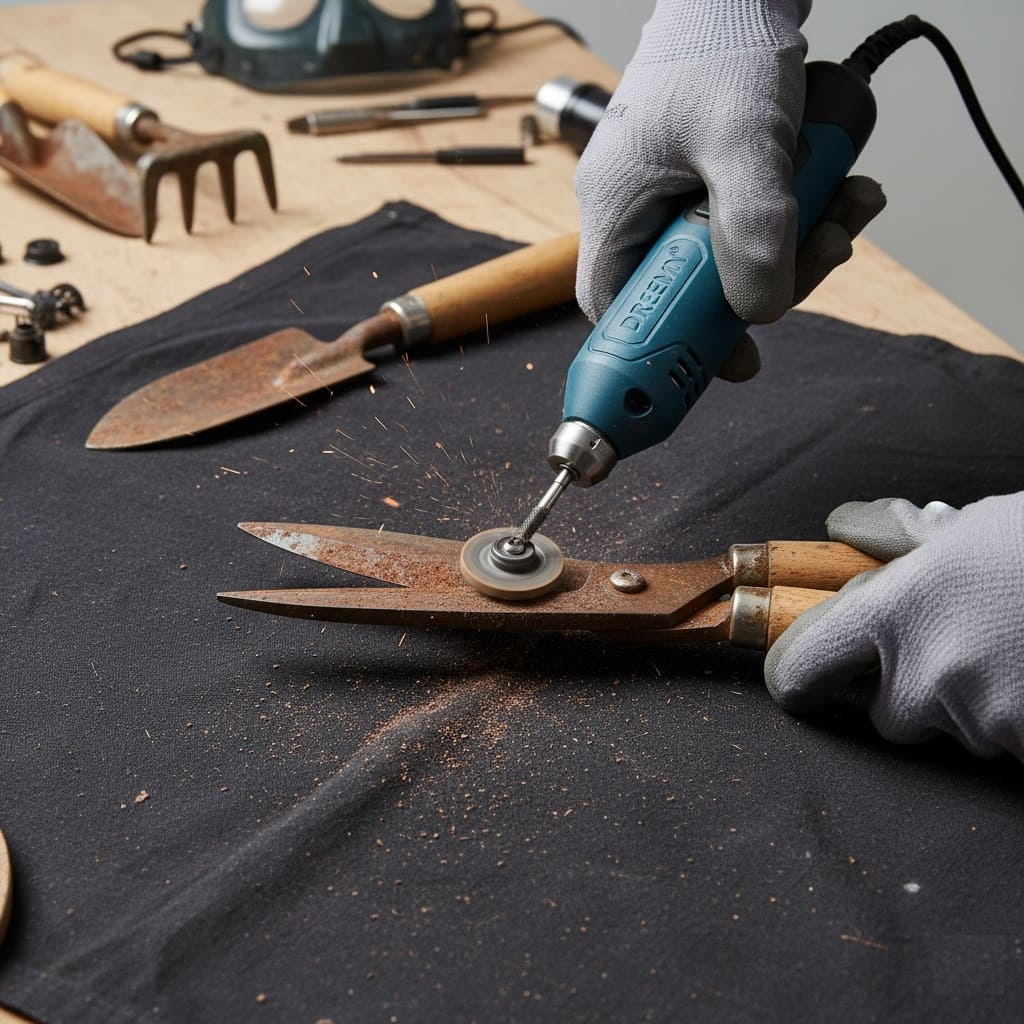
Safety is Critical:
- Always wear safety glasses—rust particles fly everywhere
- Use a dust mask to avoid inhaling metal dust
- Wear gloves to protect your hands from sharp edges and heat buildup
- Work in a well-ventilated area
- Be gentle—aggressive grinding removes metal along with rust, potentially weakening the tool
Method 6: The Potato Method—Surprisingly Effective
This unusual approach uses oxalic acid naturally present in potatoes. While it might sound like an internet hoax, it actually works for light rust.
How to Do It:
- Cut a potato in half
- Dip the cut surface in dish soap or sprinkle with salt
- Rub the potato over rusted areas
- Let the juice sit for 10-15 minutes
- Scrub and rinse

This method won’t replace vinegar for serious rust, but it’s perfect for quick touch-ups and demonstrates that effective rust removal doesn’t always require harsh chemicals.
👉 Here’s How to Grow Tons of Potatoes in Buckets (Even in Small Spaces!)
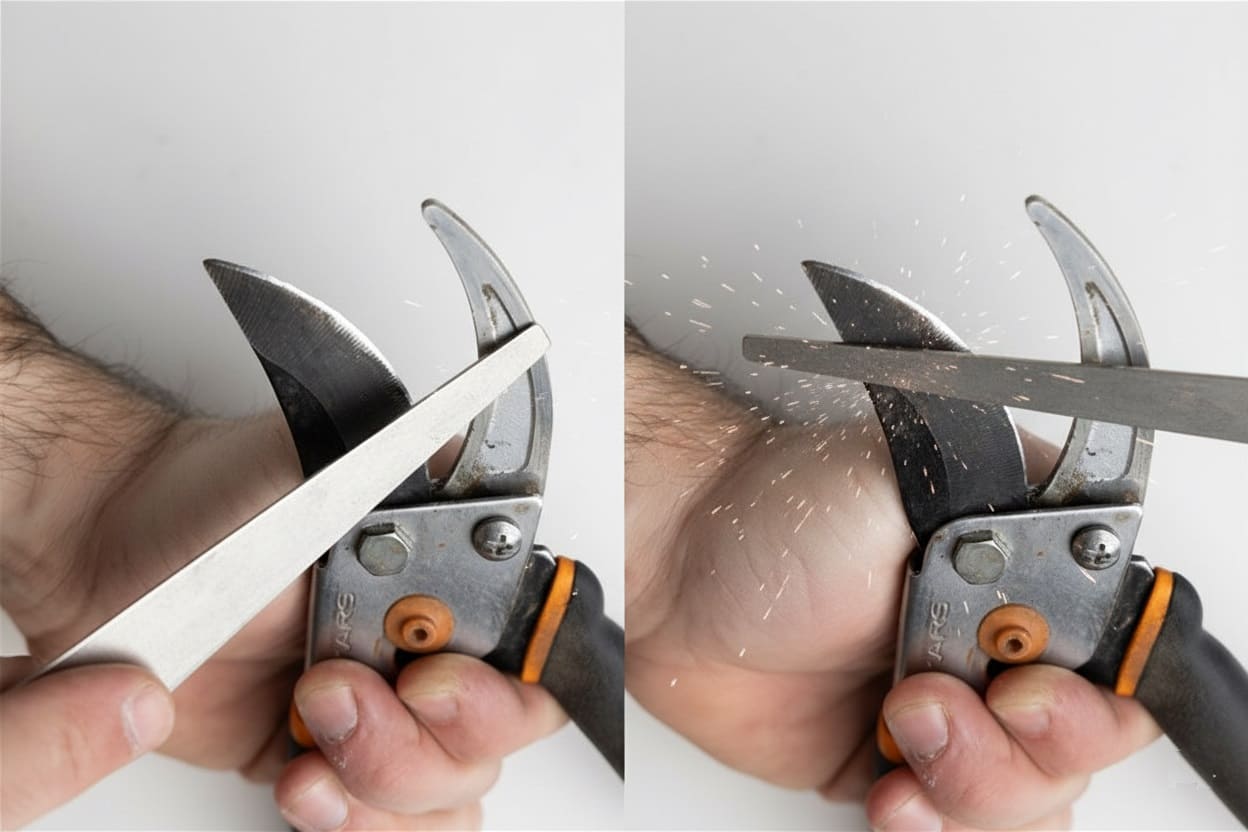
Sharpening: The Final Touch
After removing rust, your tools deserve to be sharp. Rust removal often involves abrasion that can dull edges further, and you’ve already invested time in restoration—finish the job right.
For Pruners and Shears:
- Open the blades fully and secure the tool in a vise or hold firmly
- Identify the beveled edge—most pruners have one sharp blade and one flat blade
- Use a diamond file or whetstone at the blade’s existing angle (usually 20-25 degrees)
- File in one direction only, from the base toward the tip
- Make 5-10 smooth strokes, applying light to moderate pressure
- Remove any burrs on the flat side with fine-grit sandpaper
- Test sharpness on paper—a truly sharp blade should cut smoothly with little pressure
For Shovels and Hoes:
- Secure the tool
- Use a mill bastard file at a 45-degree angle
- File along the existing bevel in one direction
- Maintain consistent pressure and angle
- A few passes are usually sufficient
- Test by pressing your thumb along (not across!) the edge—it should feel distinctly sharp
A sharp tool isn’t just more effective—it’s actually safer. Dull tools require excessive force, increasing the likelihood of slips and injuries.
Protecting Your Investment: Prevention Strategies
Removing rust once teaches you to never want to do it again. Prevention is straightforward and takes just minutes after each gardening session.
After Every Use:
- Brush Off Debris: Remove soil, sap, and plant material while it’s still fresh. Dried sap becomes incredibly stubborn.
- Rinse if Needed: If tools are muddy, rinse with a hose. For sap or sticky residue, use a bit of dish soap or paint thinner on a rag.
- Dry Completely: Water is rust’s best friend. Wipe tools down with an old towel, paying extra attention to joints and crevices where moisture hides.
- Apply Oil: Keep a rag moistened with mineral oil, linseed oil, or a spray like WD-40 near your tool storage. A quick wipe after each use creates a protective barrier against moisture.
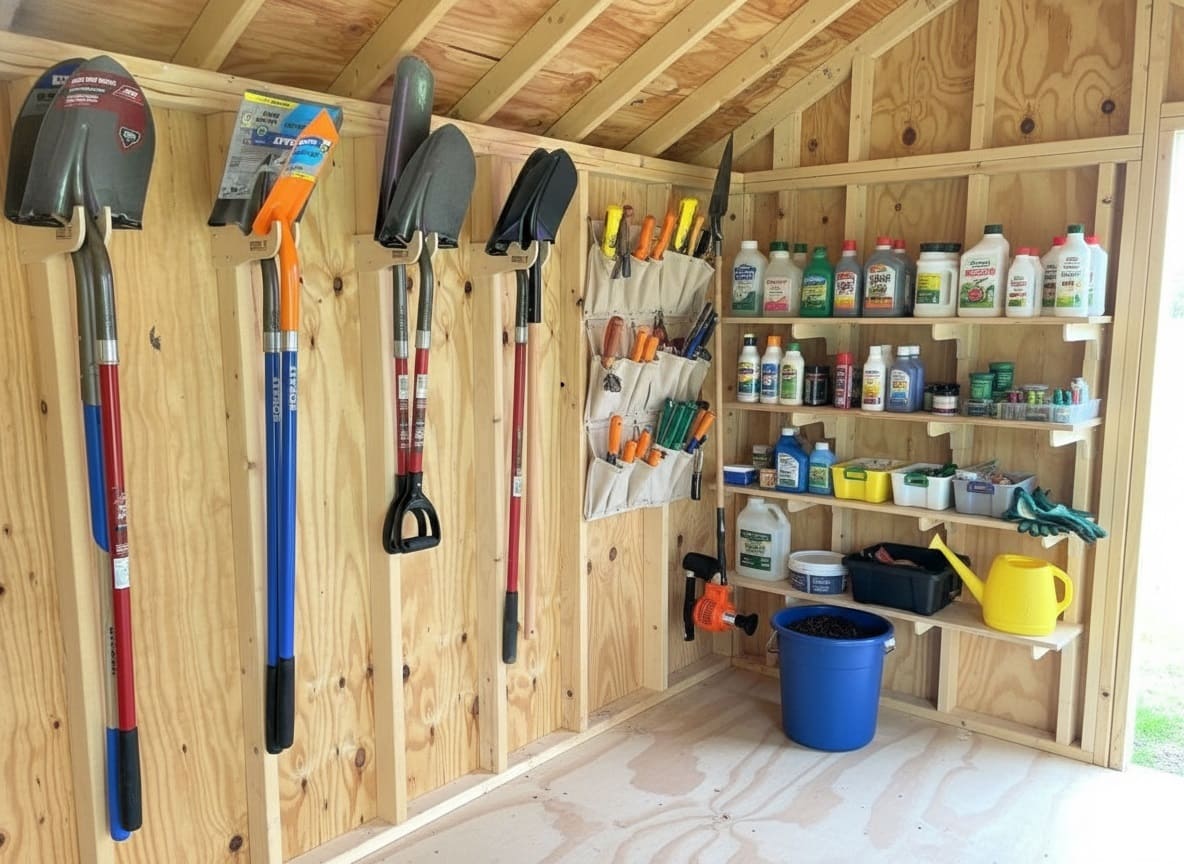
Storage Solutions:
- Hang, Don’t Pile: Tools left in heaps on shed floors trap moisture between surfaces. Hang them on pegboards, hooks, or racks where air circulates freely.
- Control Humidity: If your shed or garage is particularly damp, consider a small dehumidifier or moisture-absorbing products.
- The Sand Bucket Method: Fill a large bucket with sand and pour in enough mineral oil to barely moisten the sand (think of the consistency for building sandcastles). Store hand tools blade-down in this mixture. The sand provides abrasion for cleaning, while the oil coats and protects.
- Seasonal Deep Clean: At the end of the growing season, thoroughly clean, oil, and sharpen all tools before winter storage. This ensures they’re ready when spring fever strikes.
For Long-Term Storage:
Apply a generous coating of oil or a protective wax. Some gardeners wrap particularly valuable tools in oiled cloth or store them in sealed plastic bags with desiccant packets to absorb any moisture.
Troubleshooting: When Methods Don’t Work as Expected
- Vinegar soak produced minimal results:
The solution may be exhausted—acetic acid becomes neutralized after treating heavy rust. Use fresh vinegar. Alternatively, rust may be more severe than assessed. Remove loosened surface rust, then soak again for 12-24 hours. Temperature matters—cold vinegar works slower. Move the container to a warmer environment.
- Rust returns quickly:
Inadequate drying or insufficient oil coating. Moisture remained in joints or crevices and initiated new oxidation. Use compressed air to blow water from tight spaces, air-dry for several hours, then oil generously. If other metal items in the same space rust, address the humidity issue.
- Protective oil seems sticky or attracts dirt:
Too much oil applied. The layer should be thin—just enough for a moisture barrier. After applying, wipe with a clean cloth to remove excess, leaving only a light film.
- Power tool grinding created heat discoloration:
Bluish or rainbow coloring means you overheated the metal, potentially softening it. Use lighter pressure and keep the tool moving constantly. Consider chemical methods for tools requiring preserved metal hardness.
- Tool doesn’t function smoothly after cleaning:
Rust may have penetrated threads or pivot mechanisms. Disassemble completely and soak individual pieces separately. Apply penetrating oil to stubborn areas and work parts back and forth. Let penetrating oil sit overnight rather than forcing immediate movement.
For rust-welded bolts or screws, carefully apply heat with a propane torch to expand metal slightly, then attempt removal while warm. This is advanced restoration—consider it a last resort.
- Chemical removers damaged the finish:
Some commercial removers strip paint, damage wood, or discolor metal. Always test on a small, inconspicuous area first. If damage occurs, factor in finish restoration time when deciding whether to proceed.
- Sharpening created an uneven edge:
Varying pressure or angle during filing causes this. Start over: use coarser sandpaper to remove the uneven edge, then resharpen with consistent angle and pressure. Mark the bevel with permanent marker before filing—you’ll see exactly where you’re removing metal.
Special Considerations for Different Tools
- Pruning Tools: These require extra care because they cut living tissue. Sanitize blades with rubbing alcohol or a bleach solution (1 part bleach to 9 parts water) between plants to prevent disease transmission. Clean and oil immediately after sanitizing to prevent the bleach from causing corrosion.
- Stainless Steel Tools: These resist rust better than regular steel but aren’t completely immune. If rust appears, it usually indicates the protective chromium layer has been scratched. Use gentler methods like baking soda paste rather than aggressive scrubbing that could damage the coating further.
- Tools with Moving Parts: Joints, springs, and hinges need special attention. After rust removal, work a penetrating oil into these areas. Open and close the tool repeatedly to distribute the lubricant. A drop of oil on pivot points should be part of regular maintenance.
- Wooden Handles: While metal gets the most attention, don’t neglect wooden handles. Sand rough spots smooth with fine-grit sandpaper, then apply linseed oil or tung oil to prevent drying and cracking. Properly maintained wooden handles can last decades.
Your Rust-Free Future: Building Sustainable Habits
The difference between gardeners who battle rust repeatedly and those who rarely see it? Ingrained habits, not special products.
- Create a designated tool station: Choose a specific spot for tool prep—a shed corner, garage wall section, or potting bench area. Install hooks or pegboard for hanging. Keep a bucket of water nearby during growing season for quick rinses. Store an oil-soaked rag in a sealed container at this station. When maintenance supplies are immediately at hand, you’ll actually use them.
- The two-minute rule: After any gardening session, spend two minutes per tool before walking away. Brush off dirt, wipe the blade, apply a tiny amount of oil. This microscopic investment prevents hours of restoration later. Make it automatic—like rinsing a knife after cutting vegetables.
- Seasonal rituals: Schedule spring and fall maintenance sessions. Spring: clean, sharpen, and oil everything before the gardening rush. Fall: thorough cleaning and generous oiling before winter storage. These twice-yearly sessions catch problems early.
- Recruit help: Involve family or friends for sharpening or detailed work. Working alongside someone makes time pass pleasantly. Kids often enjoy simple tasks like scrubbing or applying oil—it teaches tool care while making them feel useful.
- Appreciate your tools: Notice how a freshly sharpened pruner makes clean cuts, how a rust-free shovel glides through soil. When you appreciate your tools as partners in creating your garden, maintaining them becomes something you want to do, not something you should do.
When Restoration Isn’t Worth It: Making the Right Call
Not every rusty tool deserves restoration effort. Knowing when to replace rather than restore saves time, money, and prevents safety hazards.
Replace When:
- Structural compromise: Rust has created holes through metal or thinned it to the point of abnormal flexing. A shovel blade snapping while you’re digging can cause injury.
- Deep pitting: Rough, cratered metal after rust removal concentrates stress and makes cracking likely. Pits also become new rust sites. If pitting covers large areas, restoration becomes an ongoing battle.
- Breached chrome plating: Once rust penetrates chrome coating, protection is permanently compromised. New rust returns quickly at every damaged spot. For inexpensive chrome-plated tools, replacement beats repeated restoration.
Worth Saving:
- Quality tools: High-end brands like Felco pruners, Clarington Forge spades, or Japanese pruning saws represent significant investments. These often outlast multiple cheap replacements when properly maintained.
- Heirloom tools: Sentimental value matters. If a tool has family history or emotional significance, restoration is worthwhile regardless of rust severity—assuming structural soundness.
- Replaceable parts: Pruners with replaceable blades or tools with replaceable wooden handles benefit from hybrid approaches. Restore what’s salvageable, replace what’s not.
Cost-Benefit Analysis:
Compare replacement cost against restoration time. An eight-dollar trowel requiring three hours of work? Replace it. Sixty-dollar pruners needing one hour of vinegar soaking? Definitely restore.
Your skill level matters. If uncomfortable with restoration or lacking tools, professional sharpening services often charge $15-20 to clean, sharpen, and oil—far cheaper than replacement.
The Gray Area:
For moderate rust on average-quality tools, ask yourself: How often do I use this? Will I maintain it properly after? Is it still available if I need to replace it later? Sometimes the best approach is attempting restoration with replacement as a backup plan.
Frequently Asked Questions
- Q: How long does it take for rust to form on garden tools?
Surface rust can begin forming within 24-48 hours if tools are left wet, especially in humid environments. However, problematic rust that affects tool performance usually develops over weeks or months of neglected exposure to moisture.
- Q: Can I prevent rust entirely?
Not completely—steel tools will eventually oxidize when exposed to oxygen and moisture, which is unavoidable in gardening. However, proper care and storage can keep tools rust-free for years or even decades.
Choosing stainless steel or aluminum tools offers better resistance, though these materials have their own trade-offs in terms of durability and edge retention.
- Q: Is rust on garden tools dangerous to my health?
Minor rust exposure while gardening isn’t typically harmful, but rusty tools do pose a tetanus risk if they cause puncture wounds. Ensure your tetanus vaccination is current. When removing rust, wear a dust mask to avoid inhaling rust particles, which can irritate lungs.
- Q: Will rust removal weaken my tools?
Gentle rust removal methods like vinegar soaking actually preserve metal by only dissolving the rust itself. However, aggressive mechanical methods (heavy grinding or coarse sanding) do remove some underlying metal. Use the gentlest method that’s effective for your rust level, and avoid overzealous scrubbing.
- Q: Why does my tool rust even though I clean it?
If rust returns quickly after cleaning, you’re likely not removing all moisture before storage or you’re storing tools in a humid environment. Make sure tools are completely dry—moisture trapped in joints and crevices is a common culprit. Consider improving ventilation in your storage area or using a rust-inhibiting oil rather than general-purpose lubricants.
- Q: Can I use these methods on all metal tools?
Most methods work on carbon steel, stainless steel, and iron. However, avoid extended vinegar soaking on tools with chrome plating, as it can damage the finish. For aluminum tools (which technically don’t rust but can corrode), use gentler methods like baking soda rather than acidic solutions.
The Bottom Line
Key Takeaways:
- Act quickly when you spot rust—early intervention prevents serious damage
- Vinegar soaking remains the most effective, economical method for most rust situations
- Prevention through proper cleaning and storage beats even the best restoration
- Invest a few minutes after each use to save hours of restoration later
- Sharp, rust-free tools make gardening safer, more enjoyable, and better for plant health
Your garden tools are partners in creating the outdoor space you envision. They’ve helped you prune roses, turn compost, dig beds for vegetables, and shape shrubs. With a little care, they’ll continue serving you for years or even become heirlooms you pass down to the next generation of gardeners.
That’s exactly what I did with my grandmother’s pruners. After a vinegar bath, gentle scrubbing, sharpening, and a protective oil coating, they’re not just functional—they’re treasured.
Every time I make a clean cut through a stubborn branch, I think of her and her immaculate garden. Rust tried to take that connection away, but it didn’t stand a chance against a little knowledge and effort.
Your Turn
Don’t let rust steal your gardening joy or shorten your tools’ lifespan. Choose a method from this guide, set aside an afternoon, and give your faithful implements the care they deserve. Your future self—and your garden—will thank you.
Have you discovered other effective rust removal techniques? Or perhaps you’ve rescued a tool you thought was beyond saving? Share your success stories and tips in the comments below. And if you found this guide helpful, bookmark it for future reference or share it with fellow gardeners who might be staring sadly at their own rusty tools right now.
Happy gardening—and may your tools always be sharp and rust-free!