
Picture this: You’re standing in your garden on a warm July morning, coffee in hand, watching your pole beans spiral gracefully up their supports like nature’s own green skyscrapers.
The pods dangle at perfect picking height, no backbreaking bending required. This isn’t just a gardener’s daydream—it’s exactly what happens when you get your bean supports right from the start.
I learned this lesson the hard way during my second year of gardening. My beautifully planned bean teepee collapsed spectacularly during a summer thunderstorm, taking weeks of growth and my gardening confidence with it.
That soggy morning, untangling bean vines from my neighbor’s fence, I realized that growing vertical isn’t just about going up—it’s about building something that can handle the incredible weight and wind resistance of a fully loaded bean plant.
After years of experimenting with everything from bamboo teepees to recycled mattress springs, I’ve discovered that the perfect bean support isn’t just about function—it’s about finding the sweet spot between your garden’s needs, your budget, and your willingness to get creative with materials.
Why Your Bean Plants Desperately Need Good Support
Pole beans aren’t called “pole” beans by accident—these vigorous climbers can reach 8-10 feet tall and produce pounds of pods. Without proper support, you’re setting yourself up for disappointing harvests and frustrated mornings spent trying to prop up drooping plants.
Growing beans vertically transforms your garden in remarkable ways. A 4×4 foot teepee can produce as many beans as a 4×8 foot row of bush beans, freeing up precious garden real estate for other crops.
More importantly, vertical growing puts your harvest right at eye level, eliminating the need to crawl around searching for hidden pods under ground-level foliage.
The health benefits are equally compelling. Improved air circulation dramatically reduces fungal diseases like powdery mildew and bean rust that plague ground-hugging plants. Since pole beans are indeterminate, they keep producing until frost kills them—but only if they have somewhere to climb.
Choosing the Right Bean Varieties for Your Support System
Not all pole beans are created equal, and matching your variety to your support system can make the difference between success and frustration. Vigorous climbers like Kentucky Wonder and Rattlesnake beans can easily reach 12 feet and need substantial support structures. These powerhouses are perfect for tall teepees or strong A-frame systems.
For more modest supports or container growing, consider gentler varieties like Blue Lake or French Gold beans, which typically max out around 6-8 feet. Purple-podded varieties like Carminat are excellent choices for any support system because their colorful pods are easier to spot during harvest, reducing waste from missed beans.
If you’re new to pole beans, I recommend starting with Emerite or Fortex varieties. Both are forgiving, productive, and stay tender even if you miss a few during harvesting—perfect for building confidence while you perfect your support techniques.
The Foundation of Success: Understanding What Makes Supports Strong
Here’s what I wish someone had told me before my great trellis collapse: bean plants are surprisingly heavy when loaded with pods and soaked with rain.
A mature pole bean plant can easily weigh 10-15 pounds, and when you multiply that by 10-20 plants on a single support structure, you’re looking at serious weight that increases dramatically during storms.
Your support needs three critical qualities. First, deep anchoring is non-negotiable. Posts should be buried at least 18-24 inches deep, and in windy areas, go even deeper. I’ve found that the “one-third rule” works well—if your support is 6 feet above ground, plan for 3 feet below ground.
Second, the framework must handle not just weight, but also wind loads. Bean-covered trellises act like giant sails during storms, creating forces that can topple even well-built structures. Finally, beans need appropriate climbing surfaces.
They twine around supports, so they need something between pencil-thick and broomstick-thick to grab onto. Anything thicker than 3 inches becomes difficult for tendrils to wrap around.
Classic Support Designs That Actually Work
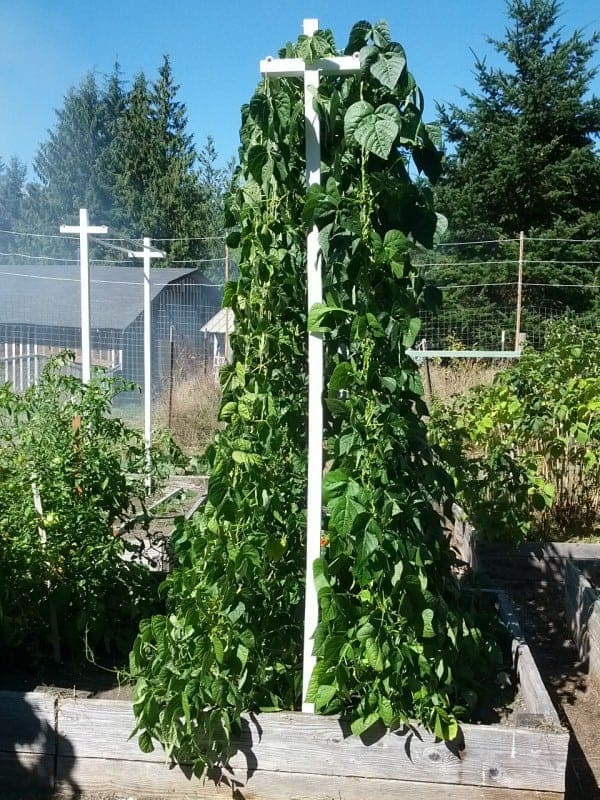
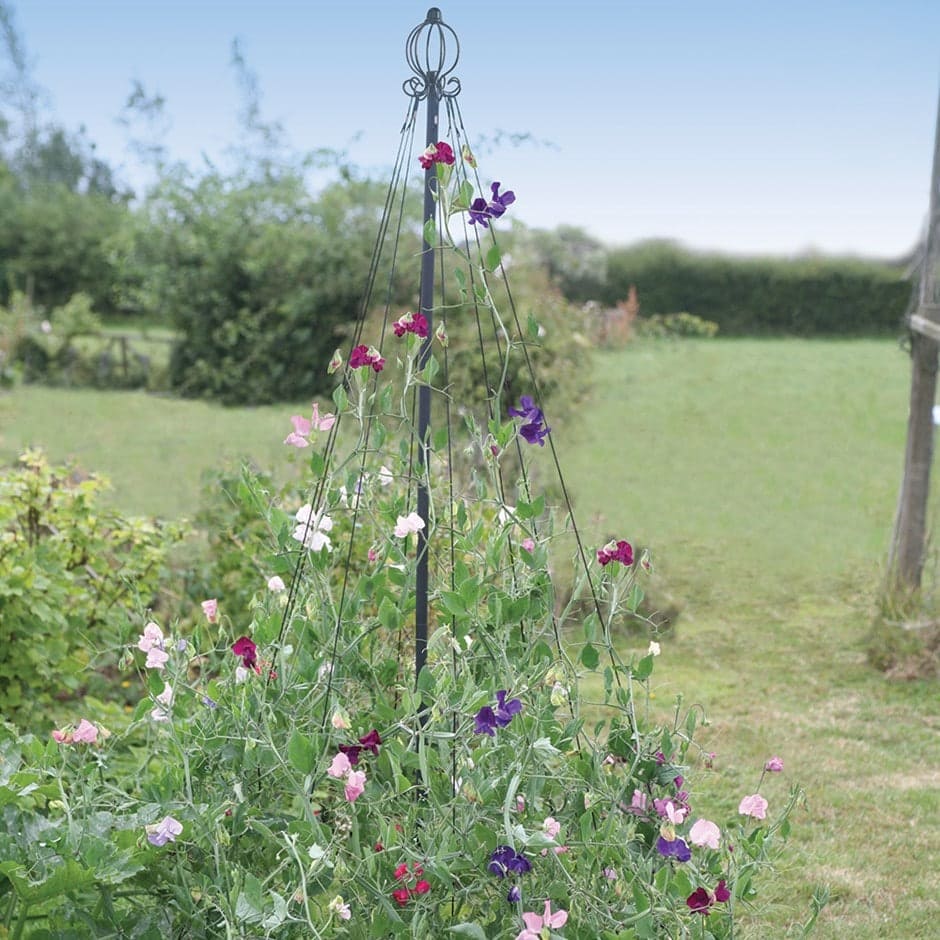
The Trusty Teepee: Simple but Effective
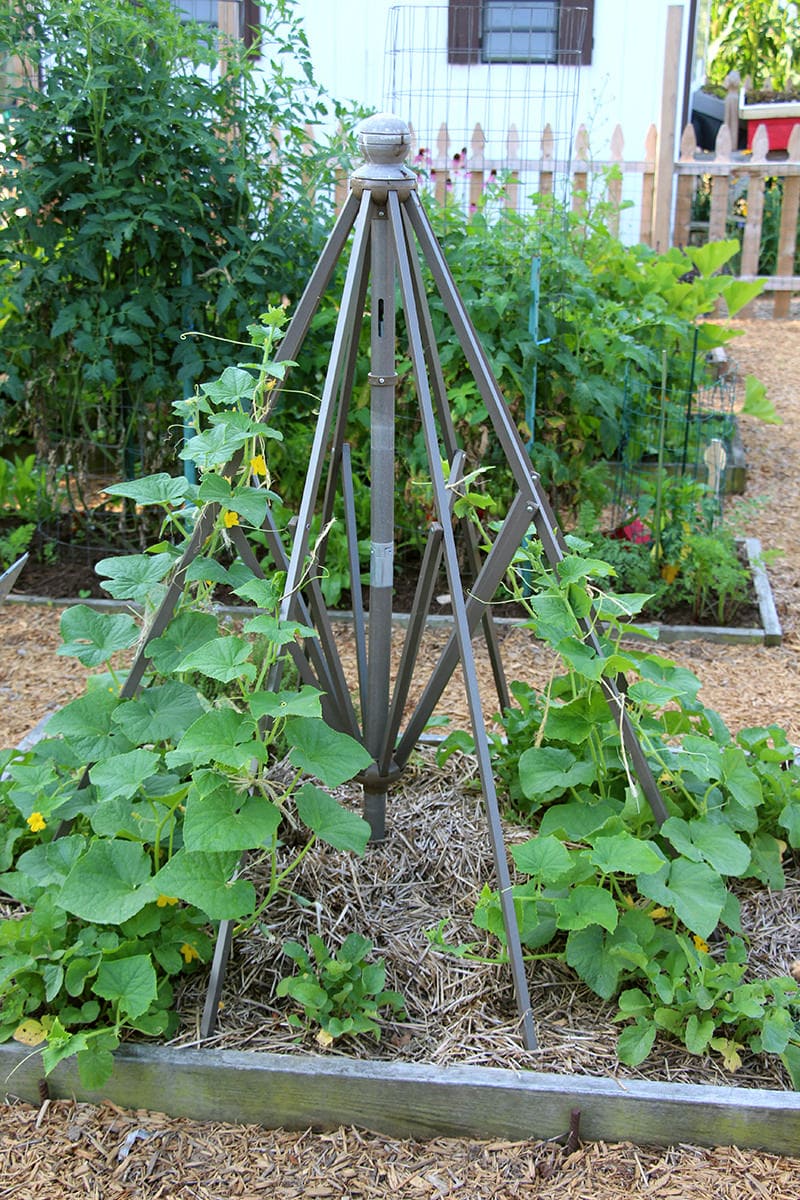
The teepee remains popular because it works reliably and looks attractive in any garden. I use 7-foot bamboo poles, leaving about 18 inches for ground insertion, arranged in a circle roughly 3 feet in diameter. The key is using at least 6 poles—fewer creates instability, while more creates unnecessary congestion in the center.
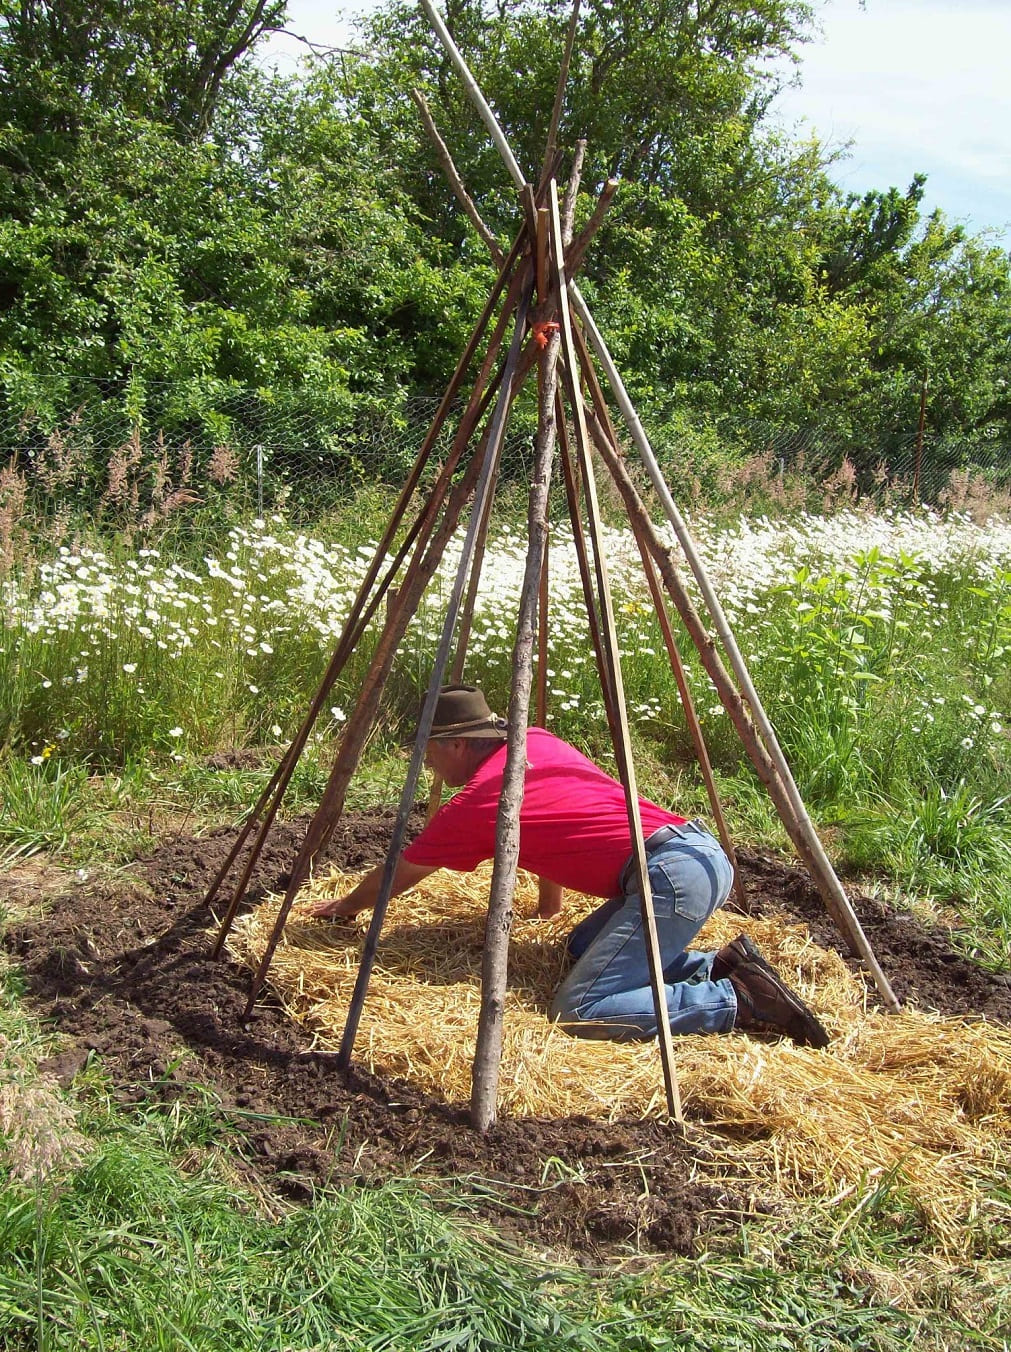
I run horizontal strings at 1-foot intervals between the poles. This gives young plants something to grab onto as they start their upward journey and provides backup support if one pole fails. Plant 1-2 bean seeds at the base of each pole, spacing them about 4 inches from the pole itself so they can easily find their support.
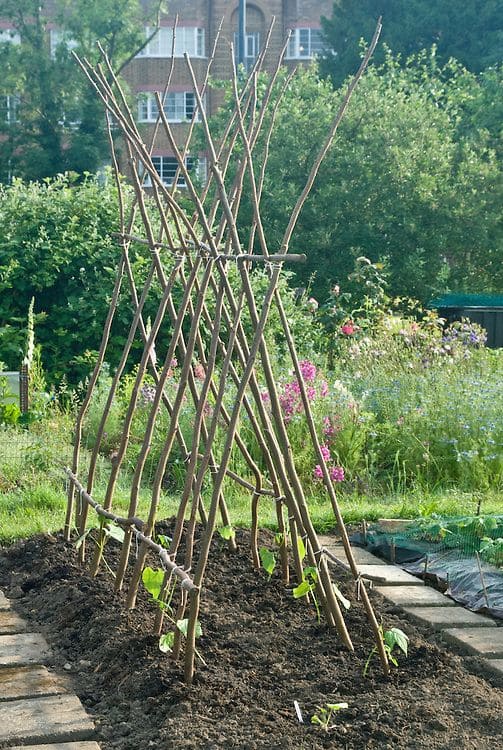
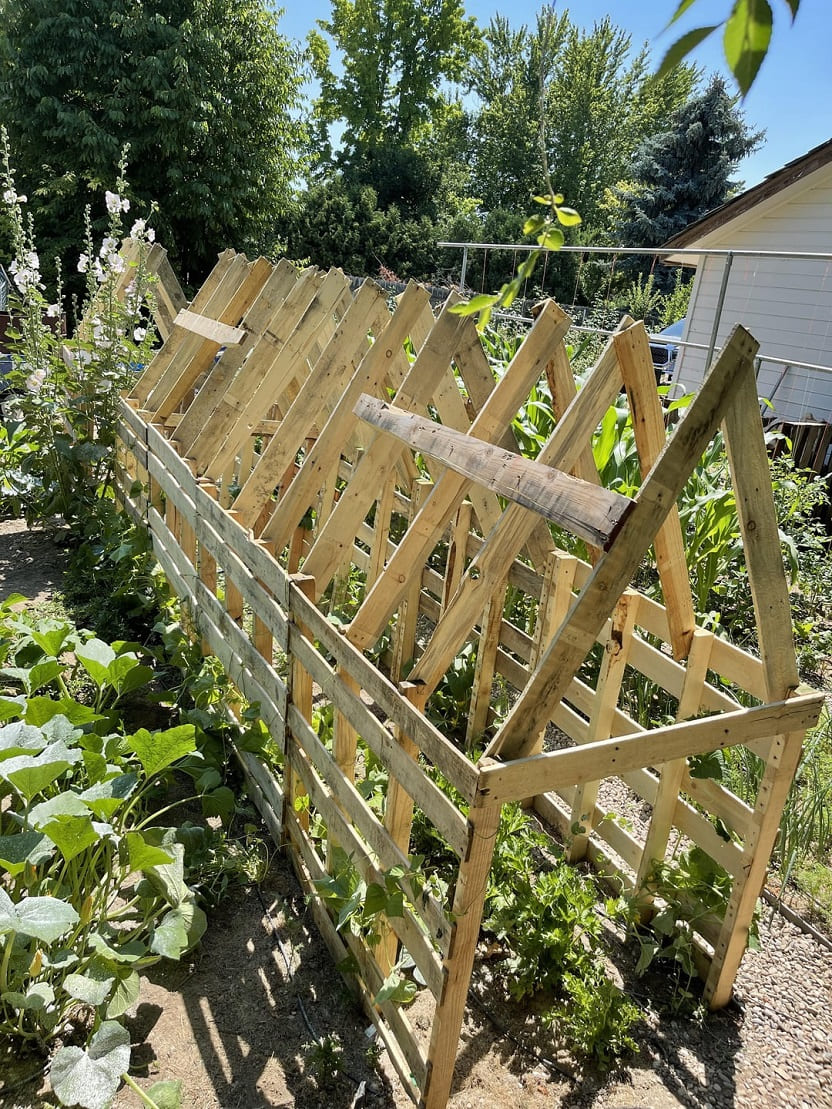
The A-Frame: Maximum Productivity in Minimum Space
This has become my go-to design for serious bean production. Two rows of poles lean against each other at about 60-degree angles, connected by a ridge pole at the top. It’s incredibly stable and allows you to plant beans on both sides, essentially doubling your production in the same footprint.
The magic happens in the spacing. Poles should be 18-24 inches apart within each row, with the two rows separated by about 4 feet at the base. This creates enough space to walk between them for harvesting while maximizing growing area. Plant beans every 6 inches along the base of each side, giving each plant about a square foot of space.
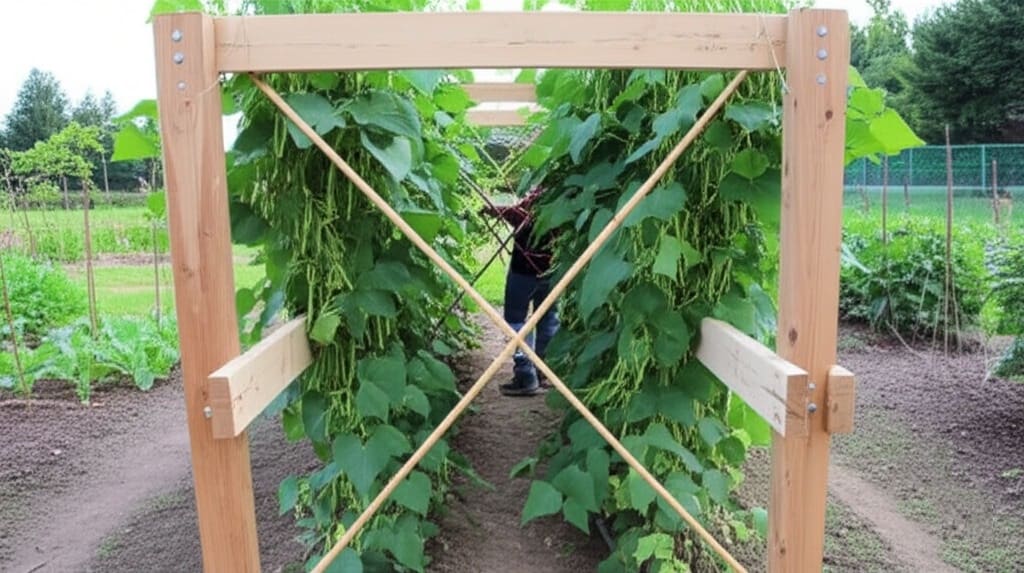
The X-Frame Alternative
Similar to the A-frame but with poles crossing lower and at sharper angles, the X-frame offers easier harvesting at the expense of a slightly larger footprint. The crossing point sits about 3 feet off the ground, making the upper portions more accessible while maintaining excellent stability.
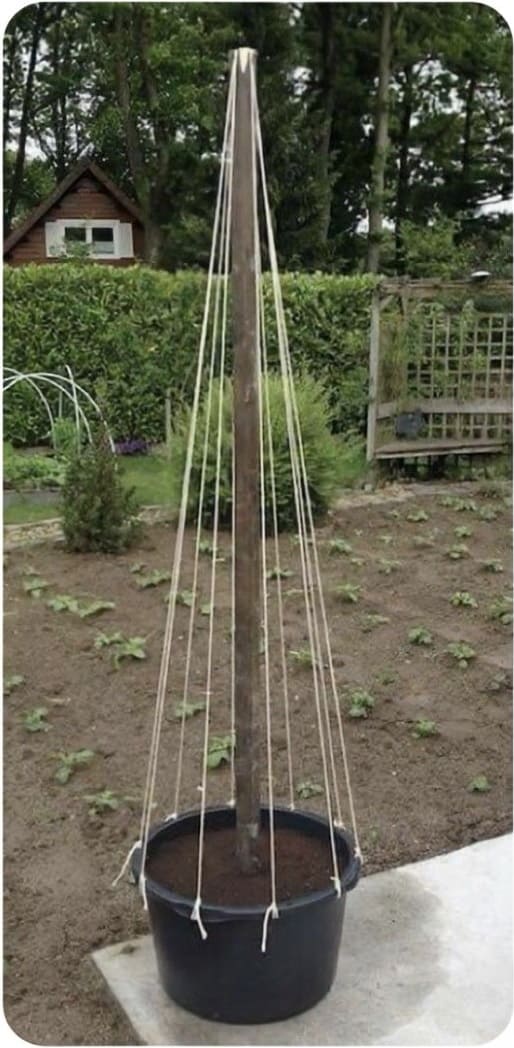
The String Symphony: My Personal Favorite Discovery
Three years ago, I stumbled onto what I now consider the ultimate bean support: a simple framework of posts with strings hanging down like a vertical harp. It sounds almost too simple, but it’s revolutionized my bean growing.
Here’s how it works: I drive 8-foot T-posts into the ground every 8 feet, then run a tight wire between them at about 7 feet high. From this wire, I hang individual strings down to ground level, spacing them about 6 inches apart. Each string supports 1-2 bean plants.
This system wins because harvesting is easy from both sides, end-of-season cleanup is simple (just cut the biodegradable strings and compost everything), and you have incredible flexibility in row length. The strings move naturally with wind rather than creating resistance, making this one of the most storm-resistant designs I’ve used.
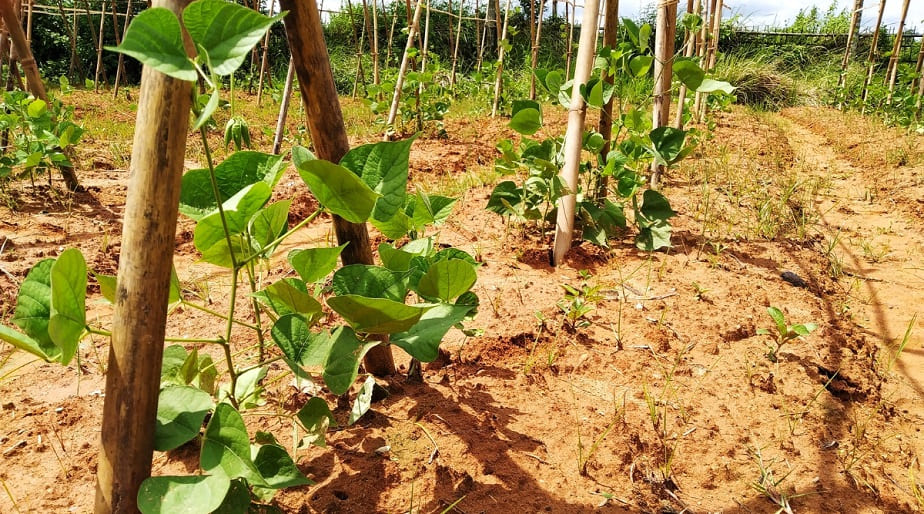
The Single Pole Method
For smaller plantings or when materials are limited, individual poles can work beautifully. Use sturdy 8-foot poles driven 2 feet into the ground, with 4-6 bean plants arranged around each pole’s base. The rough bark of natural wood poles provides excellent grip for climbing tendrils.
To prevent poles from toppling under the weight of mature plants, I connect them with a tensioned wire system running between the tops, similar to a telephone line setup. This provides mutual support while maintaining the simplicity of individual pole planting.
Advanced Permanent Support Systems
The Corral System: Built to Last
For gardeners seeking a robust, reusable system, the corral design offers unmatched stability. Insert fence posts into the ground at 6-foot intervals, then attach horizontal wooden rails at waist and chest height using screws. Push bamboo canes into the ground in an X pattern along the center of the frame, securing them to the horizontal rails with twine.
This system creates a framework where beans hang over a central path, offering incredibly easy harvest access. The beans literally dangle at perfect picking height, and the sturdy construction can handle even the most vigorous varieties.
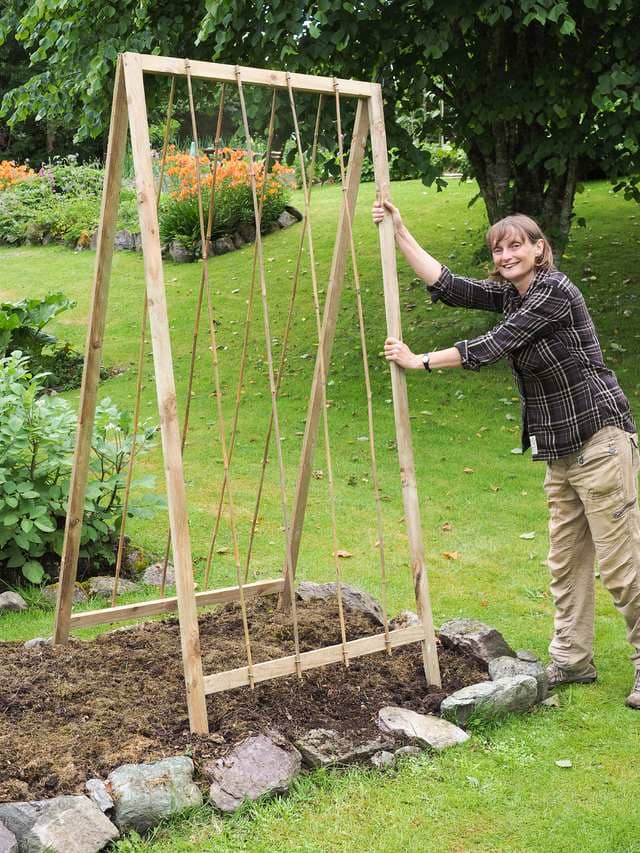
The Harp Support System
Create your own pergola framework or adapt an existing one to support strings like a giant harp. Install a base rail close to the ground and slightly inward from the top rail, then run strings from top to bottom at 6-8 inch intervals. Plant one bean per string on the outside of the base rail.
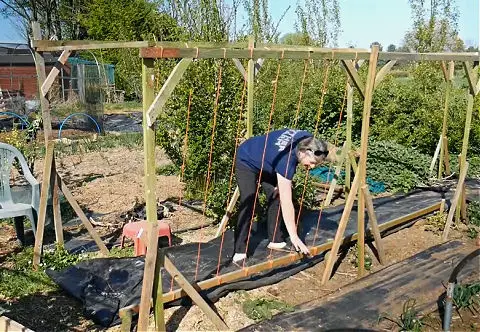
The slight inward angle of the strings makes harvesting easier while providing excellent support for heavy vines. This system works particularly well for creating bean walls that can provide privacy screening or wind protection for other garden areas.
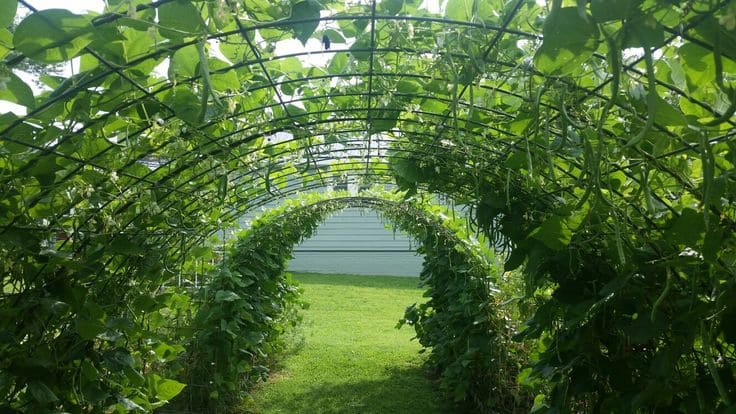
Bean Archways and Tunnels
Metal or wooden arches create stunning garden features while maximizing growing space. Commercial metal arches are costly but last decades, while homemade versions using bent cattle panels or concrete reinforcing mesh offer similar function at lower cost.
I’ve created 50-foot bean tunnels using 16-foot cattle panels bent into arches and anchored with rebar stakes. Plant beans on both sides of the tunnel for a magical walkway that’s productive and beautiful. The shade inside provides perfect growing conditions for lettuce and other cool-season crops during hot weather.
The Maypole Design
A single thick pole driven deep into the ground becomes the anchor for multiple ropes radiating out like spokes on a wheel. Secure ropes to the top of an 8-foot pole and stretch them taut to ground anchors positioned in a circle around the central pole.
While my early attempts with this design were less successful than commercial versions, the concept works well for creating focal points in ornamental vegetable gardens. The key is ensuring the central pole is absolutely secure and the ropes are tensioned properly.
Creative Budget-Friendly Solutions
Recycled Material Masterpieces
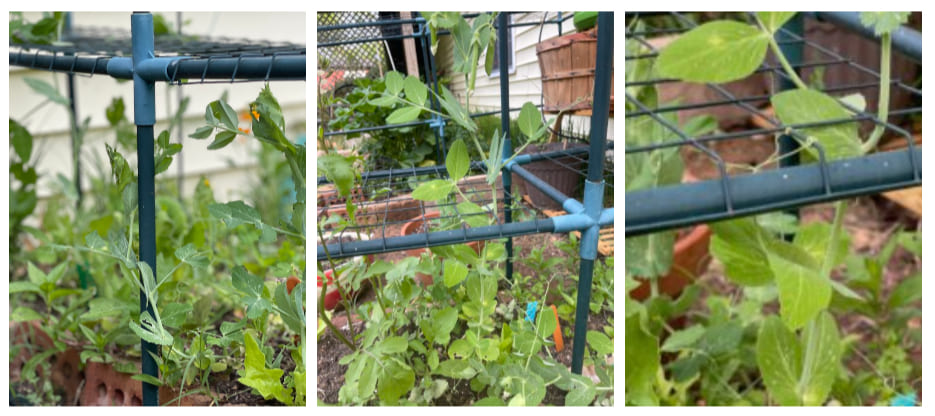
Some of my most successful bean supports have cost almost nothing. That old wire shelving unit gathering dust in your basement makes a perfect bean support when mounted vertically. The shelves create natural levels for different varieties, and the open design makes harvesting effortless.
Discarded mattress springs create fascinating conversation-piece trellises that work surprisingly well. Ensure they’re rust-free and secure them firmly to posts driven into the ground. The irregular pattern of springs actually helps bean tendrils find purchase points more easily than regular grid patterns.
Old bed frames, particularly metal ones, can be repurposed into excellent bean supports when propped against fences or walls. The headboard and footboard provide natural anchor points for additional support strings or wires.
The Ladder Trellis
Wooden ladders, whether purchased new or rescued from renovation projects, make excellent bean supports. Position them vertically and anchor firmly to prevent tipping. The rungs provide natural climbing points, and you can add vertical strings between rungs for additional support.
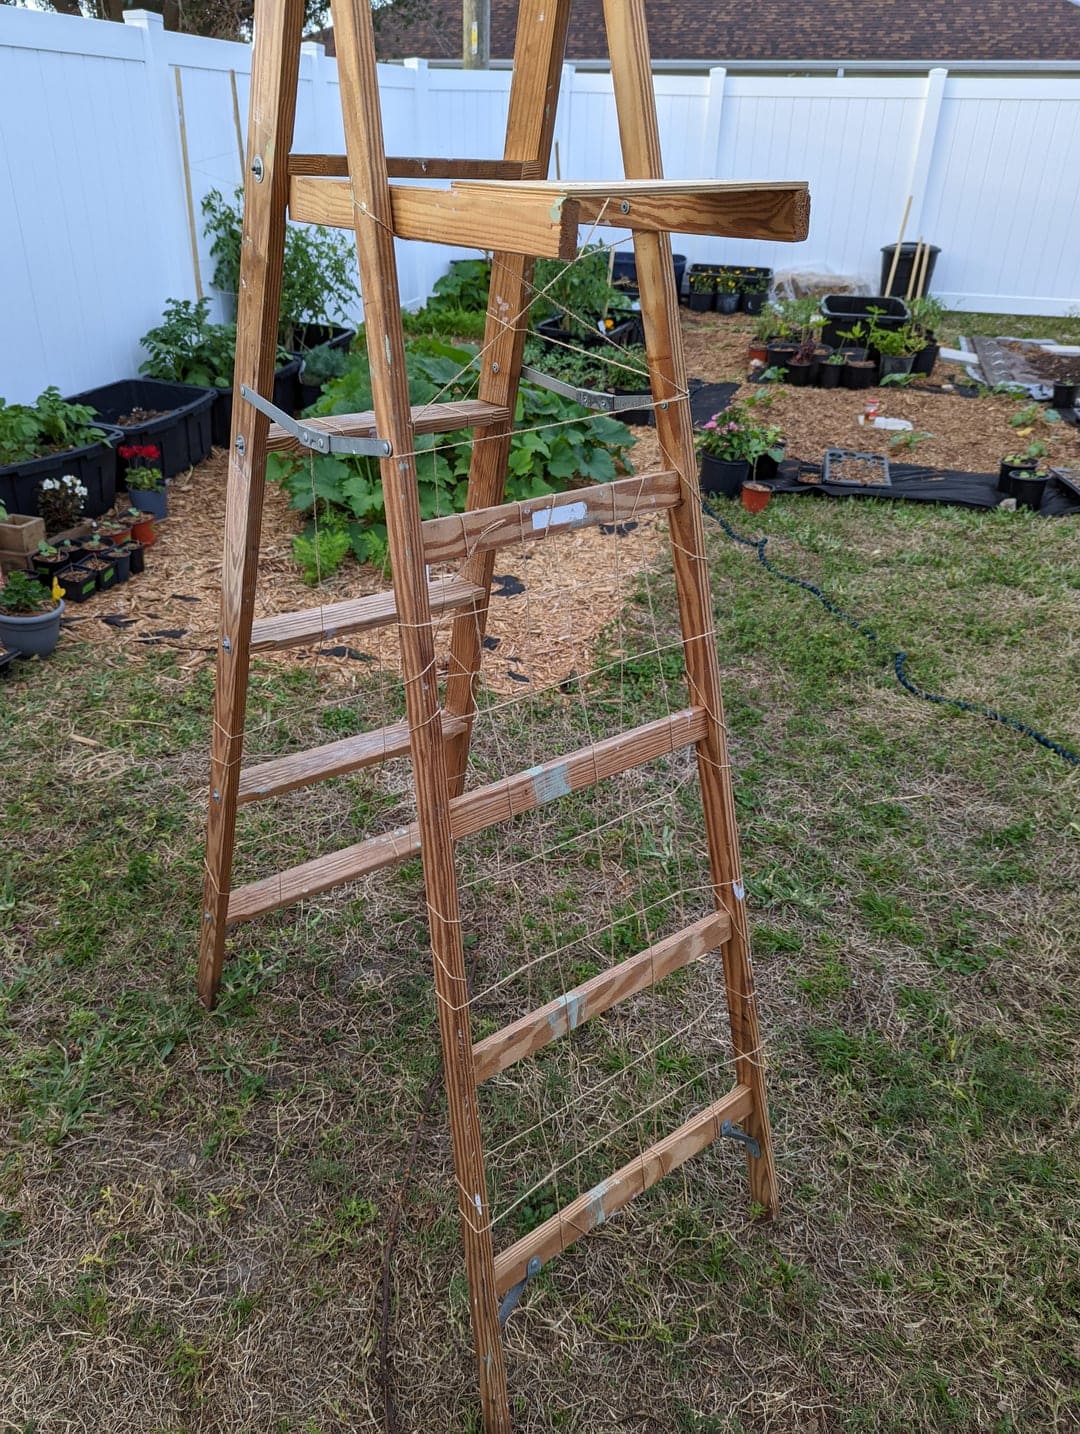
For a DIY version, construct ladder-like frames using 2×2 lumber with horizontal rungs every 12 inches. These can be made to any height and are particularly useful for creating uniform support walls in larger gardens.
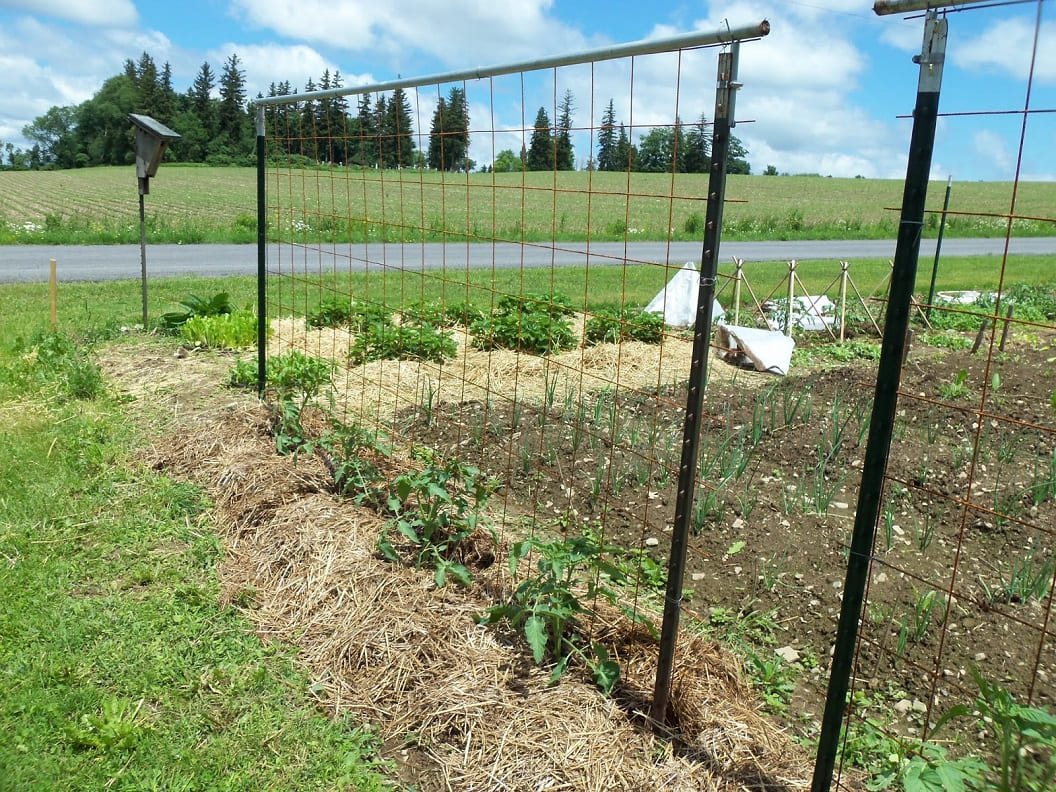
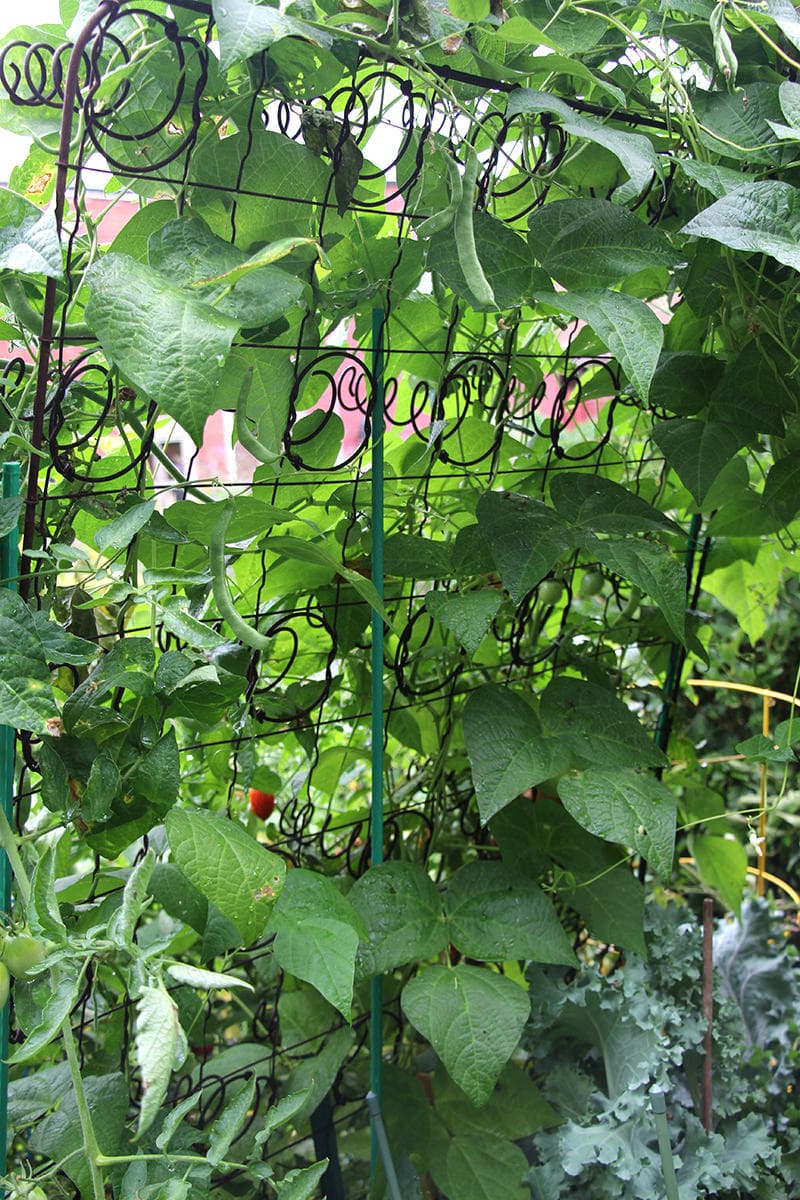
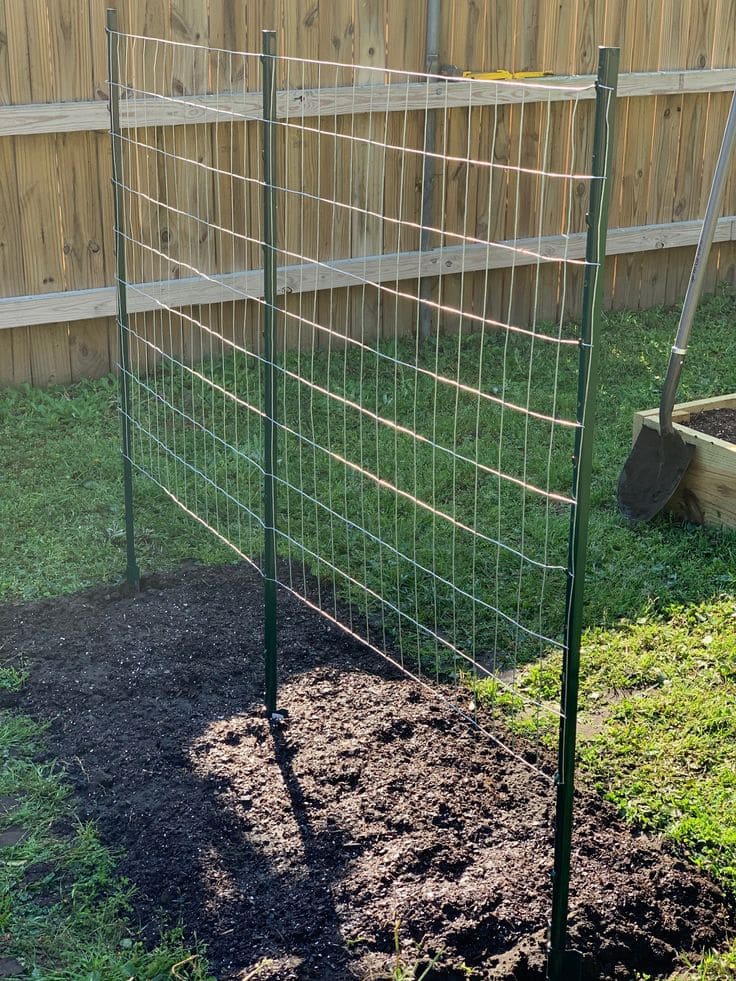
Wire Panel and Mesh Systems
Concrete reinforcing mesh, available at building supply stores, creates incredibly strong support systems that rust to an attractive color over time. The 6-inch grid spacing is perfect for bean climbing, and the panels can be easily secured to posts for multi-season use.
Welded wire fencing panels work similarly and are often available in convenient 4×8 foot sizes. Mount these vertically between posts for instant trellis systems that require minimal construction skills but provide professional results.
The Umbrella Frame Innovation
Old patio umbrellas can be transformed into unique bean supports by removing the fabric and using just the framework. The spoke design creates perfect radiating support lines, and the central pole provides excellent stability. I’ve had great success using wooden umbrella frames, adding strings between the spokes for additional climbing surfaces.
Pallet Trellis Systems
Wooden pallets can be converted into excellent bean supports with minimal modification. Stand them vertically and secure with posts, or create A-frame structures by joining two pallets at the top. The gaps between pallet boards are perfect for bean climbing, and the rustic appearance fits well in most garden settings.
Natural and Living Support Systems
The Three Sisters Method
This traditional Native American planting system uses corn stalks as living bean poles, with squash growing at ground level to suppress weeds and retain moisture. Plant corn first, then add beans when corn reaches 18 inches tall. Choose sturdy corn varieties and less vigorous bean types to prevent the beans from overwhelming the corn.

The system works best with field corn varieties rather than sweet corn, as they develop thicker, stronger stalks. This method creates a beautiful, productive polyculture that maximizes garden space while improving soil health through the beans’ nitrogen fixation.
Sunflower Support Systems
Giant sunflowers make excellent living bean poles, growing tall and strong while the beans provide beneficial nitrogen to their roots. Plant sunflowers first, then add beans around their base when the sunflower stalks reach about 2 feet tall. Choose varieties like Russian Mammoth that grow 10-12 feet tall with thick, sturdy stems.
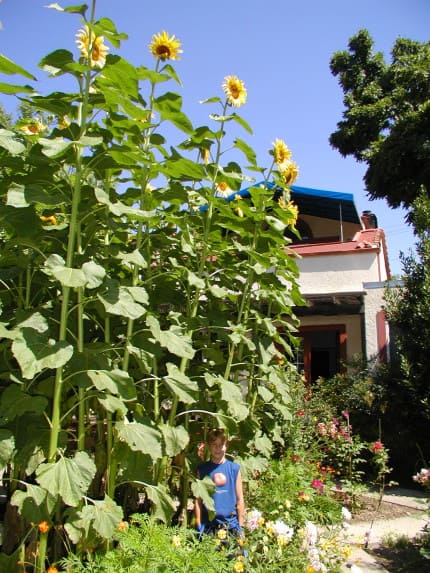
This combination creates stunning garden displays while providing food for both humans and wildlife. The sunflower seeds attract birds, while the beans provide fresh vegetables throughout the growing season.
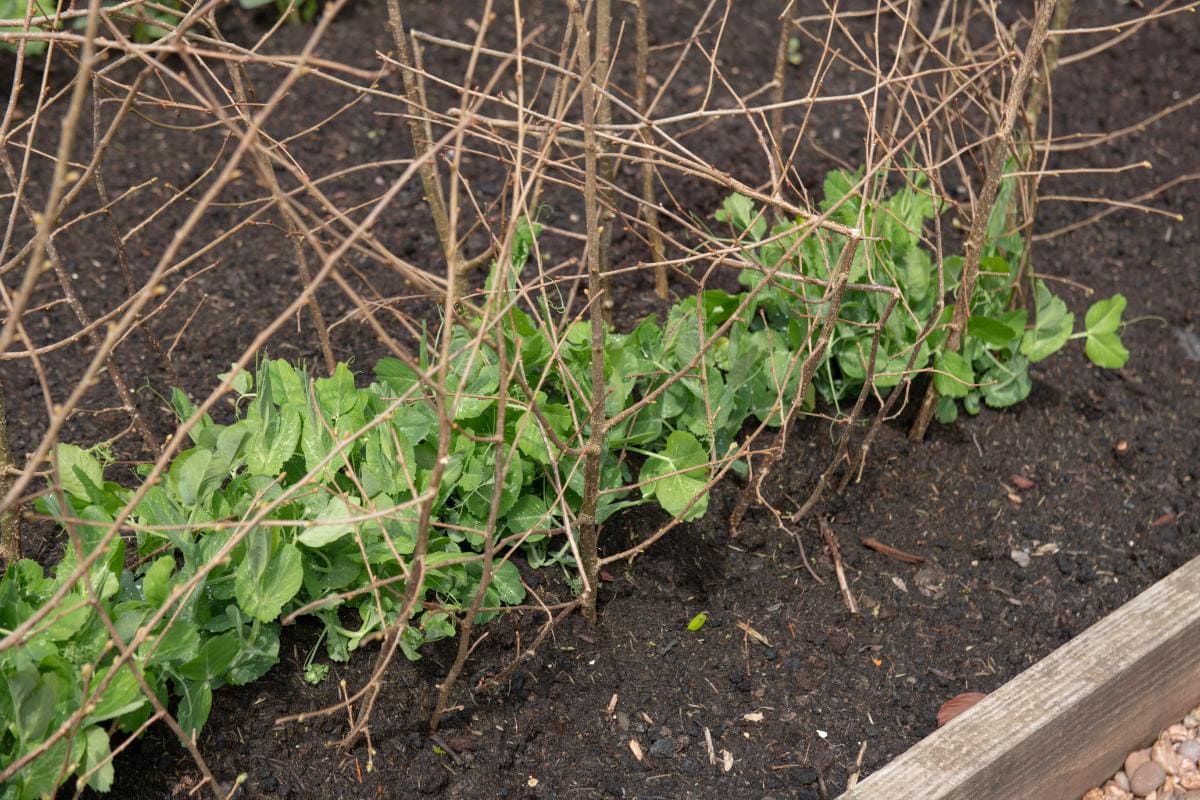
Tree Branch and Brush Supports
Pruned branches from trees make excellent free support materials. Apple, peach, and other fruit tree prunings work particularly well because their bark provides good grip for bean tendrils. Create teepees or lean-to structures using these natural materials.
Brush bundles can be woven together to create attractive rustic supports that blend naturally into garden settings. This approach works especially well in cottage-style gardens where the informal appearance complements the overall design aesthetic.
Living Fence Integration
Existing chain-link or wire fencing can become productive bean growing space with minimal additional infrastructure. Simply plant beans along the fence line and guide them onto the existing structure. This approach maximizes garden productivity while requiring no additional construction.

For wooden privacy fences, add horizontal wires or install simple trellis panels to create climbing surfaces. The fence provides wind protection while the beans create additional privacy screening and attractive green coverage.
Small Space and Container Solutions
Compact Tower Systems
For container growing or small spaces, create tower supports using tall central poles with radiating strings or wires. A single pole in a large container can support 6-8 bean plants arranged around its base, creating a productive tower that occupies minimal floor space.
These towers work excellently on patios, decks, or in small urban gardens where ground space is limited but vertical space is available. Use containers at least 20 gallons in size to provide adequate root space and stability.
Here’s How to Grow Potatoes in Containers: Tips for a Bountiful Harvest
Fan Trellis Designs
Commercial fan trellises or homemade versions created from bamboo stakes work well for container bean growing. Three or more stakes joined at the base and spreading outward create support for multiple plants in a single container while maintaining an attractive appearance.

These work particularly well for balcony gardens where space is extremely limited but some vertical growing is possible. The fan shape provides good light exposure for all plants while creating an attractive display.
Circular Cage Systems
Wire fencing can be shaped into circular cages that provide 360-degree growing space. Create access holes by cutting and bending back sections of the wire, allowing easy harvesting from inside the cage. Plant beans around the outside perimeter and train them to climb inward.

This design maximizes production in minimal space while creating an interesting focal point in the garden. The circular shape is naturally stable and resistant to wind damage.
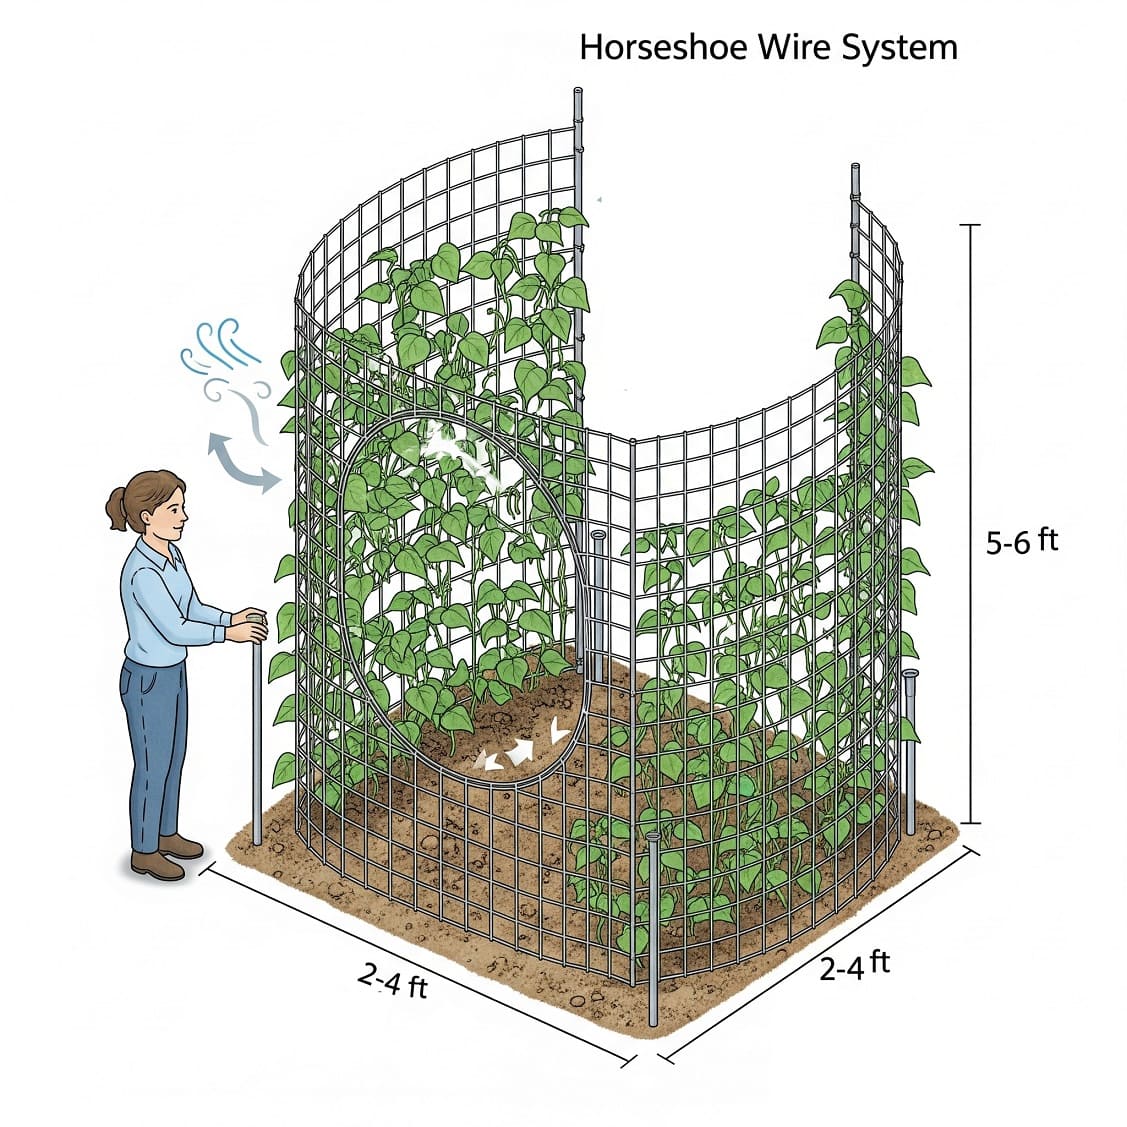
Horseshoe Wire Systems
Bend 5-6 foot sections of wire fencing into horseshoe shapes for compact bean growing areas. The curved design creates a natural windbreak while providing climbing space for 8-10 plants in less than 2 square feet of ground space.
Mount these systems using metal stakes at the ends and center, creating stable supports that can be easily moved or reconfigured as needed. This approach works well for succession planting or crop rotation systems.
Specialized Support Techniques
Wall-Mounted Systems
South-facing walls provide excellent bean growing opportunities with minimal additional infrastructure. Install eye hooks at top and bottom, then run wires or strings vertically to create climbing surfaces. The wall provides wind protection while reflecting additional heat for faster growth.
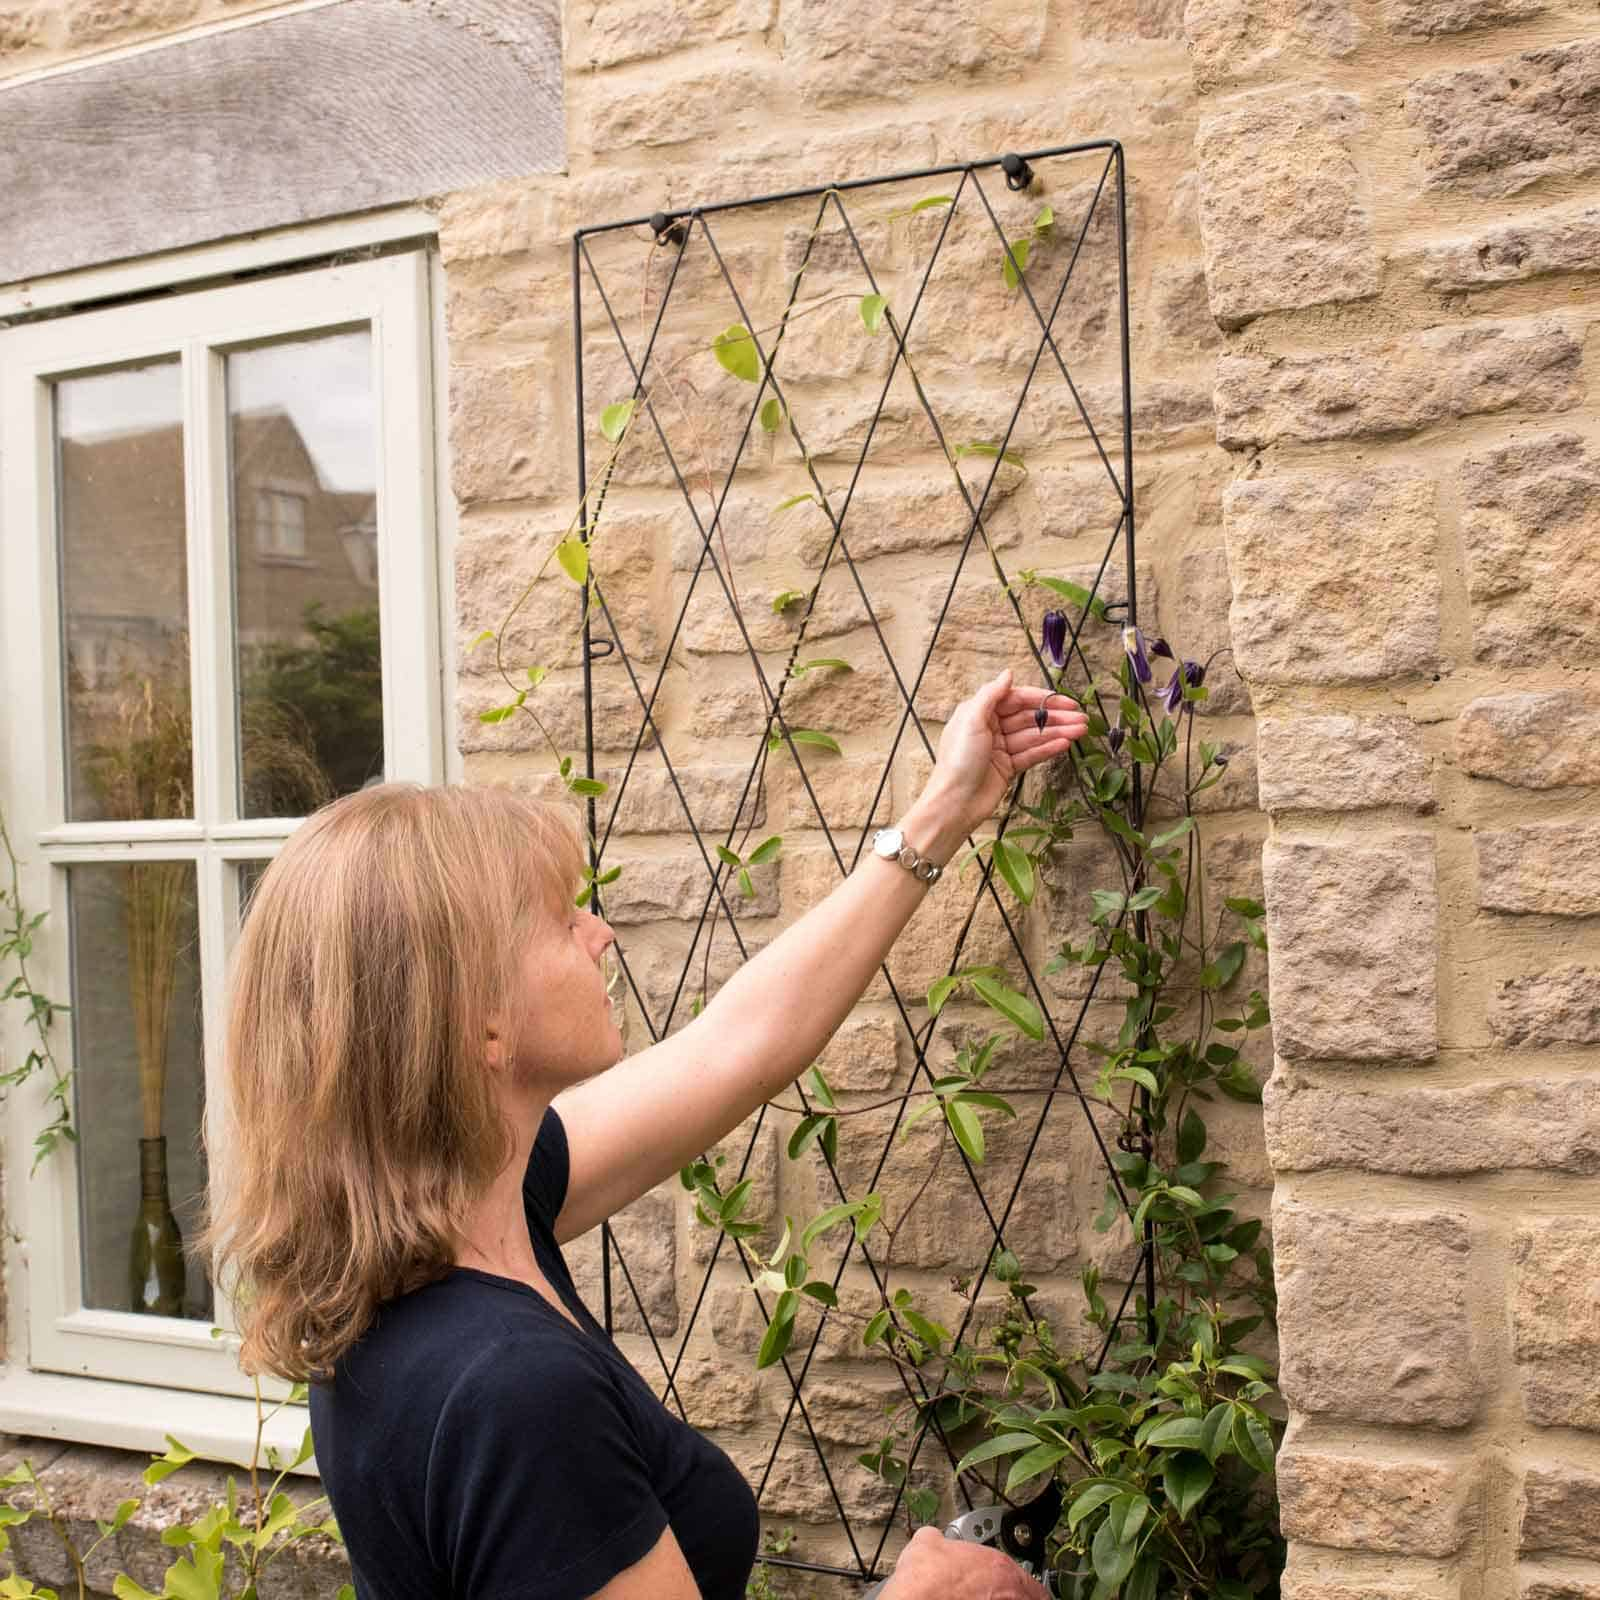
Ensure adequate air circulation by mounting supports several inches away from the wall surface. This prevents fungal problems while maximizing the benefits of wall-reflected heat and protection.
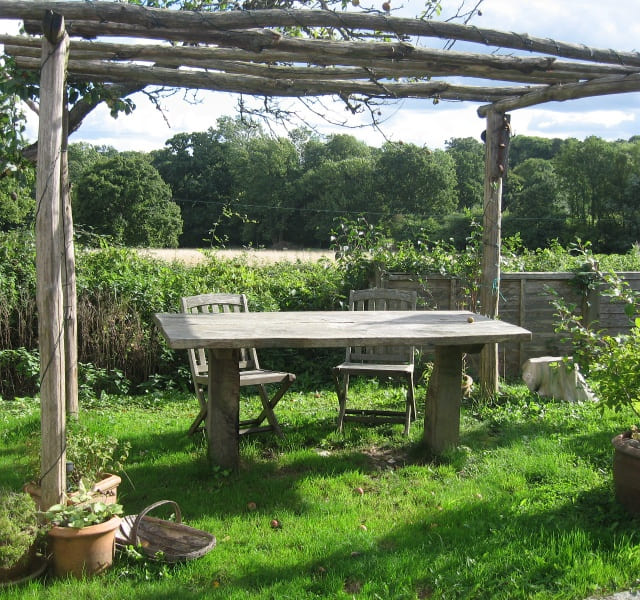
Pergola Integration
Existing pergolas or arbors can be enhanced with string or wire systems to create productive bean growing space. The established framework provides excellent support, while the beans create additional shade and attractive coverage.
This approach works particularly well for creating outdoor dining areas where the bean coverage provides natural shade while producing fresh vegetables for meals. Choose varieties with attractive flowers to enhance the ornamental value.
Greenhouse and Tunnel Supports
In protected growing environments, beans can be trained up existing structure supports or along specially installed wire systems. The controlled environment allows for extended growing seasons and protection from weather extremes.
Use the existing framework of greenhouse or high tunnel structures to create zigzag wire patterns that maximize growing space while maintaining access for other crops. This approach can significantly increase the productivity of protected growing spaces.
Getting Your Timing Right: When and How to Plant
Timing is crucial for bean success, and it starts with soil temperature rather than calendar dates. Bean seeds need soil temperatures consistently above 60°F to germinate reliably. Plant too early in cold, wet soil, and your seeds will rot before they sprout.
- Learn more about Optimal Soil Temperatures for Seed Germination: A Gardener’s Guide
I use a soil thermometer to check ground temperature at planting depth for several consecutive days. Once I’m confident the soil has warmed sufficiently and all danger of frost has passed, I plant my beans directly where they’ll grow. While you can start beans indoors, they don’t transplant well due to their sensitive root systems.
Install all supports before planting—this cannot be overstated. Trying to erect supports around existing plants invariably leads to damaged seedlings and unstable structures. I typically set up my bean supports in early spring, weeks before planting, giving myself time to test stability and make adjustments.
Training Young Plants: Getting Beans Started on Their Upward Journey
Even with perfect supports in place, young bean plants sometimes need encouragement to start climbing. Beans have a natural instinct to twine, but they can’t always find their supports immediately, especially if there’s a gap between the seedling and the nearest climbing surface.
I keep a spool of soft twine handy during the first few weeks after planting. When a bean plant reaches about 6 inches tall but hasn’t found its support, I gently guide the growing tip to the nearest string or pole. Usually, just one assisted connection is enough—once a bean finds its support, it climbs enthusiastically.
For supports that start several inches off the ground, I temporarily stake short bamboo canes or even sturdy twigs next to each plant to bridge the gap between soil level and the main support structure. These “training wheels” can be removed once the plants reach the permanent support.
Watering and Feeding Your Vertical Garden
Vertical bean growing changes your watering strategy compared to ground-level crops. Because you have more plant mass in a smaller ground footprint, and because the extensive foliage can shed rain away from the root zone, container-like watering becomes necessary even for in-ground plants.
I water deeply but less frequently, soaking the soil around the base of supports rather than trying to water the entire area. During peak production, this might mean daily watering in hot weather, especially for beans growing on south-facing supports where reflected heat can stress plants.
Beans fix their own nitrogen, so they don’t need heavy feeding, but they do appreciate consistent moisture and a balanced fertilizer applied monthly during the growing season. I avoid high-nitrogen fertilizers, which encourage leafy growth at the expense of pod production.
Harvesting Your Vertical Bounty
One of the greatest joys of vertical bean growing is the ease of harvest. Most pods hang at or below eye level, making them easy to spot and pick. I harvest every 2-3 days during peak season, picking pods while they’re still young and tender.
The secret to extended production is frequent picking. Beans produce flowers and pods continuously until they sense they’ve completed their reproductive mission by creating mature seeds. Keep picking young pods, and your plants will keep producing new ones.
For beans growing on both sides of A-frame or fence systems, I systematically work one side, then the other, ensuring I don’t miss pods hidden behind leaves. Purple-podded varieties are particularly helpful here because their distinctive color makes them easier to spot.
Maintenance and End-of-Season Care
Good supports require minimal maintenance during the growing season, but a little attention goes a long way. I check connections monthly, especially after storms, and tighten loose wires or add extra stakes if needed during periods of heavy growth.
Come fall, cleanup strategy depends on your materials. With biodegradable strings and natural materials, I often compost the entire structure, letting the decomposing vines add organic matter to the soil. Permanent supports get cleaned and stored for next season, though I leave the framework in place and simply remove the old vines.
Troubleshooting Common Support Problems
When posts start leaning, it usually indicates insufficient depth or loose soil. The solution is to remove the post, dig deeper, and pack soil firmly around it—don’t try to push leaning posts back into position, as this only makes the problem worse.
Broken connections at high-stress joints need immediate attention. I always use both wire and strong twine at critical connection points, providing redundancy when one fails. If your supports repeatedly fail at the same points, consider upgrading your materials or redesigning those connections.
Insufficient height is a planning problem that’s hard to fix mid-season. Bean varieties vary dramatically in vigor—Kentucky Wonder can easily reach 12 feet, while some varieties stop at 6 feet. Research your varieties and build accordingly, erring on the side of taller supports.
Personal Lessons from the Garden
My biggest revelation came during a particularly windy August. As I watched my carefully constructed teepees sway dramatically while my string system remained rock-steady, I realized that flexibility often trumps rigidity in garden structures. The strings could move with the wind while maintaining their essential function.
This taught me to think of supports not as rigid structures, but as dynamic systems that work with plants and weather rather than against them. The best supports accommodate natural forces rather than fighting them.
Making the Most of Your Bean Support Space
Don’t let the space around your bean supports go to waste. I plant quick-growing crops like lettuce and radishes around the base of my supports in early season. As the beans grow and create shade, these cool-season crops benefit from the protection during hot summer months.
Marigolds scattered throughout the bean patch not only look beautiful but help attract beneficial insects and may deter some pests. The key is choosing companions that won’t compete heavily for nutrients or space as your beans establish themselves.
Planning for Multiple Seasons
The best support systems are designed with longevity in mind. Bamboo and metal supports typically last 3-5 years with proper care, while wooden supports may need replacement every 2-3 years depending on weather exposure.
I keep detailed notes about which supports performed well and which need upgrading, making each season’s setup more efficient than the last.
For crop rotation purposes, portable supports offer tremendous flexibility. I can move my A-frame systems to different beds each year, following my rotation schedule while maintaining the same high-quality support infrastructure.
Building Your Bean Empire
Growing climbing beans successfully isn’t just about the beans—it’s about creating the infrastructure that lets them thrive. Whether you choose a simple teepee or an elaborate tunnel system, the principles remain the same: build strong, plan ahead, and don’t be afraid to get creative with materials.
The reward for this upfront effort is months of easy harvesting from productive, healthy plants that turn your garden into a vertical wonderland. There’s something deeply satisfying about creating structures that work in harmony with nature, supporting your plants’ natural climbing instincts while making your life easier.
Start simple, learn from each season, and gradually build the support systems that work best for your space and growing style. Your back will thank you, your yields will impress you, and your garden will become the envy of every neighbor who’s still crawling around picking ground-level bush beans.
Remember: the best bean support is the one you’ll actually build and use. Choose a design that matches your skill level and available time, then commit to building it properly. Your future self, standing among towering bean plants heavy with harvest, will thank you for the effort.