
Picture this: You’re standing in your garden center, seed packets scattered across the counter like tiny treasure maps. Each one promises a future harvest of vibrant tomatoes, crisp lettuce, or fragrant herbs.
But there’s just one problem—you’ve been here before. Last year, half your seeds never sprouted, and the ones that did produced weak, spindly plants that barely survived transplanting.
If this sounds familiar, you’re not alone. Seed germination is where many gardening dreams either take flight or crash and burn. But here’s the good news: with the right knowledge and techniques, you can transform those dormant seeds into vigorous seedlings that will reward you with abundant harvests.
By the end of this guide, you’ll have mastered multiple germination methods, understand how to treat different types of seeds, and gained the confidence to start anything from common vegetables to challenging perennials.
Whether you’re working with a sunny windowsill or a full indoor setup, this comprehensive approach will give you the tools to succeed.
Understanding the Science Behind Seed Awakening
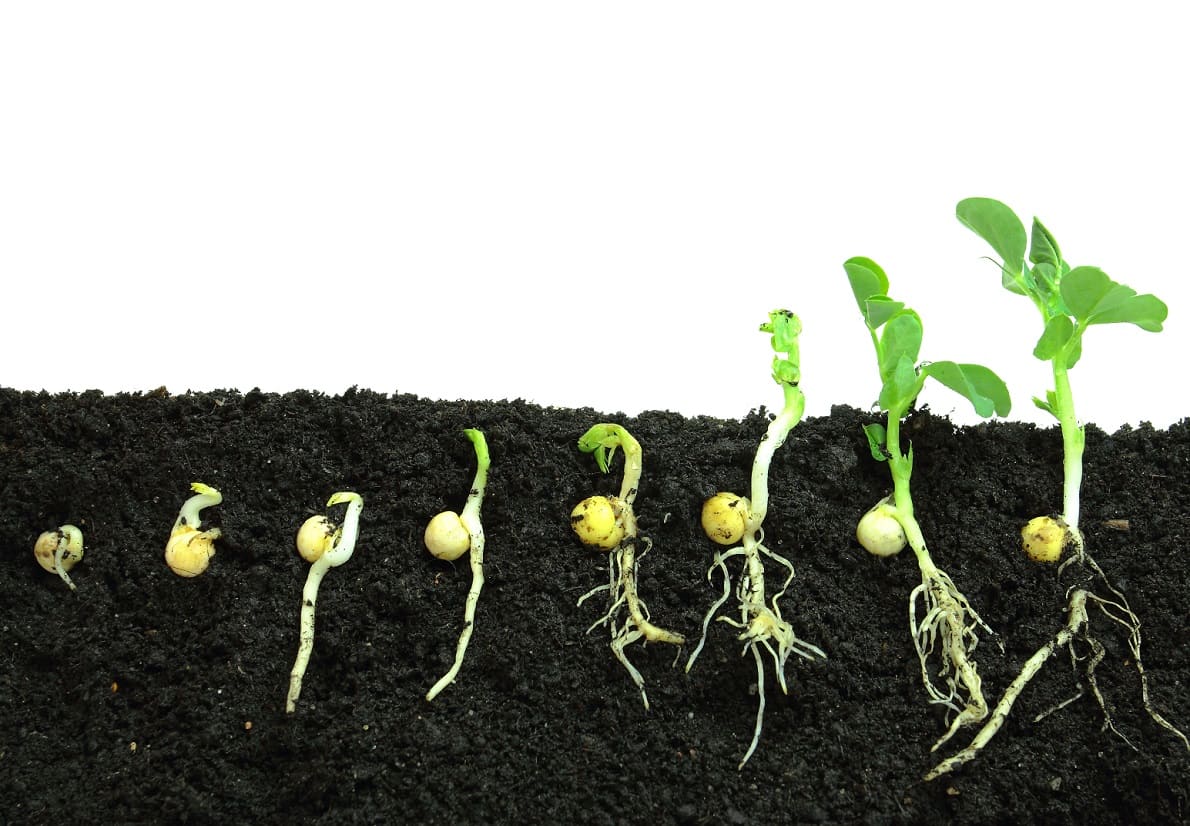
Before diving into techniques, let’s understand what’s actually happening inside those tiny packages of potential. Germination is nature’s awakening process—when a dormant seed absorbs water, its protective coating softens, enzymes activate, and stored energy converts into new growth.
Think of a seed as a perfectly packed survival kit. Inside that hard shell lies an embryo surrounded by a food supply called endosperm, all waiting for the right environmental cues to spring into action.
The process begins with imbibition—the absorption of water that triggers the breakdown of the seed coat. This releases enzymes that convert stored starches and proteins into usable energy, fueling the emergence of the radicle (first root) followed by the shoot containing the stem and first leaves.
The Essential Requirements for Germination Success
Every seed, regardless of variety, needs these fundamental conditions, but the specific requirements vary significantly between plant families.
Moisture
Moisture serves as the wake-up call that starts the entire process. Water softens the seed coat and activates dormant enzymes, but the quality of that water matters more than many gardeners realize.

Room temperature water works best—cold water can shock seeds and delay germination, while hot water can damage the embryo. If your tap water is heavily chlorinated or has a high mineral content, consider using distilled water or letting tap water sit overnight to allow chlorine to evaporate.
Temperature
Temperature acts like a precision thermostat for both germination speed and success rates. Cool-season crops like lettuce and spinach actually prefer soil temperatures around 50-65°F and may fail to germinate in hot conditions. Warm-season crops like tomatoes and peppers need soil temperatures of 70-85°F to sprout reliably.
Many gardeners make the mistake of using air temperature as their guide, but soil temperature often runs 10-15 degrees cooler than ambient air temperature, especially in unheated spaces.
Oxygen
Oxygen fuels the cellular respiration that converts stored nutrients into growing tissue. This is why seed-starting mix texture matters so much—compacted or waterlogged growing medium blocks oxygen access and kills seeds before they can establish.
The ideal growing medium feels like a wrung-out sponge when squeezed, holding moisture while allowing air to circulate freely.
Light
Light requirements vary dramatically by species and represent one of the most misunderstood aspects of germination. While most seeds can germinate in darkness, some tiny seeds like lettuce, petunias, and coleus actually require light to trigger sprouting. These should be pressed gently into the soil surface rather than buried.
Conversely, some seeds like calendula and sweet peas need complete darkness and should be covered thoroughly.
👉 Here are 36 Shade-Loving Herbs and Vegetables That Grow With Less Sunlight
Preparing Seeds for Optimal Germination
Many seeds benefit from special treatment before sowing, techniques that can dramatically improve germination rates and speed.
Stratification: Breaking Nature’s Sleep Timer
Some seeds, particularly perennials and trees, have built-in dormancy mechanisms that prevent germination until they’ve experienced winter-like conditions. This process, called stratification, can be replicated indoors for faster, more reliable sprouting.
Cold stratification involves mixing seeds with slightly damp sand or vermiculite and storing them in the refrigerator for periods ranging from two weeks to several months, depending on the species.
Seeds that commonly benefit from this treatment include lavender, rosemary, echinacea, and most tree seeds. Check your seed packet or research your specific variety to determine if stratification is needed.
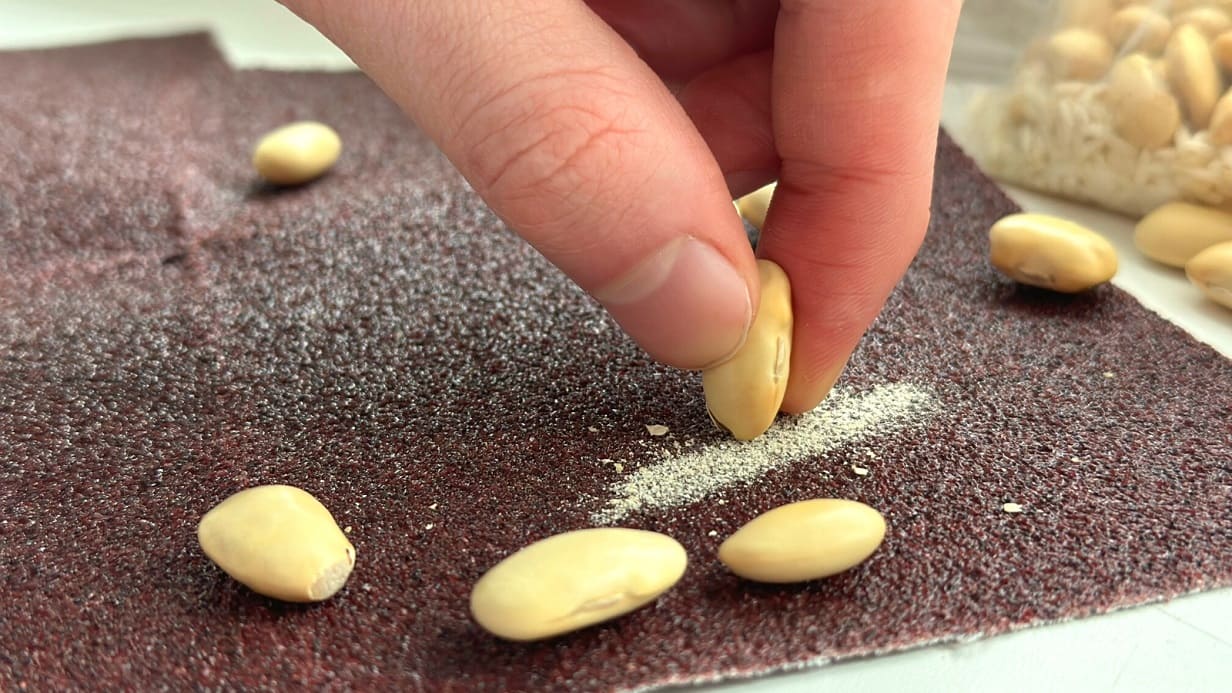
Scarification: Helping Seeds Break Free
Seeds with particularly hard coats—like morning glories, nasturtiums, and many legumes—sometimes need help breaking through their protective shell. Scarification involves creating small nicks in the seed coat to allow water penetration.
For home gardeners, the safest method involves gently rubbing seeds with fine sandpaper or making a small nick with a nail file. Some gardeners prefer soaking hard-coated seeds in warm water for 12-24 hours before planting, which achieves similar results with less risk of damage.
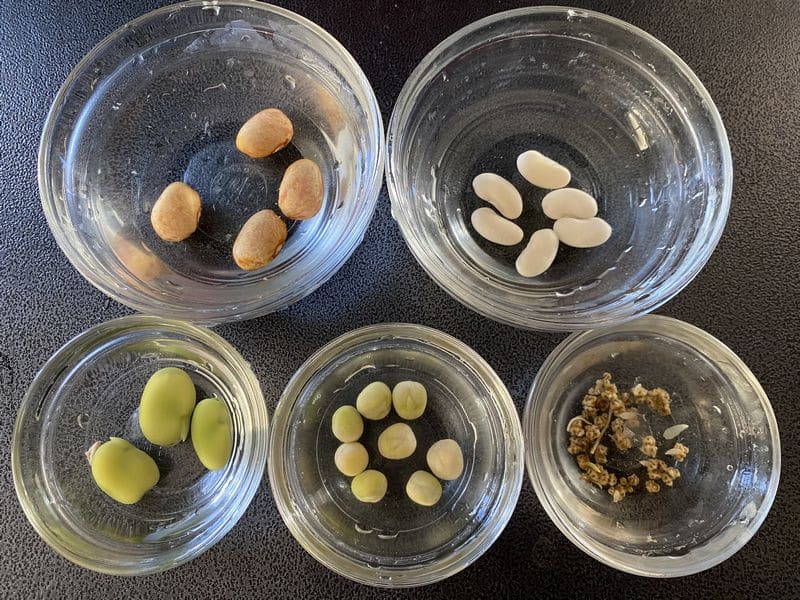
Pre-Soaking: The Gentle Approach
Many larger seeds benefit from a pre-soaking period that jumpstarts the imbibition process. Beans, peas, corn, and squash family seeds often germinate faster and more uniformly after soaking in lukewarm water for 4-8 hours before planting. This technique works particularly well for succession plantings where you want quick, even emergence.
👉 Here’s How to Grow a Three Sisters Garden: Corn, Beans, Squash Together
Choosing Your Germination Method
The approach you select depends on your goals, available space, and the specific plants you’re growing. Each method has distinct advantages for different situations.
Traditional Soil Germination: The Foundation Method
This time-tested approach works well for beginners and provides the most natural root development. Seeds go directly into containers filled with seed-starting mix, where they complete their entire early development without disturbance.
This method excels for larger seeds like beans and cucumbers, plants that dislike transplanting such as root vegetables, and gardeners who prefer simplicity over maximum germination rates.
The main trade-offs are lower overall germination percentages compared to pre-sprouting methods and the need for more containers and growing medium.
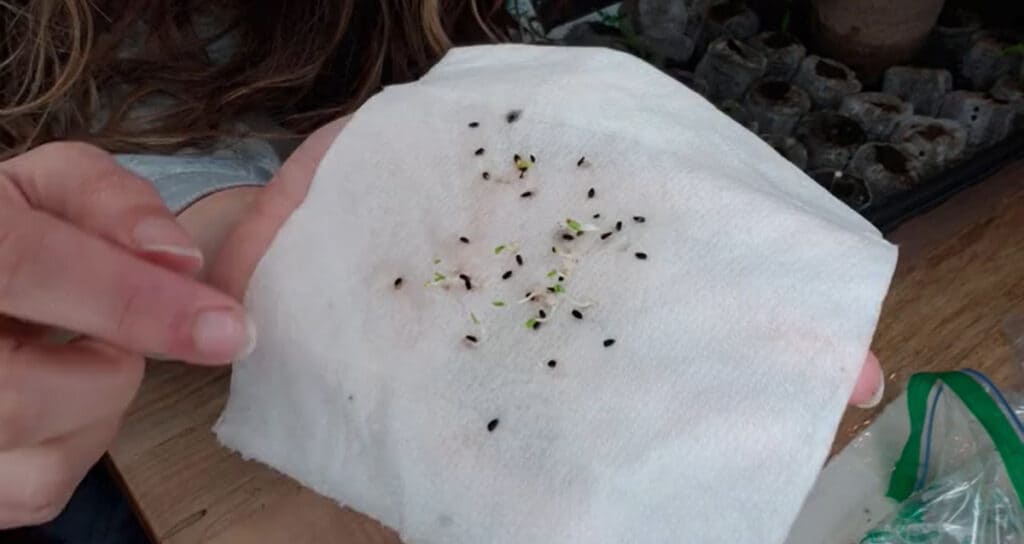
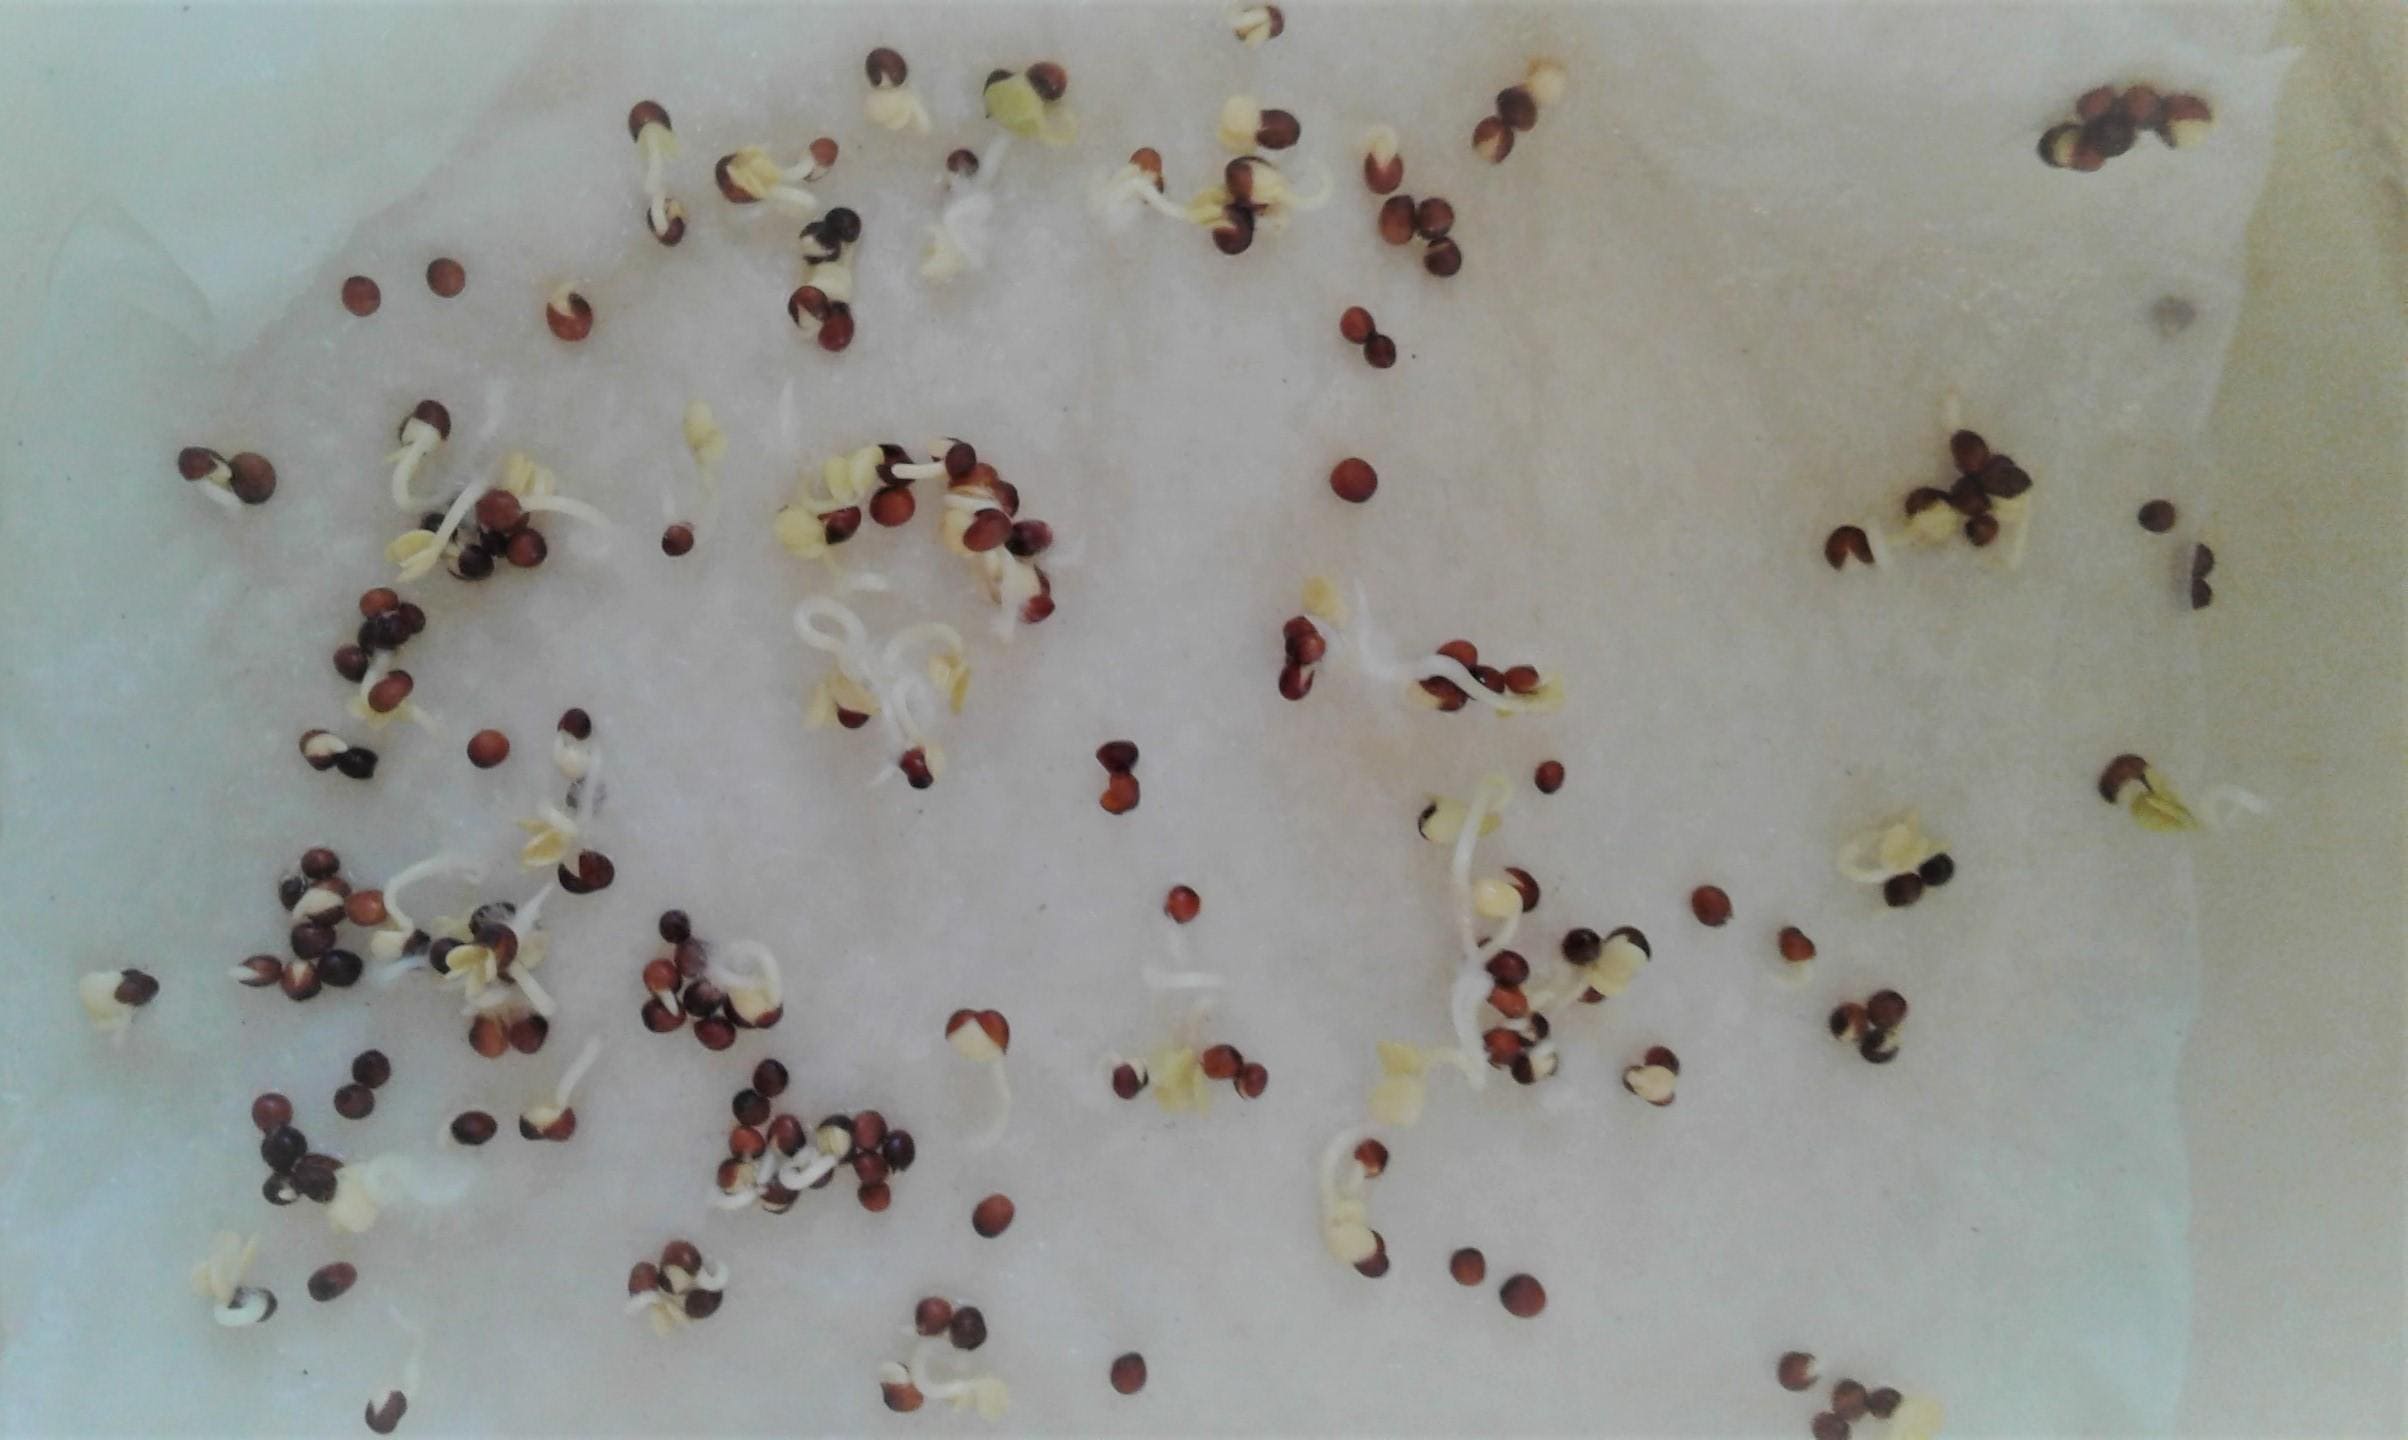
Paper Towel Pre-Sprouting: The Efficiency Maximizer
This technique has transformed seed starting for countless gardeners by allowing precise control over the germination environment. Seeds sprout between damp paper towels in sealed containers, then transplant to growing medium once established.

The method shines for expensive or rare seeds where every sprout counts, testing seed viability before committing space and resources, and slow-germinating crops like peppers where monitoring progress becomes important.
The main challenge lies in timing the transplant correctly—too early and the sprout may not survive, too late and the roots become difficult to handle.
Direct Sowing: Working with Nature’s Timeline
Some crops perform better when sown directly in their final growing location, whether that’s garden beds or large containers. Root crops like carrots and radishes often produce better results this way since they dislike root disturbance. Fast-growing crops like lettuce and spinach may not benefit enough from indoor starting to justify the extra effort.
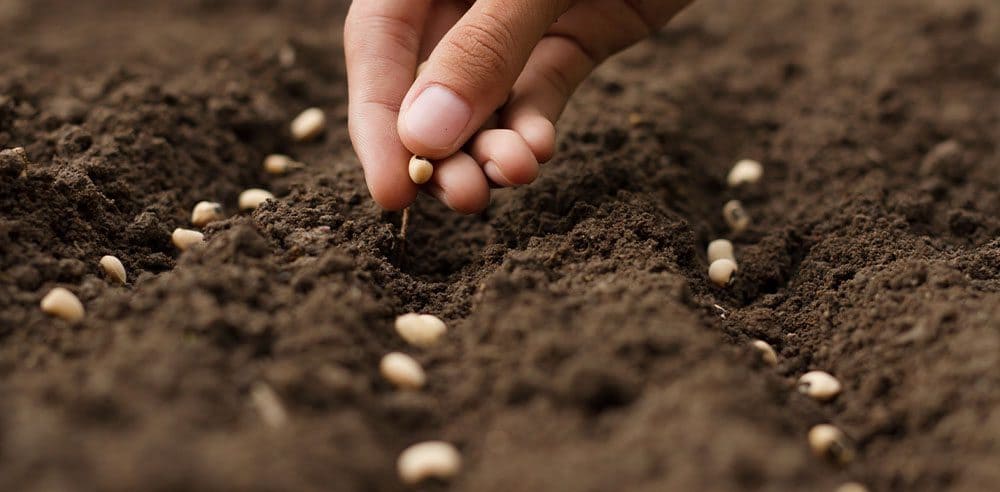
This approach requires careful timing to ensure soil conditions are appropriate, but it eliminates transplant shock and allows plants to develop naturally adapted root systems.
Step-by-Step Germination Techniques
Method 1: Professional Soil Germination
Essential Supplies:
- Seed-starting containers with drainage holes
- High-quality seed-starting mix
- Labels and waterproof markers
- Spray bottle for gentle watering
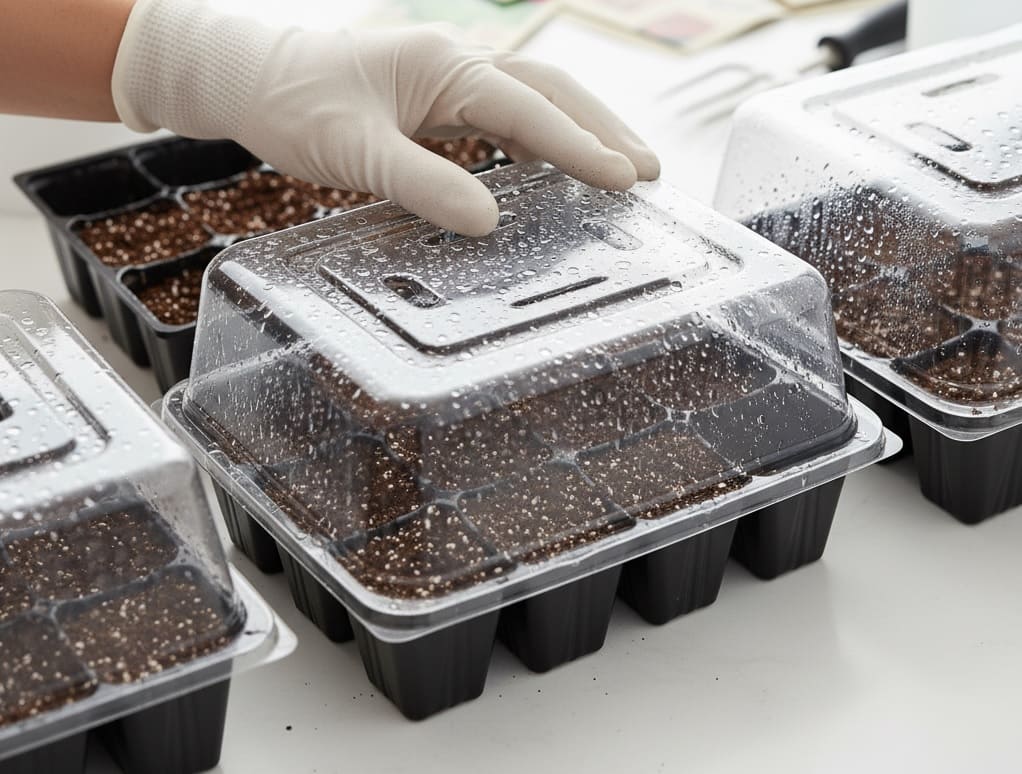
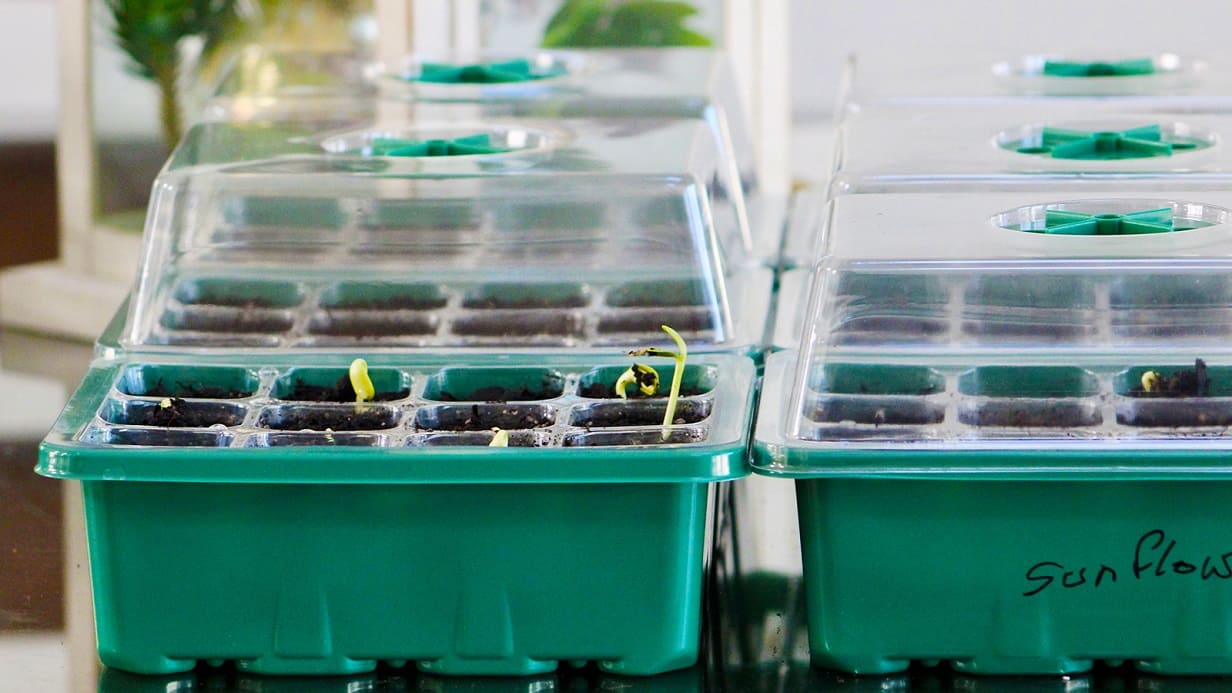
- Clear plastic covers or humidity domes
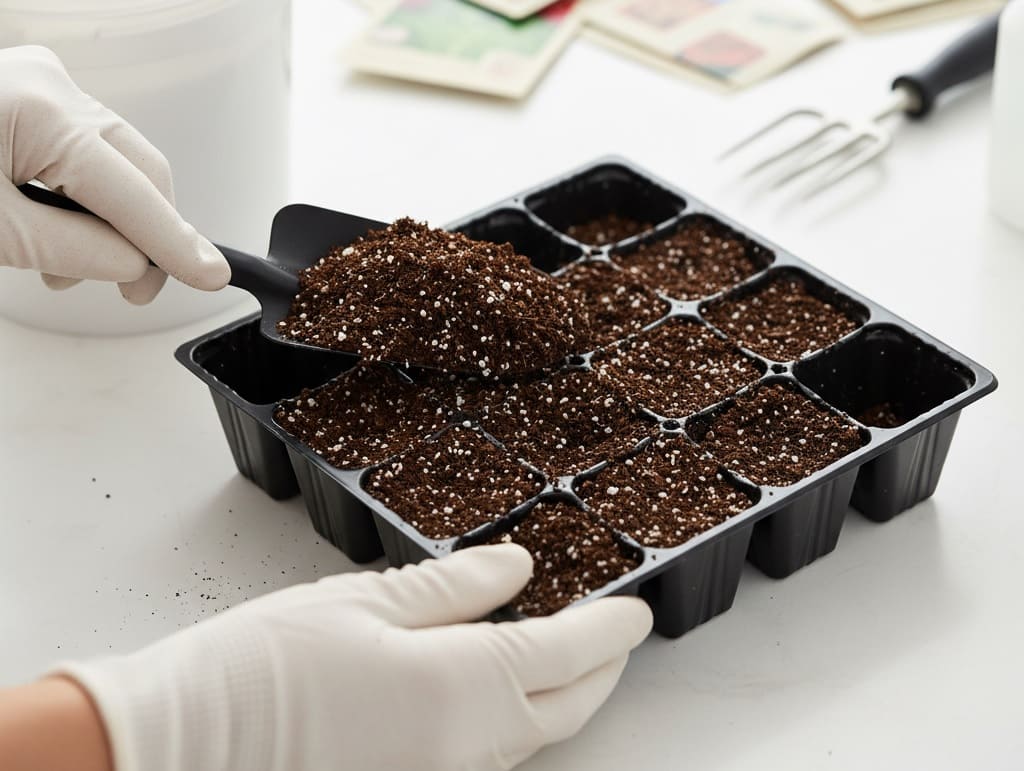
1. Container Preparation: Start with scrupulously clean containers to prevent disease issues. If reusing containers from previous seasons, wash thoroughly with soapy water and rinse with a diluted bleach solution (1 part bleach to 9 parts water). This step alone can prevent many of the fungal problems that plague seed starting.
2. Growing Medium Setup: Fill containers with pre-moistened seed-starting mix to within ¼ inch of the rim. The mix should feel like a wrung-out sponge—moist throughout but not dripping. Avoid using garden soil, which is too heavy and may contain disease organisms that can kill seedlings.
3. Planting Protocol: Follow the depth guidelines on your seed packet religiously. As a general rule, plant seeds 2-3 times their diameter deep. Tiny seeds like lettuce need only a light sprinkling of mix on top, while larger seeds like beans require deeper holes. After planting, gently firm the surface without compacting.
4. Environmental Control: Cover containers with clear plastic or humidity domes to maintain consistent moisture and temperature. Position in a warm location away from direct sunlight—heat from the sun can quickly overheat and kill seeds. The top of a refrigerator, near a heating vent, or on a seedling heat mat all provide appropriate warmth.
5. Daily Management: Check moisture levels daily by touching the soil surface. Water with a spray bottle if the surface begins to dry, but avoid oversaturating. Remove covers immediately when green shoots appear to prevent fungal issues that thrive in humid, enclosed environments.
Method 2: Paper Towel Pre-Sprouting Mastery
Required Materials:
- Plain, unscented paper towels
- Clear containers with tight-fitting lids
- Spray bottle with clean water
- Tweezers for delicate handling
- Permanent marker for labeling
1. Setup Process: Place 2-3 layers of paper towel in your container and spray until evenly damp but not soaking. Excess water should be poured off—pooling water creates conditions for mold and rot rather than healthy sprouting.
2. Seed Placement: Arrange seeds on the damp towels with adequate space between each one. Different varieties can share the same container if clearly separated and labeled. Fold another layer of damp towel over the seeds, creating a protective environment that maintains moisture while allowing air exchange.
3. Optimal Conditions: Seal containers with lids slightly ajar to prevent condensation buildup while maintaining humidity. Store in a consistently warm location—many gardeners find success placing containers on appliances that generate gentle heat like refrigerator tops or cable boxes.
4. Monitoring and Transplanting: Check daily for signs of sprouting and to ensure towels remain adequately moist. Most seeds show white root tips within 3-7 days, though some varieties take longer. Transplant immediately when roots reach 2-3mm long, handling gently with tweezers to avoid damage.
Method 3: Advanced Indoor Growing Systems
For gardeners serious about starting large quantities of seeds or extending growing seasons significantly, investing in proper equipment pays substantial dividends.
1. Climate Control Setup: Dedicate a space where you can control temperature, humidity, and lighting independently from your home’s general environment. Many successful seed starters use basements, spare rooms, or even heated garages for this purpose.
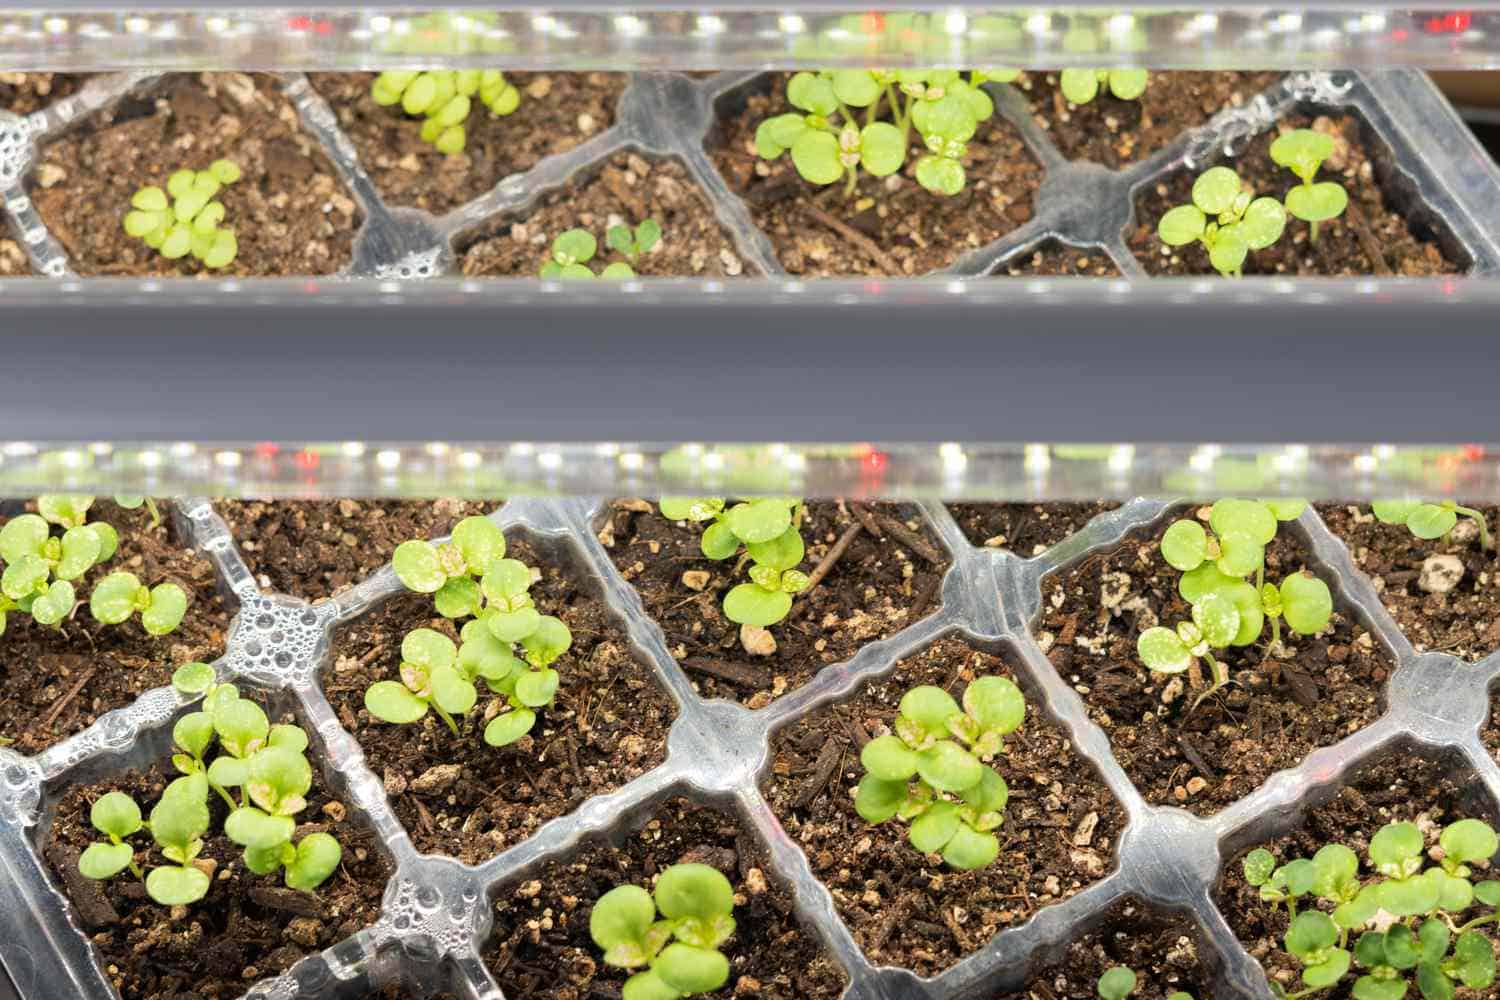
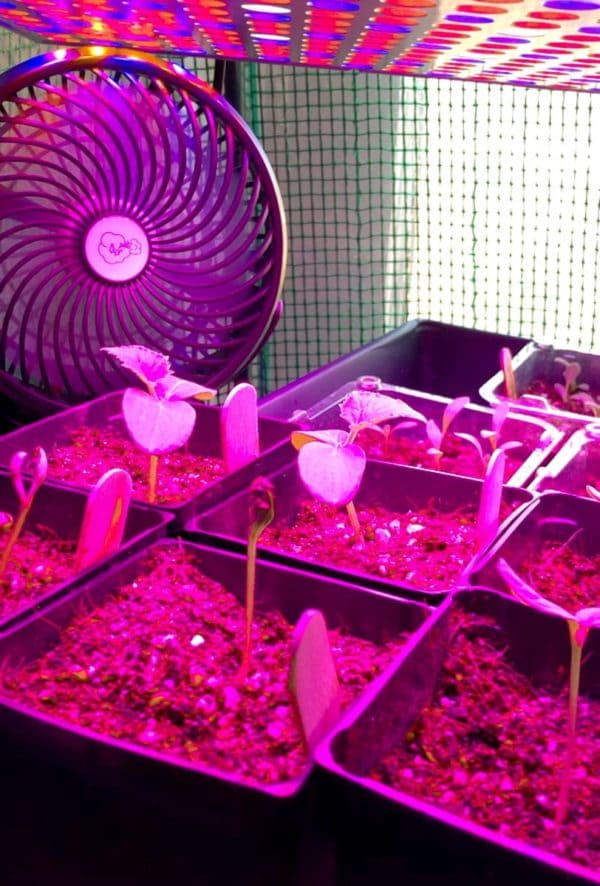
2. Professional Lighting: Position grow lights 2-3 inches above seed trays, adjusting height as seedlings grow. LED lights run cooler and more efficiently than fluorescent, but both work well. Plan for 14-16 hours of daily lighting once germination occurs, using timers to maintain consistency.
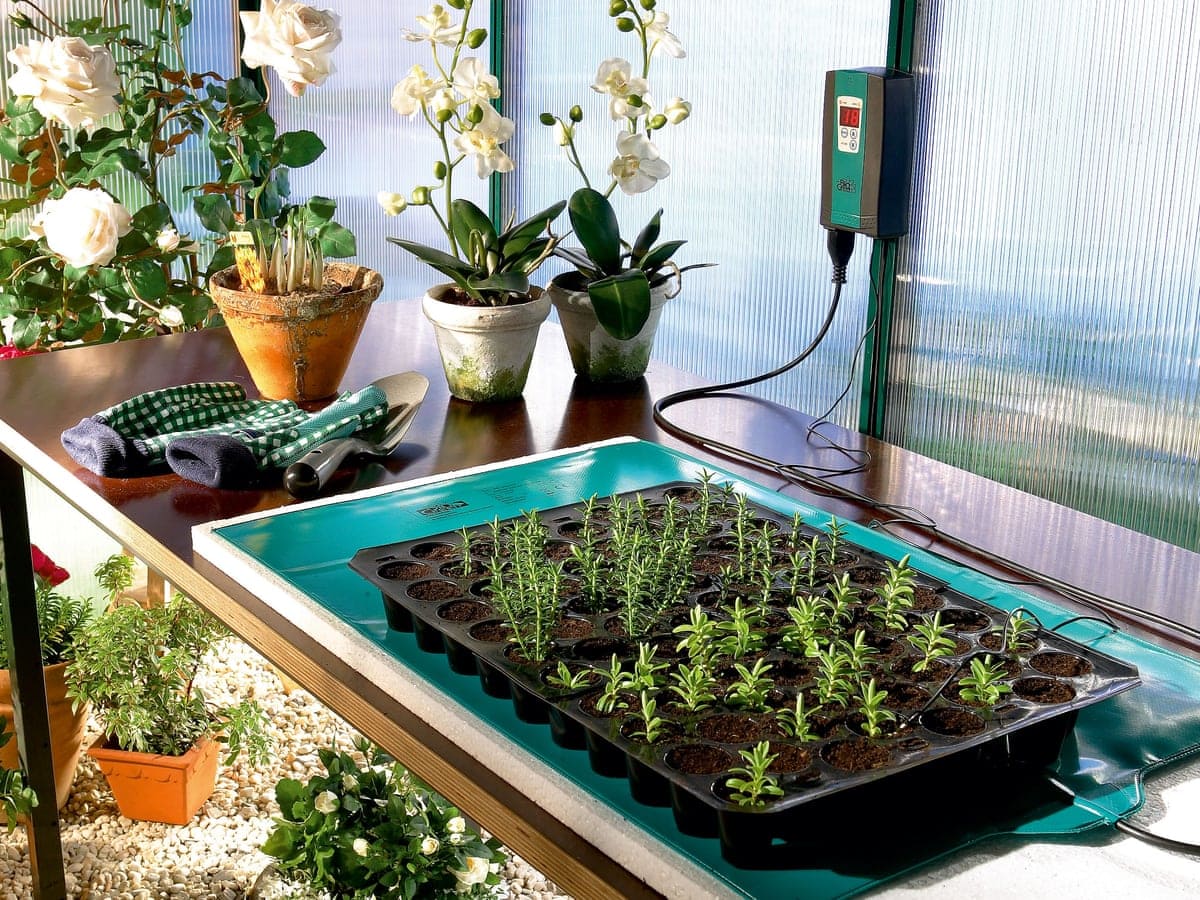
3. Heat Management: Use seedling heat mats to maintain soil temperatures in the optimal range for your crops. Most vegetables prefer 70-75°F soil temperature for germination. Remove heat mats once seeds sprout to prevent excessive drying and encourage proper root development.
4. Air Circulation: Install small fans to provide gentle air movement around seedlings. This helps prevent fungal diseases and strengthens stems by simulating natural wind conditions.
Mastering Timing for Different Plant Families
Understanding when to start various crops makes the difference between perfectly sized transplants and overgrown, stressed seedlings.
Cool-Season Crops: Working with Nature’s Schedule
Brassicas like broccoli, cabbage, and kale prefer cooler growing conditions and can tolerate light frosts. Start these 6-8 weeks before your last frost date for spring planting, or 12-14 weeks before your first fall frost for autumn harvests. These crops actually perform better when grown in cooler weather and may bolt prematurely if started too late in spring.
Alliums including onions and leeks require exceptionally long growing seasons. Start onions from seed 10-12 weeks before transplanting, and leeks even earlier. These crops tolerate cool conditions well and can be among the first transplants to go outside.
Warm-Season Crops: Patience Pays Off
Solanaceae family members—tomatoes, peppers, and eggplants—need warm soil and air temperatures to thrive. Start tomatoes 6-8 weeks before your last frost date, but wait until soil temperatures reach at least 60°F before transplanting.
Peppers prefer even warmer conditions and may benefit from starting 8-10 weeks early, especially in shorter growing seasons.
Cucurbits like cucumbers, squash, and melons germinate quickly in warm conditions but dislike root disturbance. Start these only 2-4 weeks before transplanting to avoid pot-bound, stressed plants.
Understanding Your Local Conditions
Your local frost dates provide the foundation for timing decisions, but microclimates within your property can vary significantly. South-facing areas protected by structures may warm up weeks earlier than exposed northern exposures. Keep detailed records of actual conditions in your specific garden locations to refine timing over seasons.
Troubleshooting Common Challenges
Identifying and Preventing Damping Off
This devastating fungal disease can wipe out entire trays of healthy-looking seedlings overnight. Affected plants suddenly topple over at soil level, with stems appearing pinched or rotted at the base.
Prevention strategies focus on environmental control and sanitation. Use only sterile seed-starting mix, ensure adequate air circulation around seedlings, and avoid overwatering. Bottom watering helps keep soil surfaces drier while maintaining root zone moisture. If damping off appears, immediately improve air circulation and reduce watering frequency.
Solving Germination Failures
When seeds fail to sprout, systematic diagnosis usually reveals the cause. Old or improperly stored seeds lose viability over time—test questionable seed batches using the paper towel method before committing valuable growing space.
Temperature problems rank among the most common causes of germination failure. Invest in a soil thermometer to verify actual growing medium temperature, which often differs significantly from air temperature.
Seeds planted too deeply may exhaust their energy reserves before reaching the surface, while seeds planted too shallowly may dry out before establishing roots.
Correcting Weak, Leggy Growth
Tall, spindly seedlings with weak stems indicate insufficient light or excessive temperatures. This problem rarely corrects itself and usually results in poor plant performance even after transplanting.
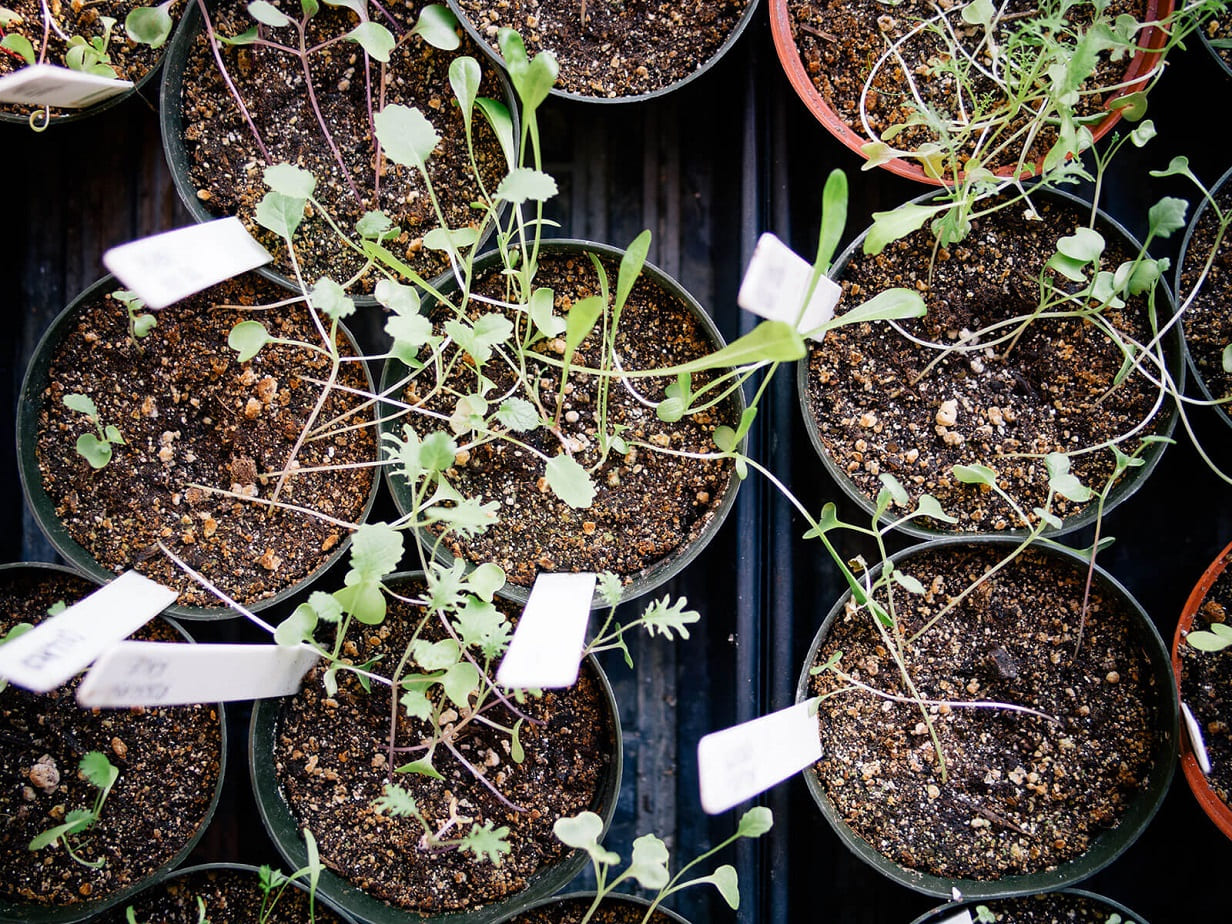
Address lighting issues by moving fixtures closer to plants—most seedlings benefit from lights positioned 1-2 inches above foliage. Increase daily lighting duration to 14-16 hours if growth remains weak. Lower ambient temperatures slightly to encourage more compact growth habits.
Managing Environmental Stress
Seedlings are particularly sensitive to environmental fluctuations during their first few weeks of growth. Maintain consistent temperatures by avoiding locations near heat sources that cycle on and off. Protect from cold drafts that can stress plants and increase disease susceptibility.
Humidity management becomes critical in heated indoor environments where air moisture levels drop significantly. Group containers together to create beneficial microclimates, or use humidity trays filled with water and pebbles to increase local moisture levels.
Post-Germination Care and Development
The Critical Transition Period
Once seeds germinate, their needs change dramatically, and many gardeners lose plants during this vulnerable transition. Remove humidity covers immediately to prevent fungal problems, but maintain consistent soil moisture to support rapid root development.
Light becomes absolutely critical at this stage. Seedlings that seemed fine in ambient light during germination will quickly become weak and stretched without adequate illumination. Position grow lights or move containers to the brightest available location.
Feeding Your Growing Seedlings
Seeds contain enough stored energy to germinate and produce their first leaves (cotyledons), but once true leaves appear, seedlings need supplemental nutrition. The appearance of the second set of leaves—the first true leaves that resemble the mature plant—signals the time to begin fertilizing.
Use a balanced, diluted liquid fertilizer at quarter strength every two weeks. Over-fertilizing can burn tender roots and actually slow growth, so err on the side of too little rather than too much. Organic options like diluted fish emulsion or kelp meal provide gentle nutrition that builds strong plants.
👉 Learn about Banana Peel Fertilizer: Truth vs. Myths About This Popular Garden Hack
Mastering the Transplant Process
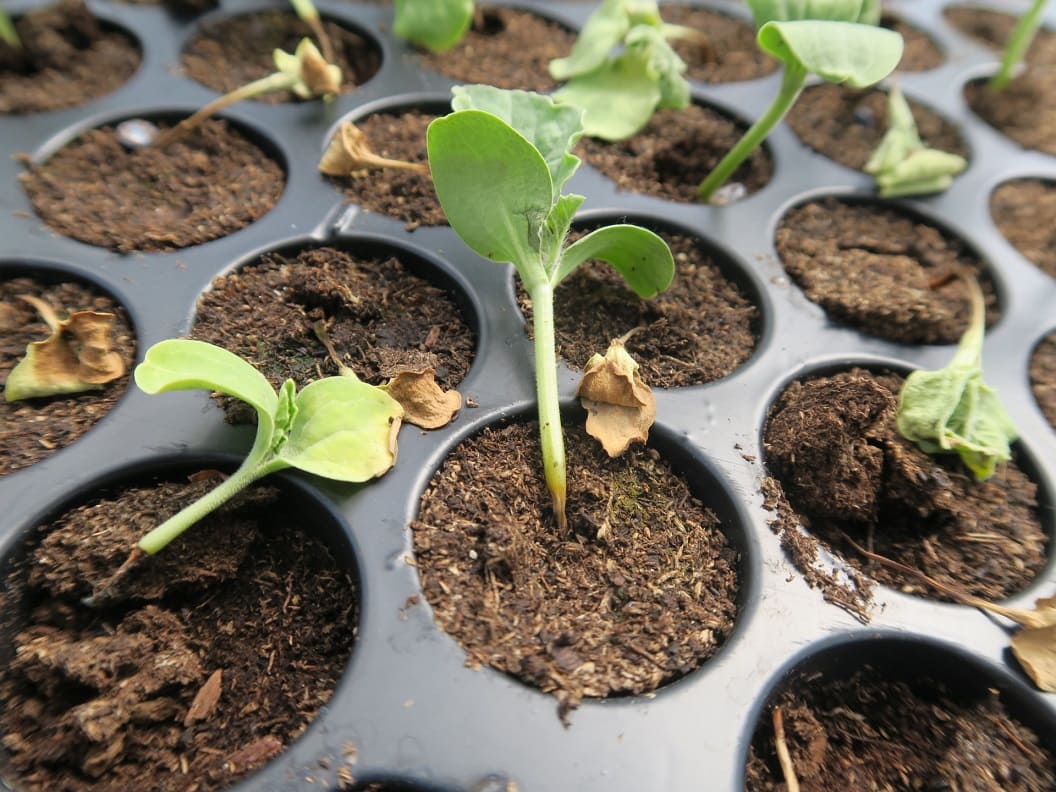
Successful transplanting requires timing, technique, and environmental awareness. Wait until seedlings have developed 2-3 sets of true leaves and show strong root development before moving to larger containers or the garden.
Handle seedlings only by their leaves, never by the delicate stems that can be damaged easily. Prepare the new growing location in advance, whether that’s larger pots or garden beds. Water thoroughly after transplanting and provide protection from wind and direct sun for the first few days while plants recover from the transition.
Hardening Off: The Final Preparation
Indoor-grown seedlings need gradual acclimatization to outdoor conditions through a process called hardening off. This critical step prevents transplant shock and ensures strong establishment in the garden.
Begin by placing plants outside in a protected, shaded location for one hour on the first day. Gradually increase outdoor time and sun exposure over 7-10 days until plants can remain outside overnight.
Cold-hardy crops can tolerate cooler conditions during this process, while warm-season crops should only be hardened off when nighttime temperatures remain above 50°F.
Advanced Strategies for Seed Starting Success
Creating Optimal Growing Environments
Successful seed starting often depends on controlling environmental factors that many gardeners overlook. Humidity levels between 50-70% support healthy growth without encouraging fungal problems. Use hygrometers to monitor conditions and adjust through ventilation or humidity trays as needed.
Air circulation prevents stagnant conditions that promote disease while strengthening plant stems. A small fan running continuously at low speed provides sufficient air movement without creating stressful drafts.
Record Keeping for Continuous Improvement
Maintain detailed records of your seed starting activities to identify patterns and improve results over time. Track germination rates by variety and source, noting environmental conditions and any special treatments used. Record timing from sowing to transplanting for different crops to refine your scheduling for future seasons.
Document problems and solutions to build your troubleshooting expertise. Photographs can be particularly valuable for identifying recurring issues and monitoring plant development patterns.
👉 Find out Why You Need a Garden Journal and How to Keep One
Scaling Production Efficiently
As your skills develop, you may want to start larger quantities of plants for expanded gardens or to share with others. Modular seed starting systems allow easy expansion without major equipment changes. Consider succession planting schedules that spread out germination timing to avoid overwhelming transplanting workloads.
Budget-Conscious Equipment Solutions
Quality seed starting doesn’t require expensive specialized equipment. Standard shop lights from hardware stores provide adequate illumination for most seedlings when positioned properly. Repurpose food containers for seed starting—egg cartons, yogurt cups, and takeout containers all work well with drainage holes added.
Create effective humidity chambers using clear storage containers or even plastic bags supported by stakes. Heat can come from simple heating pads designed for human use, though specialized seedling mats offer better temperature control.
Your Path to Seed Starting Mastery
Armed with this comprehensive knowledge, you’re ready to transform those packets of potential into thriving plants. Start with easy varieties like lettuce, beans, or zinnias to build confidence while mastering the fundamentals.
Set up a simple growing area with basic equipment, focusing on providing consistent moisture, appropriate temperature, and adequate light.
Expect some setbacks as you learn—every experienced gardener has stories of failed seed starting attempts that taught valuable lessons. Keep detailed records of what works in your specific conditions, and don’t hesitate to experiment with different techniques to find your preferred approaches.
Success in seed starting comes from understanding plant needs, maintaining consistent care, and learning from experience. Each growing season builds your expertise and confidence, leading to more adventurous seed choices and better results.
Whether you’re growing a few herbs on a windowsill or starting hundreds of plants for market gardens, these fundamental principles will serve you well.
Choose your first seeds, gather your supplies, and take that exciting first step into the rewarding world of growing plants from seed. Your future garden—and your sense of accomplishment—will thank you.