
Picture a vegetable that practically plants itself, survives harsh winters without protection, produces abundant sweet, nutty tubers, and sends up stunning yellow flowers that brighten your garden all summer.
Meet Jerusalem artichokes—the low-maintenance perennial that delivers year after year.
Whether you’re seeking a reliable food crop or your first guaranteed gardening success, this comprehensive guide covers everything from planting to harvest to that first delicious bite.
By the end, you’ll have the complete roadmap for growing thriving Jerusalem artichokes in your own garden.
What Are Jerusalem Artichokes?
Despite their misleading name, Jerusalem artichokes have nothing to do with Jerusalem or artichokes.
These knobby tubers are North American natives belonging to the sunflower family. The name likely evolved from the Italian girasole (sunflower), corrupted to Jerusalem over time.
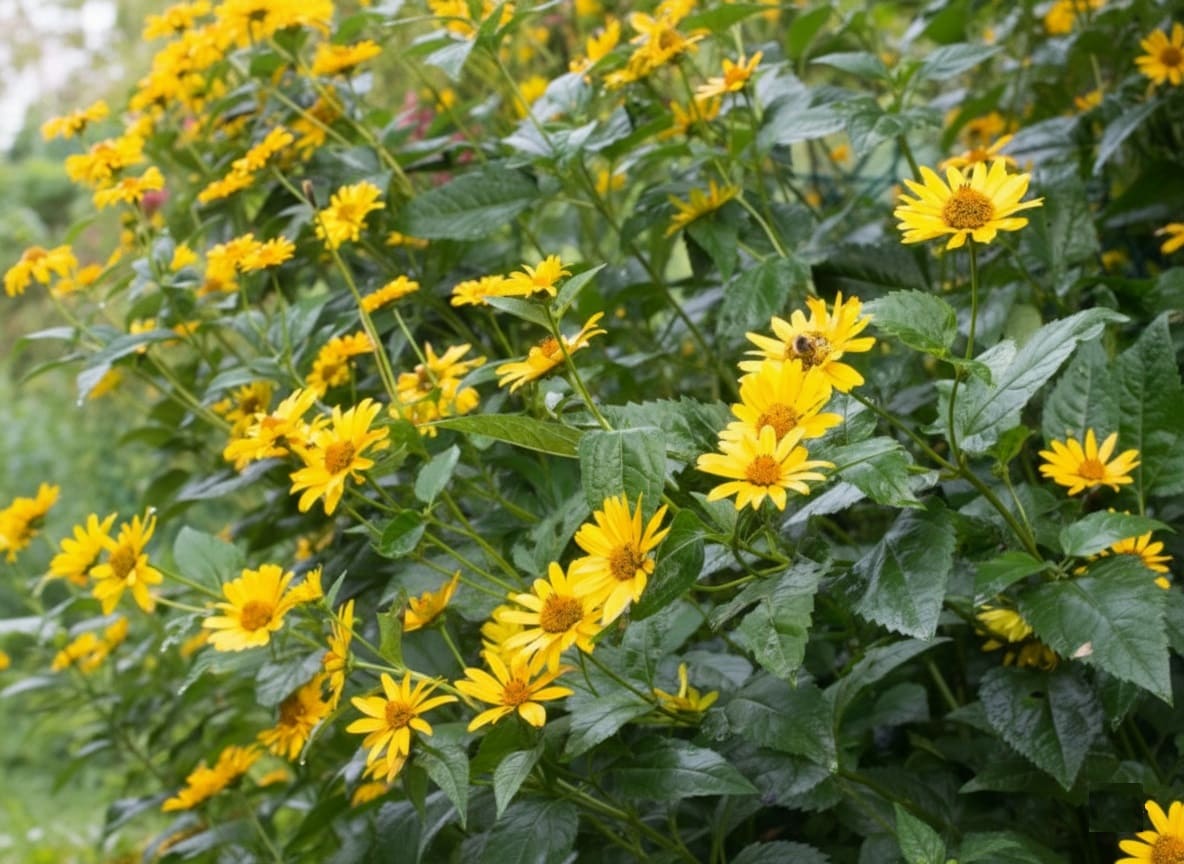
Also called sunchokes or earth apples, these perennials reach impressive heights of six to ten feet by late summer.
👉 Here’s How to Grow Giant Sunflowers: Expert Tips for Towering Blooms
Their cheerful yellow flowers emerge as days shorten—typically August in cooler climates, October in Mediterranean regions. But the real prize lies underground, where irregular, knobby rhizomes develop throughout the season.
The flavor is distinctly earthy and nutty with subtle sweetness. Raw, they’re crisp like water chestnuts with a refreshing bite. Cooked, they develop a creamy, almost buttery consistency that makes stellar soups and roasted dishes.

My first taste came at a farmer’s market when a vendor handed me a raw slice. That unexpected sweetness and satisfying crunch convinced me to dedicate a corner of my garden to them the following spring.
Six years later, that patch still produces abundantly with virtually no maintenance.
Understanding the Growing Cycle
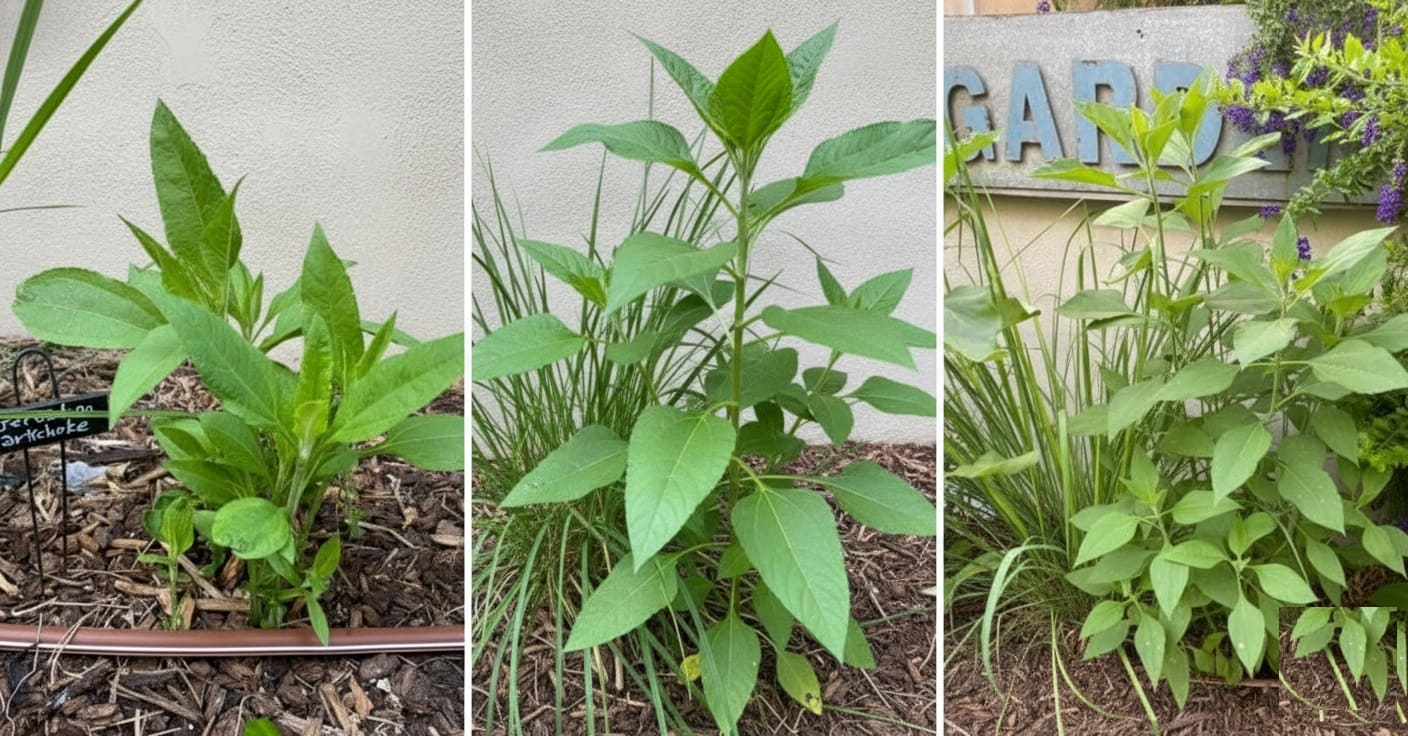
Jerusalem artichokes follow a predictable annual rhythm. Shoots emerge in spring from overwintered tubers, growing rapidly through early summer.
Plants focus energy on height and foliage development until midsummer, when tuber formation begins underground. This continues through autumn as foliage yellows and dies back, signaling that tubers have reached full size and maximum sweetness.
First-year plants from newly planted tubers typically produce modest harvests while establishing root systems.
Second and subsequent years deliver substantially larger yields—often double or triple the first year’s production. This delayed gratification pays off handsomely in long-term productivity.
Why Grow Jerusalem Artichokes?
Jerusalem artichokes offer compelling advantages for home gardeners. They’re remarkably hardy perennials that return year after year without replanting, thriving in conditions that challenge many crops.
Poor soil? No problem. Forgot to water? They’ll forgive you. Their dual purpose as both food crop and ornamental plant means stunning late-summer flowers alongside productive harvests.
The nutritional profile deserves attention too. These tubers pack unique health benefits, particularly for diabetics and those seeking lower-calorie alternatives to potatoes.
👉 Here’s How to Grow Tons of Potatoes in Buckets (Even in Small Spaces!)
Perhaps most remarkably, they store themselves naturally in the ground all winter, eliminating preservation concerns while providing fresh harvests on demand from October through March.
Beyond home gardens, Jerusalem artichokes serve industrial purposes including fructose production, livestock fodder, and biofuel conversion. For bioethanol production, only sugar beets surpass their biomass yield per hectare.
Climate and Growing Conditions
Jerusalem artichokes thrive across USDA hardiness zones 3 through 9, tolerating winter temperatures well below zero. This exceptional cold hardiness makes them reliable even in harsh northern climates where many perennials struggle.
In warmer zones, they appreciate some afternoon shade during peak summer heat, though they’ll still produce in full sun with adequate water.
Soil pH between 5.8 and 7.0 works best, though they tolerate slightly acidic to slightly alkaline conditions without complaint.
The plants adapt to clay, sand, or loam, but loose, well-draining soil enriched with organic matter produces the most abundant, easy-to-harvest tubers. Heavy clay can be amended with compost and sand to improve tuber expansion and simplify digging.
Choosing Your Planting Location
Location decisions have long-term implications with Jerusalem artichokes. These plants grow tall and spread enthusiastically, so thoughtful placement prevents future complications.
Select a spot receiving full sun for optimal growth and tuber production. While they tolerate partial shade, expect noticeably smaller yields in shadier conditions.
Consider placing them along property edges, fence lines, or garden corners where their height won’t shade other crops. Many experienced growers designate a permanent patch rather than rotating Jerusalem artichokes through main vegetable beds.
This approach acknowledges their persistent nature while simplifying management. Their tall, attractive stalks can also serve as living windbreaks or privacy screens.
Before planting, think about accessibility throughout winter. Marking your patch’s location before snow arrives makes midwinter harvesting much easier. A simple stake or permanent marker prevents frustrated searching through frozen ground.
Preparing the Soil
Proper soil preparation makes everything easier down the line. Work soil to twelve inches deep, breaking up compacted layers that could restrict tuber expansion.
Incorporate three to four inches of finished compost or aged manure, which improves both drainage and moisture retention—the sweet spot for Jerusalem artichokes.
If your soil tends toward heavy clay, add coarse sand along with compost to improve structure. Sandy soils benefit from extra organic matter to boost water-holding capacity.
The investment in soil preparation pays dividends at harvest when loose, friable earth releases tubers cleanly instead of requiring excavation.
Test soil pH if you’re uncertain about your conditions. While Jerusalem artichokes tolerate a range, adjusting excessively acidic soil with lime or alkaline soil with sulfur optimizes growth. Most garden centers offer inexpensive pH testing kits that provide quick results.
Planting Jerusalem Artichokes
Sourcing Quality Planting Stock
Obtaining healthy tubers starts your crop on the right foot. Seek out garden centers, nurseries, or seed catalogs specializing in unusual vegetables. Farmers’ markets and fellow gardeners often have tubers available in autumn or early spring.
Even grocery store Jerusalem artichokes work, though named varieties from reputable sources typically perform better.
Choose firm tubers without soft spots, mold, or excessive shriveling. Larger tubers (two to three inches) establish faster than smaller ones.
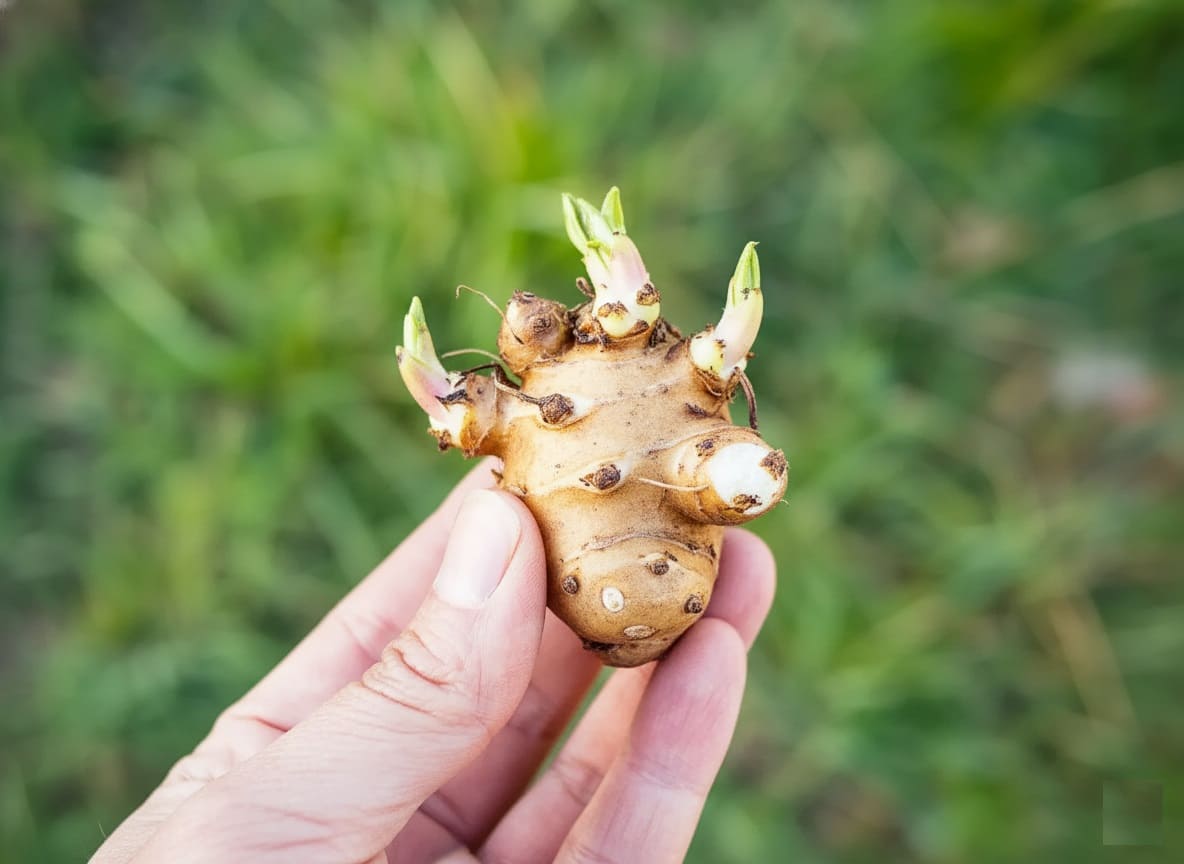
Like seed potatoes, you can cut large Jerusalem artichoke tubers into sections, ensuring each piece has at least two or three visible growing nodes. Let cut surfaces dry for a day before planting to reduce rot risk.
Planting Timing and Method
Plant tubers between late March and mid-May once soil temperatures reach 45-50°F. Cold, wet soil causes rot, so patience pays off in northern regions. In warmer climates, earlier planting extends the growing season and boosts yields.
Follow these steps for successful establishment:
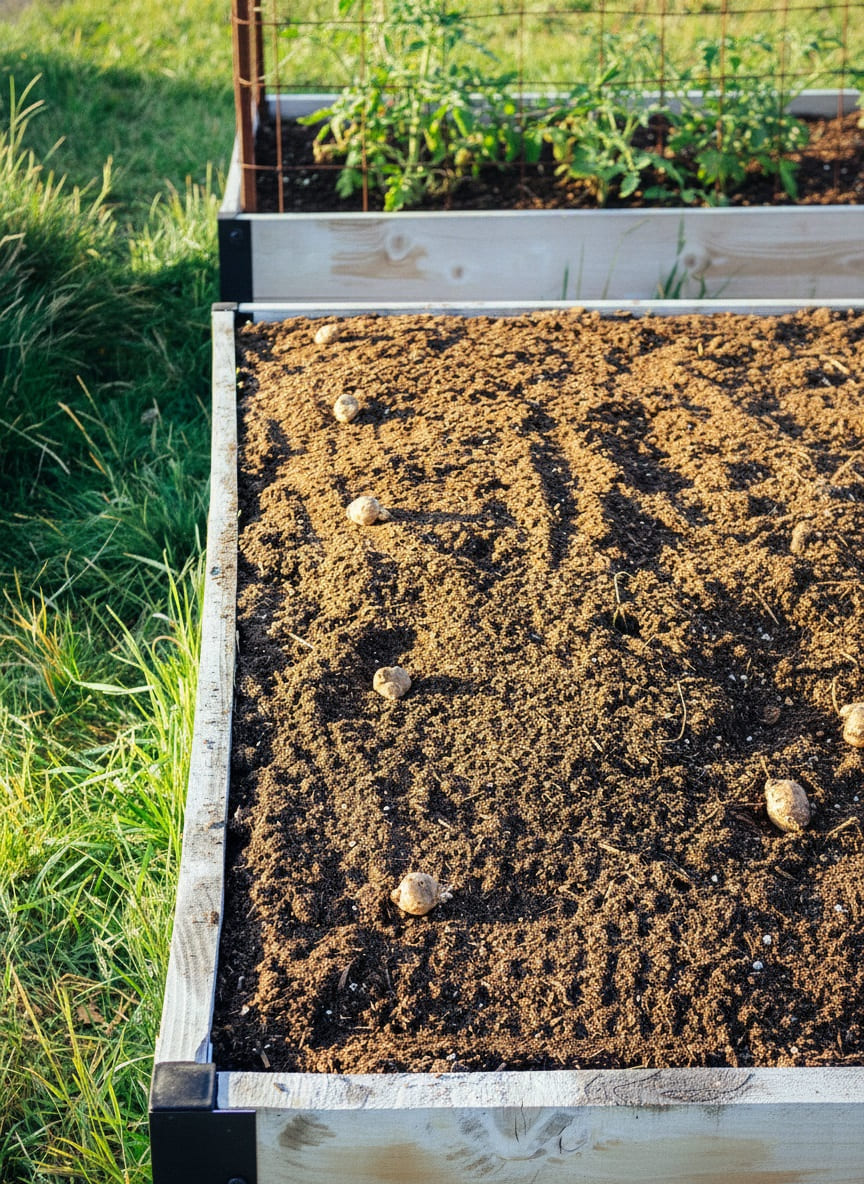
- Dig holes or trenches four to six inches deep
- Space tubers twelve to eighteen inches apart in rows three feet apart
- Place tubers with growing nodes facing upward
- Cover with soil and water thoroughly to settle
- Apply two to three inches of organic mulch to conserve moisture and suppress weeds

Shoots typically emerge within two to three weeks, making Jerusalem artichokes wonderfully gratifying for impatient gardeners. Mark planted areas clearly to avoid accidental disturbance while waiting for emergence.
Care and Maintenance Throughout the Season
Watering Strategy
Consistent moisture during the first six weeks after planting establishes strong root systems. Keep soil evenly moist but never waterlogged, checking moisture levels by feeling the soil a few inches down.
Drip irrigation or soaker hoses work beautifully, delivering water directly to roots while keeping foliage dry.
Established plants develop extensive root systems that access deeper moisture, making them remarkably drought-tolerant. However, Jerusalem artichokes produce substantial biomass, so they still benefit from consistent water.
During hot, dry weather, deep watering once or twice weekly maintains vigorous growth. Irregular watering can reduce tuber size and quality.
Mulching for Success
Mulch serves multiple purposes in Jerusalem artichoke cultivation. Apply three to four inches of organic material—shredded leaves, straw, grass clippings, or wood chips—around plants in late spring.
This layer conserves soil moisture, moderates temperature fluctuations, suppresses weeds, and gradually breaks down to enrich soil.
Refresh mulch in midsummer if it’s decomposed significantly. In autumn, add an extra layer over the planting area to insulate overwintering tubers and make winter harvesting easier in frozen ground. This blanket also protects any tubers you’re leaving for next year’s crop.
Fertilizing for Optimal Yields
Fertilization strategy depends on soil quality and harvest goals. Rich garden soil amended with compost often provides adequate nutrition without supplemental feeding. Poor or sandy soils benefit from strategic fertilizer applications.
Apply balanced fertilizer at planting, then every six to eight weeks during the growing season. Choose formulations with moderate nitrogen and higher potassium, which supports tuber development without excessive foliage production.
Excessive nitrogen creates tall, leafy plants with disappointing underground harvests and reduced storage quality.
Avoid fresh manure, which releases nitrogen too rapidly. Well-composted organic matter or granulated fertilizers applied around plant bases work better.
Tomato or root vegetable fertilizers provide excellent nutrient profiles for Jerusalem artichokes. Side-dress plants in early summer for a midsummer growth boost.
👉 Learn about Banana Peel Fertilizer: Truth vs. Myths About This Popular Garden Hack
Support and Staking
Jerusalem artichokes achieve impressive heights but lack corresponding structural strength. In windy locations or areas prone to summer storms, providing support prevents plants from toppling and breaking.
Install sturdy stakes—bamboo poles, metal garden stakes, or wooden posts—once plants reach three to four feet tall. Drive stakes twelve inches deep for stability.
Loosely tie main stems using soft garden twine, cloth strips, or commercial plant ties. Create a figure-eight pattern around stake and stem to prevent rubbing. Check ties monthly and adjust as plants continue growing.
Managing Height
Ten-foot plants aren’t practical for every garden. Trimming stems to five feet in early to mid-July manages height while maintaining decent tuber production. This pruning encourages branching and creates bushier, more manageable plants.
Some gardeners report that topped plants produce slightly smaller but more numerous tubers.

👉 Learn about Topping Pepper Plants: The Simple Gardening Hack for Bigger Harvests
If growing Jerusalem artichokes for animal fodder, harvest aboveground growth once or twice during summer, followed by fertilization. Plants regrow vigorously from roots, providing multiple harvests of nutritious greens before tuber harvest.
Companion Planting Considerations
Jerusalem artichokes’ tall stature and spreading habit limit ideal companion planting options.
Their height creates substantial shade, making them poor neighbors for most vegetables that require full sun. However, they can work alongside other tall, vigorous plants like corn if spaced adequately.
Plant shade-tolerant crops like lettuce, spinach, or Asian greens on the north side of Jerusalem artichoke rows to take advantage of afternoon shade during hot weather.
Late-season greens planted beneath Jerusalem artichokes in August benefit from cooling shade while tubers finish sizing underground.
Avoid planting Jerusalem artichokes near invasive spreaders like mint or horseradish—that combination creates management nightmares. Similarly, keep them away from perennial herbs and flowers you don’t want overwhelmed by vigorous tuber spread.
Managing Pests and Diseases
Jerusalem artichokes’ remarkable pest and disease resistance makes them ideal for organic growing. They rarely require intervention, though a few issues occasionally arise.
Powdery Mildew
In cool, damp conditions, powdery mildew manifests as white, dusty coating on leaves. While unsightly, minor infections typically don’t significantly impact tuber formation since the problem emerges late in the season.
Prevention works better than treatment. Space plants adequately for air circulation. Water at soil level rather than overhead to keep foliage dry. Remove severely affected leaves and compost them away from the garden.
In persistent cases, organic fungicides containing sulfur or potassium bicarbonate provide control, though treatment is rarely necessary for home gardens.
Underground Pests
Voles pose the primary pest threat, finding Jerusalem artichoke tubers irresistible. These rodents work invisibly underground, potentially devastating entire harvests before detection. If vole activity is known in your area, take preventive measures.
Install hardware cloth barriers around planting beds, burying mesh twelve inches deep with six inches extending aboveground. Growing in raised beds lined with hardware cloth provides complete protection.
Maintain weed-free zones around Jerusalem artichoke patches to eliminate vole cover. Some gardeners report success with castor oil-based repellents applied monthly during the growing season.
Wireworms occasionally tunnel into tubers, creating small holes that don’t significantly affect eating quality but reduce storage life. Crop rotation and avoiding planting where lawn recently grew minimizes wireworm pressure.
Disease Management
Sclerotinia rot emerges when Jerusalem artichokes grow in the same location for many consecutive years. This soil-borne fungus causes stem base rot and gradually reduces vigor and yields. White, fluffy fungal growth appears at the soil line on infected plants.
Since Sclerotinia persists in soil for several years, prevention through crop rotation proves essential. Move your Jerusalem artichoke patch to a new location every three to five years.
Immediately remove and destroy infected plants rather than composting. Improving soil drainage reduces disease pressure, as the fungus thrives in wet conditions.
Aboveground Browsing
Deer occasionally browse young shoots in spring, particularly in areas with high deer populations. However, Jerusalem artichokes typically regrow vigorously from their roots.
Physical barriers like temporary fencing or deer netting protect vulnerable young plants. Deer deterrent sprays applied every few weeks can reduce browsing pressure.
Rabbits may nibble tender spring growth but rarely cause serious damage to established plants. The rapid growth rate of Jerusalem artichokes outpaces most browsing damage.
Harvesting Your Crop
When to Harvest
Patience rewards Jerusalem artichoke growers. Tubers continue sizing underground well into autumn, with sweetness improving after first frost as starches convert to sugars.
Wait until foliage yellows and dies back naturally, usually beginning in late October through November, signaling completed growth and maximum energy storage underground.
The extended harvest window—late autumn through winter into early spring before new growth begins in March—sets Jerusalem artichokes apart from most crops. This flexibility lets you harvest as needed rather than processing entire crops at once.

Harvesting Technique
Harvesting resembles digging potatoes but requires extra care due to irregular tuber shapes:
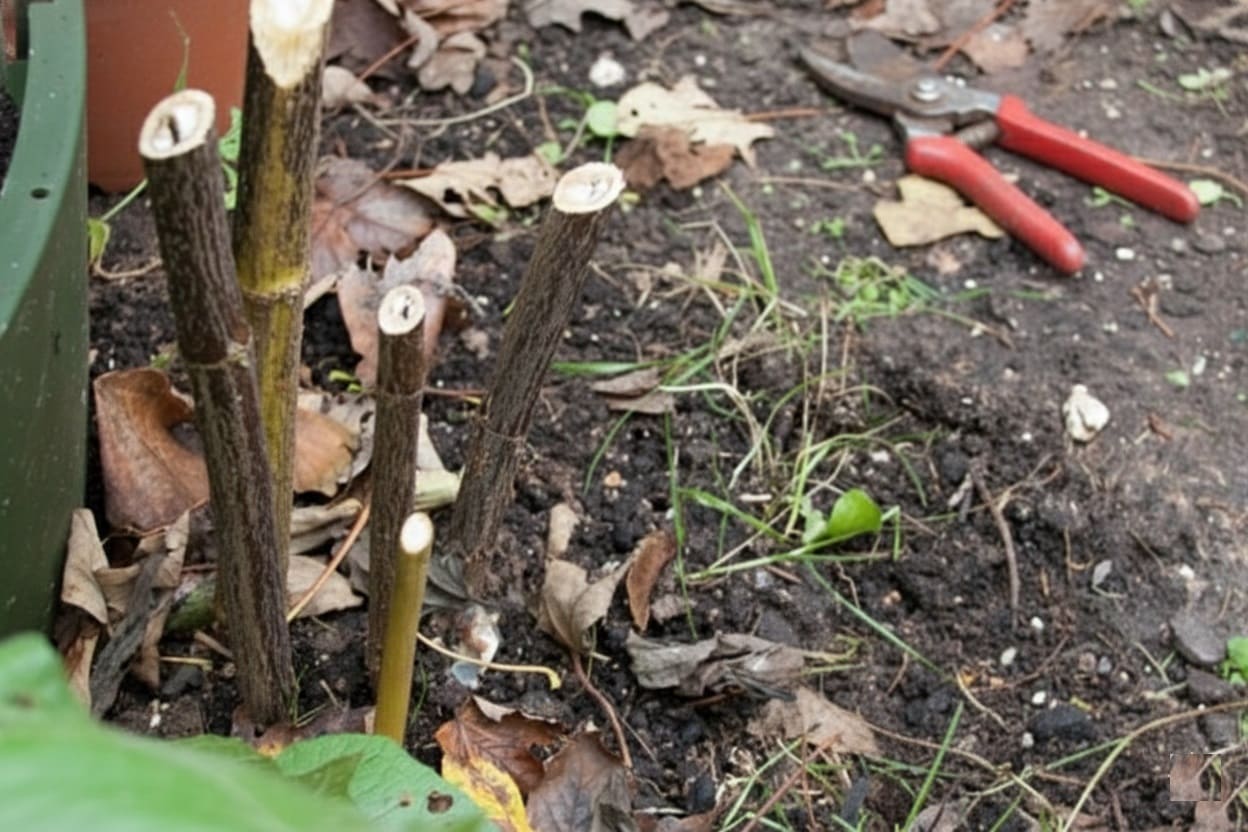
- Cut dead stems to ground level
- Insert your spading fork twelve inches from the stem base
- Lift gently, loosening soil around the entire root zone
- Remove tubers as soil falls away, working carefully to avoid breaking knobby extensions
- Sift through loosened soil with hands to find smaller tubers

Expect substantial yields from mature plants—established patches often produce three to five pounds of tubers per square foot.
First-year yields run about half that as plants establish. The irregular shapes mean tubers interconnect surprisingly, so excavate thoroughly to maximize harvest.
My first harvest was comically inefficient. I dug cautiously, trying not to spear any tubers, and spent twice as long as necessary.
I’ve since learned Jerusalem artichokes are tough—work confidently with your fork. Occasionally nicking one won’t significantly impact your harvest.
Storing Jerusalem Artichokes
Thin skins make Jerusalem artichokes more perishable than potatoes, shaping storage approaches. Understanding options helps maintain quality.
Short-Term Refrigeration
For immediate use, store unwashed tubers in perforated plastic bags in your refrigerator’s crisper drawer. They’ll keep one to two weeks before quality declines.
Wait to wash them until just before use to prevent premature deterioration. Excessive moisture promotes mold growth, so ensure good air circulation.
Root Cellar Storage
Traditional root cellar storage mimics natural growing conditions. Layer tubers in slightly damp sand in wooden crates or plastic containers, ensuring individual tubers don’t touch.
Store in cool, dark spaces where temperatures remain between 32-40°F with high humidity. Check monthly and remove any showing decay to prevent spread. This method maintains quality for two to three months.
Freezing
Freezing extends storage up to a year but changes texture from crisp to soft. Peel and cut tubers into chunks, blanch in boiling water for three minutes, plunge immediately into ice water, drain thoroughly, and package in freezer bags with air pressed out.
Frozen Jerusalem artichokes work well in soups and puréed dishes where texture change is less noticeable.
Natural Ground Storage
Here’s where Jerusalem artichokes truly excel. Simply leave them in the ground all winter—they tolerate freezing temperatures remarkably well and can be harvested whenever needed.
This natural cold storage eliminates preservation concerns entirely while maintaining peak quality.
Mark your patch’s location before winter snow obscures it. In regions with deep frost, apply six to twelve inches of mulch over the bed to ease digging during frozen periods.
A thick layer of straw or leaves prevents ground from freezing solid while allowing you to dig through easily. Complete harvesting before new growth emerges in spring.
👉 Here’s How to Overwinter Dahlia Tubers: A Complete Guide for Beginners
Managing Spread and Preventing Garden Takeover
Jerusalem artichokes’ enthusiasm for spreading is both advantage and challenge. Any tuber fragment left in soil can sprout into new plants the following season.
This regenerative ability ensures productive patches year after year but requires management to prevent garden domination.
Containment Strategies
Thorough annual harvesting provides the primary control method, removing most tubers to limit volunteer plants. Installing underground barriers—heavy plastic sheeting or metal edging buried eighteen inches deep—around beds contains root spread effectively.
Many gardeners successfully grow Jerusalem artichokes in large containers (minimum fifteen gallons) for complete control, though container plants require more frequent watering.
The most practical approach for many gardeners involves designating permanent patches in areas where spread isn’t problematic, such as along property edges, fence lines, or corners where they can naturalize without interfering with other plantings.
Monitor for volunteer shoots appearing outside intended areas and remove them promptly before they establish—this proactive approach prevents spread far more easily than attempting to eradicate established plants.
Complete Removal
Deciding to eliminate Jerusalem artichokes from a location requires persistence. Dig thoroughly, removing all visible tubers down to at least twelve inches.
Monitor the area for new shoots throughout the following season, removing them promptly before they establish and produce new tubers. This vigilance must continue for two to three years to achieve complete eradication, as even tiny tuber fragments can regenerate.
For stubborn patches, repeated cultivation that brings tubers to the surface for exposure and desiccation works gradually.
Some gardeners resort to covering the area with thick black plastic for an entire growing season to smother regrowth, though this renders the space unusable temporarily.
Health Benefits and Nutritional Value
Jerusalem artichokes pack impressive nutritional benefits into modest calorie counts. Their unique composition offers advantages worth understanding.
Inulin: The Star Component
The tubers contain approximately sixteen percent carbohydrates, with half consisting of inulin—a prebiotic fiber our bodies don’t fully digest.
This characteristic provides multiple benefits: supporting digestive health by feeding beneficial gut bacteria, avoiding blood sugar spikes (making Jerusalem artichokes suitable for diabetics), and contributing to feelings of fullness without excess calories.
Research suggests inulin may improve calcium absorption, support immune function, and promote healthy cholesterol levels. These effects stem from inulin’s role in fostering beneficial gut bacteria populations.
Additional Nutritional Highlights
Beyond inulin, Jerusalem artichokes provide about three percent protein, vitamins A, B1, and B2, and essential minerals including potassium and iron. At only thirty calories per 100 grams—less than half that of potatoes—they’re naturally diet-friendly.
Managing Digestive Effects
The inulin that makes Jerusalem artichokes nutritious can cause digestive discomfort for some people, particularly when consumed in large quantities initially. The fermentation of undigested inulin in the intestines produces gas.
Start with small portions—two to three ounces—and increase gradually as your digestive system adapts.
Cooking methods matter: longer cooking times break down more inulin, improving digestibility. Adding acidic ingredients like lemon juice or vinegar during cooking may also help. Most people develop tolerance within a few weeks of regular consumption.
Cooking and Enjoying Jerusalem Artichokes
Jerusalem artichokes’ nutty, slightly sweet flavor enhances numerous dishes. Their versatility matches their adaptability in the garden.
Preparation Basics
Skip peeling—the thin skin is completely edible and contributes fiber and nutrients. Simply scrub tubers under running water with a vegetable brush to remove soil.
For recipes requiring peeled vegetables, parboil tubers for a few minutes to loosen skins, which then slip off easily. The knobby shape makes peeling fresh tubers tedious and wasteful.
Cooking Methods That Shine
Raw preparations showcase Jerusalem artichokes’ crisp texture and refreshing quality. Slice thinly for salads where their juicy sweetness complements mixed greens beautifully, or cut into matchsticks for crunchy slaw.

Roasting brings out natural sweetness through caramelization. Cut into chunks, toss with olive oil and seasonings, and roast at 400°F for thirty to forty minutes until golden and tender. The edges develop irresistible crispy bits while interiors turn creamy.

Soups capitalize on Jerusalem artichokes’ creamy potential. Sauté with onions and garlic, add stock, simmer until soft, then purée for velvety soup without cream. Thyme, tarragon, or nutmeg complement the earthy flavor perfectly.

Mashed Jerusalem artichokes surprise people who expect potato substitutes. Boil until tender, then mash with butter and cream. The result is naturally smoother and sweeter than mashed potatoes, with a more complex flavor profile.

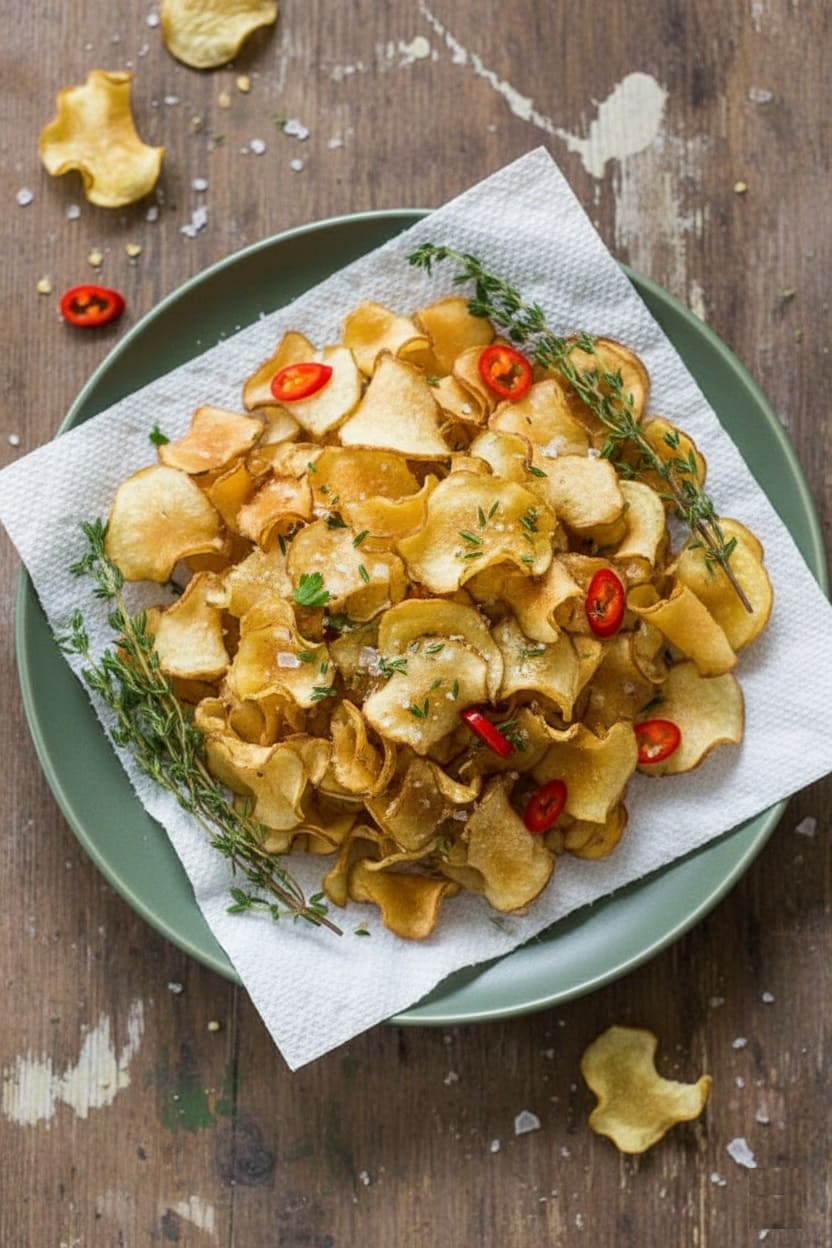
Chips make addictive snacks. Slice very thinly using a mandoline, toss with minimal oil and salt, then bake at 375°F until crisp, turning once. Dehydrating works too, producing shelf-stable chips with concentrated flavor.
Complementary Flavors
Jerusalem artichokes pair beautifully with herbs like thyme, rosemary, parsley, and tarragon. Warm spices including cumin, coriander, curry powder, and nutmeg enhance their earthy notes.
Aromatics—garlic, shallots, leeks, ginger—build complexity. Acidic elements like lemon juice, vinegar, or wine brighten dishes, while butter, cream, and aged cheeses add richness.
My favorite preparation remains embarrassingly simple: roasted Jerusalem artichokes tossed with olive oil, coarse salt, black pepper, and fresh rosemary.
This combination lets their natural sweetness shine while rosemary adds aromatic depth. I could happily eat an entire pan as a meal.
Choosing Varieties
While all Jerusalem artichokes share similar growing requirements, different varieties offer distinct characteristics.
Named varieties vary in flowering vigor, maximum height, stem strength, overall yield, and tuber color. Some produce predominantly brown-skinned tubers, while others lean toward red or purple hues. All have white flesh inside.
Smoother-skinned varieties like ‘Fuseau’ simplify preparation and reduce waste. Compact varieties reaching only six feet rather than ten work better in smaller gardens or windy locations. High-yielding varieties maximize production from limited space.
Unfortunately, variety selection often proves limited. Many garden centers stock tubers simply labeled as Jerusalem artichokes without variety specification.
This generic approach works fine for most growers—the basic unnamed varieties produce reliably. Once established, save your own tubers year after year regardless of variety.
Some gardeners maintain several varieties in different patches, comparing performance and preferences over time.
Troubleshooting Common Issues
Poor Tuber Development
Small or sparse tubers typically result from excessive nitrogen, which pushes energy toward foliage at underground storage’s expense.
Reduce nitrogen-rich fertilizers and avoid fresh manure. Overcrowding also limits tuber size—thin plants to proper spacing or divide congested patches.
Inadequate water during tuber formation (August through October) reduces size. Ensure consistent moisture through autumn. Harvesting too early, before frost sweetens tubers, also yields disappointing results. Wait for foliage to die back naturally.
Weak or Stunted Growth
Stunted plants often indicate poor drainage or compacted soil restricting root development. Improve soil structure with compost and ensure adequate drainage.
Extremely poor, depleted soil benefits from fertilization—apply balanced fertilizer at planting and midsummer.
Excessive shade limits growth and yields. Jerusalem artichokes need at least six hours of direct sun daily for optimal performance. Move plantings to sunnier locations if current sites prove too shady.
Plants Falling Over
Weak stems that flop over signal insufficient staking in windy areas or top-heavy growth from excessive nitrogen. Install sturdy support stakes and reduce nitrogen fertilization. Pruning plants to manageable heights in midsummer also prevents toppling.
No Flowers
Lack of flowering rarely impacts tuber production, as flowers form late in the season after most tuber development completes. However, if flowers are desired for ornamental purposes, ensure plants receive full sun and adequate water.
Some varieties flower more prolifically than others. Northern gardens with short growing seasons may not see flowers some years.
Long-Term Management and Perennial Care
Jerusalem artichokes can remain productive in the same location for twenty years or more with proper management. The key to long-term success is partial harvesting—dig only what you’ll use, leaving a portion in the ground to overwinter and regenerate automatically in spring.
This low-maintenance perennial system eliminates annual replanting. Simply harvest as needed and allow remaining tubers to perpetuate the patch. T
o maintain vigor over many years, apply compost or balanced fertilizer annually in spring, divide and thin overcrowded patches every three to five years, maintain mulch layers, and rotate plantings if disease appears.
For gardeners wanting fresh starts, dig thoroughly in autumn, replant select tubers in spring at a new location, and monitor the original site for volunteers to remove. This approach provides both crop rotation benefits and fresh soil for vigorous growth.
Frequently Asked Questions
- Are Jerusalem artichokes invasive?
They’re aggressive spreaders if unmanaged but not truly invasive. Proper containment, thorough annual harvesting, and prompt removal of unwanted shoots keep them under control.
Consider them enthusiastic rather than invasive—they’ll stay where you want them with reasonable attention.
- Can I grow Jerusalem artichokes in containers?
Absolutely. Use large containers (minimum fifteen gallons) with excellent drainage. Container growing completely controls spread while still producing substantial harvests.
Ensure adequate water during the growing season, as containers dry faster than ground soil. Stake tall growth to prevent toppling.
- Why do Jerusalem artichokes cause digestive issues?
Inulin ferments in the lower digestive tract, producing gas for some people. Start with small portions allowing gut bacteria to adjust. Longer cooking breaks down more inulin, improving digestibility.
Adding acidic ingredients like lemon juice during cooking may help. Most people develop tolerance within a few weeks of regular consumption.
- How do Jerusalem artichokes compare nutritionally to potatoes?
Jerusalem artichokes contain less than half the calories of potatoes while providing more fiber, particularly prebiotic inulin.
They’re lower in total carbohydrates but higher in certain minerals. The main trade-off is digestibility—potatoes are easier on sensitive stomachs initially.
- What’s the difference between Jerusalem artichokes and regular artichokes?
They’re completely unrelated plants. Globe artichokes are Mediterranean thistles grown for edible flower buds. Jerusalem artichokes are North American sunflowers grown for edible tubers. The similar name comes from comparable flavor profiles, not botanical relationship.
- When is the best time to harvest for maximum sweetness?
Wait until after the first hard frost. Cold temperatures trigger starch-to-sugar conversion, dramatically improving flavor.
Tubers harvested in November or December taste noticeably sweeter than those dug in early October. This is why many gardeners consider Jerusalem artichokes a winter crop despite summer growing.
👉 Find out When and How to Harvest Vegetables for Peak Flavor: Timing & Tips for Every Crop
Final Thoughts
Jerusalem artichokes offer a rare combination of productivity, resilience, and versatility that few crops match.
These remarkable tubers deserve serious consideration whether you’re seeking reliable food production, low-maintenance perennials, or simply something different for your garden.
Success boils down to these essentials: plant in full sun with decent drainage, provide consistent water and moderate fertilizer during the growing season, stake tall plants in windy locations, harvest from late autumn through winter into early spring, leave some tubers for next year’s crop, and control spread through thorough harvesting and boundary management.
Start small if you’re uncertain. A few tubers planted in a corner of your garden will quickly demonstrate whether Jerusalem artichokes suit your growing conditions and culinary preferences.
Given their tendency to return year after year with minimal input, there’s little risk in giving them a try.
Ready to get started? Source quality tubers from a nursery, farmer’s market, or fellow gardener. Plant them this spring, and by next autumn, you’ll be harvesting your first crop of these unique, delicious tubers.
Share your experience below, and subscribe for more practical growing guides to help you succeed in the garden all year round.