
Have you ever bitten into something so intensely bitter it made you question your life choices? Welcome to bitter melon—a knobby, peculiar-looking gourd that might just become your garden’s most rewarding crop once you unlock its secrets.
My neighbor Mrs. Chen tended her towering bitter melon vines every summer morning with the reverence of a tea ceremony. “Americans think vegetables must taste like candy,” she’d laugh, plucking the bumpy green fruits. “But bitter is medicine.”
After finally succeeding with my own thriving patch, I understood. This vegetable doesn’t apologize for what it is—and that’s exactly why it’s worth growing.
Whether you’re drawn to bitter melon for its health benefits, cultural significance, or simply love a gardening challenge, this guide covers everything you need.
By the end, you’ll have the confidence to grow abundant vines producing enough fruit to share with your most adventurous friends.
What Exactly Is Bitter Melon?
Bitter melon (Momordica charantia) belongs to the cucurbit family, making it cousin to cucumbers, squash, and watermelons. The name “Momordica” comes from Latin meaning “to bite,” describing the serrated, bite-like edges of its leaves.
Native to tropical Africa and later cultivated throughout Asia, it’s earned many names: bitter gourd, balsam pear, karela (Hindi), goya (Japanese), and ku gua (Mandarin). This worldwide embrace speaks to its value despite—or because of—its challenging flavor.
Chinese vs. Indian: Understanding the Varieties
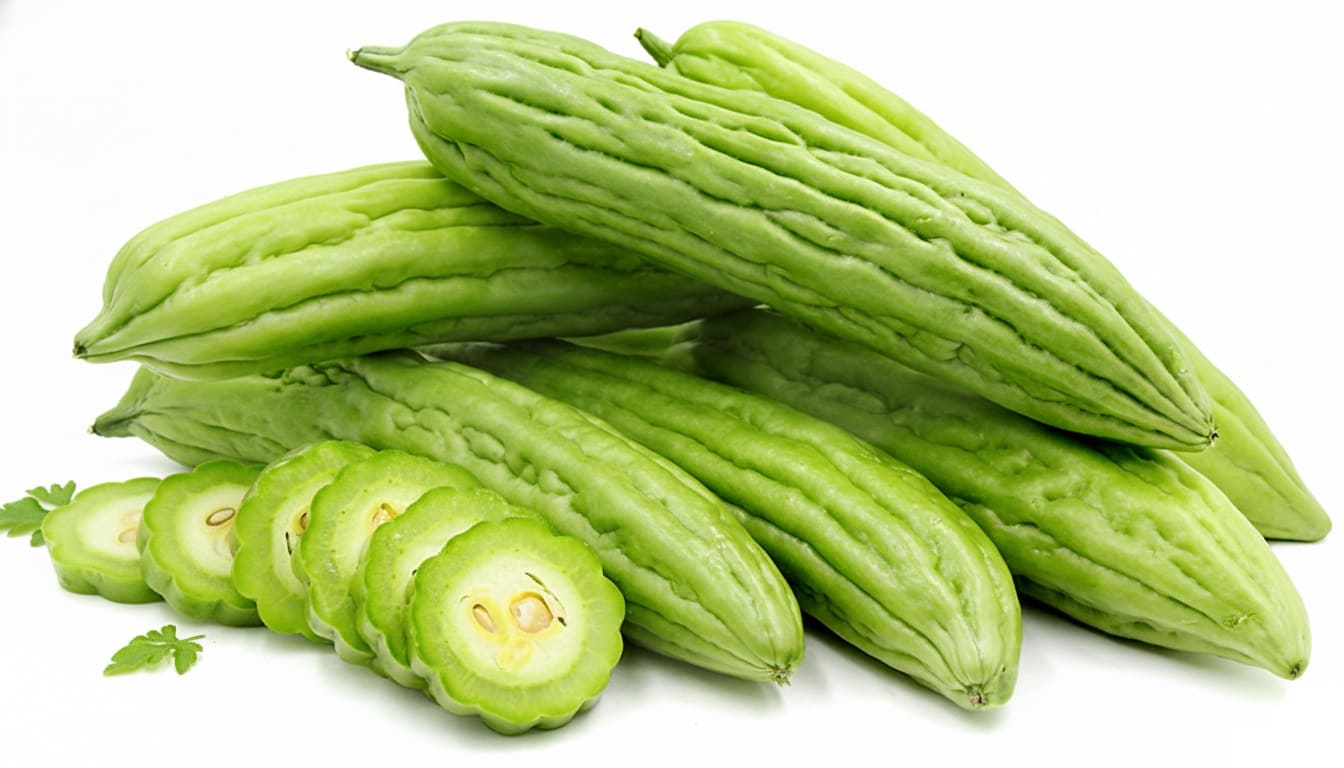
Chinese bitter melon grows 8-12 inches long with light green skin and gentle, rounded bumps. The ridges are smooth, and the taste is milder, making them more approachable for beginners. These are what you’ll typically see in stir-fries with beef or black bean sauce.
Indian bitter melon is smaller and more compact, sporting dramatic pointed ends and aggressive, spiky ridges. The skin ranges from dark green to white in some varieties. While typically more bitter, they have devoted fans who wouldn’t trade them.
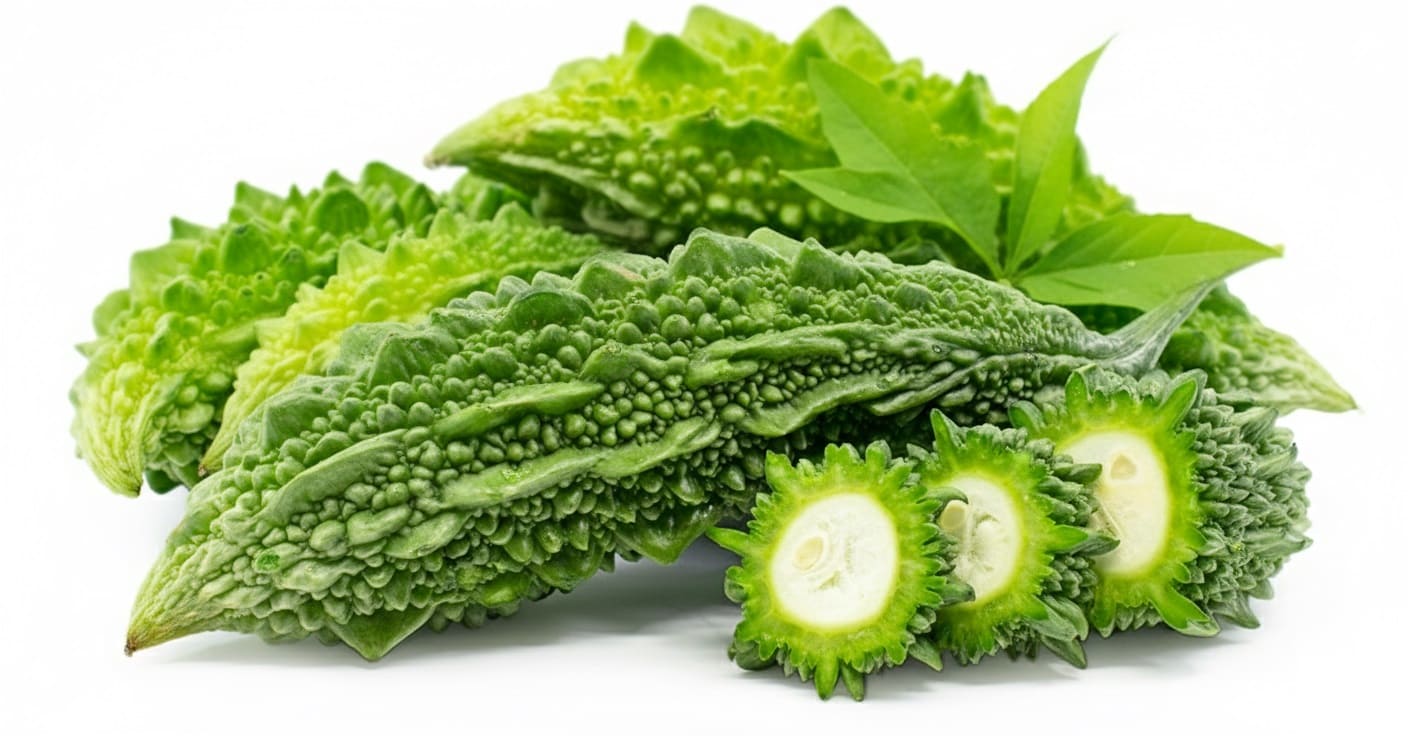
Both share the same nutritional profile and growing requirements, so your choice depends on availability and taste preference. For first-timers, Chinese varieties offer a gentler introduction.
👉 Discover more Types of Melons You Must Try Now: How to Pick, Store & Enjoy Every Type
The Nutritional Powerhouse Behind the Bitterness
The flesh contains momordicine and cucurbitacins—compounds creating that signature bitter punch (think unsweetened dark chocolate meets unripe grapefruit, multiplied). Yet this bitterness is precisely what makes bitter melon valuable.
The nutritional profile is impressive: twice the beta-carotene of broccoli, twice the potassium of bananas, twice the calcium of spinach, plus abundant iron, fiber, phosphorus, and vitamins C, B1, B2, and B3.
Traditional Asian medicine has used it for centuries to support blood sugar management, reduce inflammation, and boost immunity. Modern research continues investigating its potential anti-diabetic, antimicrobial, and anti-cancer properties.
Beyond nutrition, there’s satisfaction in successfully growing something unusual. Bitter melon thrives where many crops struggle, producing abundantly in sweltering summer heat when lettuce has bolted and peas are long gone.
Climate Requirements: Setting Realistic Expectations
Bitter melon is tropical and won’t pretend otherwise. The plant evolved in steamy environments and has specific needs.
Consistently warm temperatures above 80°F (27°C) are ideal for robust fruit production. Growth crawls at 65°F (18°C), and frost kills plants instantly.
- USDA Zones 9-11 offer ideal conditions with vigorous growth and heavy production from late spring through fall.
- Zones 7-8 require strategic planning: starting seeds indoors early, choosing south-facing locations capturing maximum heat, and using season extenders like row covers or hoop houses. Success is absolutely achievable with effort.
- Zones 6 and below need greenhouse growing or serious dedication with very early indoor starts, black plastic mulch for heat absorption, and protected microclimates near south-facing walls. Your harvest window will be shorter but possible.
Humidity matters too—bitter melon flourishes in muggy conditions. Arid climates require diligent watering and possibly misting.
Timing Your Planting by Zone
The key is soil temperature, not just air temperature. Wait until soil reaches 60-65°F (15-18°C) consistently.
- Zones 9-11: Direct sow seeds outdoors from April onwards; transplant seedlings by early May
- Zones 7-8: Start seeds indoors in late March to early April; transplant in late May to early June
- Zones 5-6: Start seeds indoors by mid-March; transplant only when nighttime temps stay above 60°F, typically early to mid-June
Count backward from your last expected frost date and start seeds indoors 4-6 weeks before that date. This gives seedlings time to establish while weather warms.
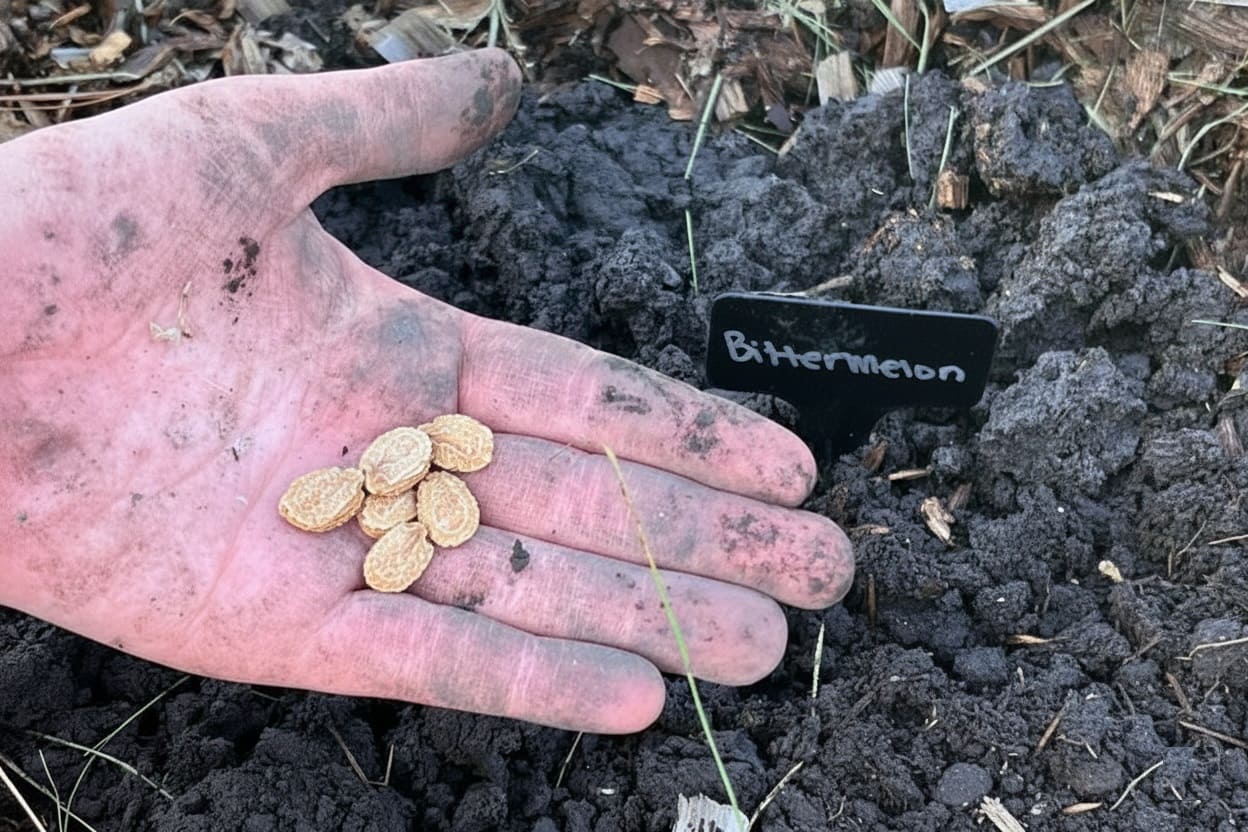
Mastering Seed Germination: The Make-or-Break Stage
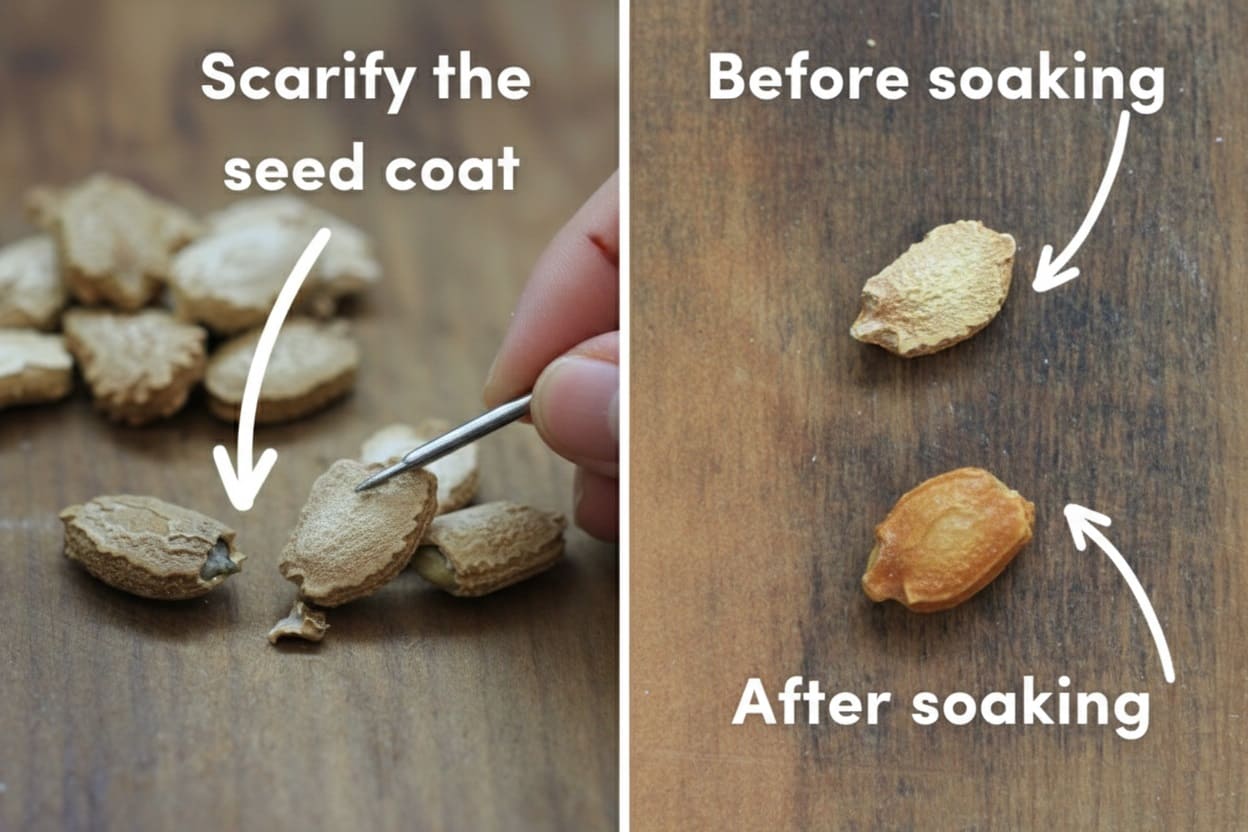
Bitter melon seeds wear armor-hard coats that can take 3-4 weeks to germinate naturally—if they sprout at all. With proper treatment, you can slash this to 7-10 days and boost success rates dramatically.
The Three-Step Pre-Treatment
- Step 1: Scarification
Use nail clippers to carefully snip a small piece from one edge of the seed coat, removing only the outer layer without damaging the white inner seed.
Alternatively, use fine sandpaper or a nail file to gently wear away a section. Be patient and gentle—you’re creating an entry point for water, not demolishing the seed.
- Step 2: The Soak
Place scarified seeds in warm (not boiling) water for 24-48 hours. Fresh seeds may show swelling after 24 hours; older seeds benefit from 48 hours. Change water once if it becomes murky.
- Step 3: The Paper Towel Method
After soaking, lay seeds on a damp paper towel, roll loosely, and place in a sealed plastic bag. Set this on a heat mat or atop your refrigerator (consistently warm areas).
Check daily, keeping the towel moist but not soggy. Within 7-14 days, white root tips should emerge.
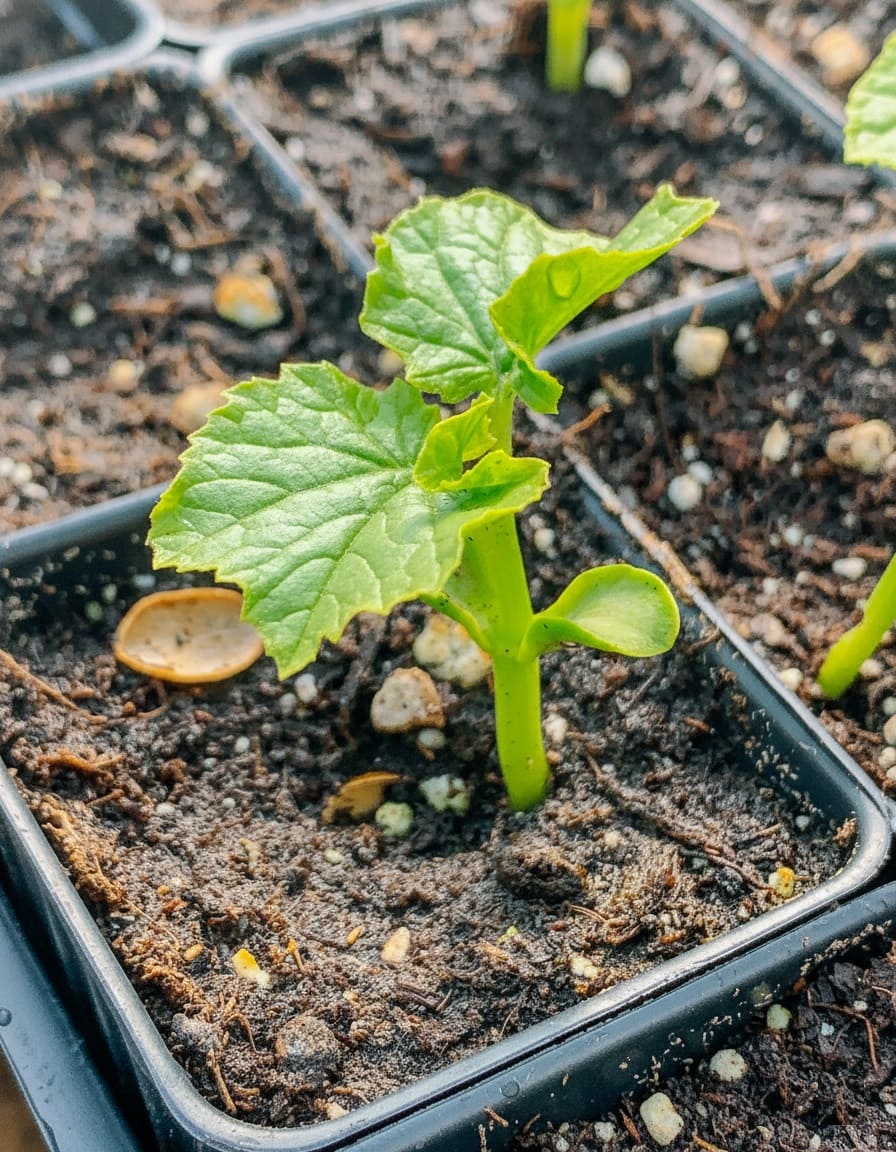
Indoor Starting Setup
Use individual 3-4 inch peat pots—bitter melon hates root disturbance during transplanting. Plant pre-treated seeds 1/2 to 3/4 inch deep, two per pot as insurance. Cover with a humidity dome or plastic wrap.
A seedling heat mat isn’t optional—it’s essential. Without bottom heat maintaining 75-85°F (24-29°C), germination rates plummet. Place trays under grow lights or in your sunniest window, as seedlings become leggy quickly without strong light.
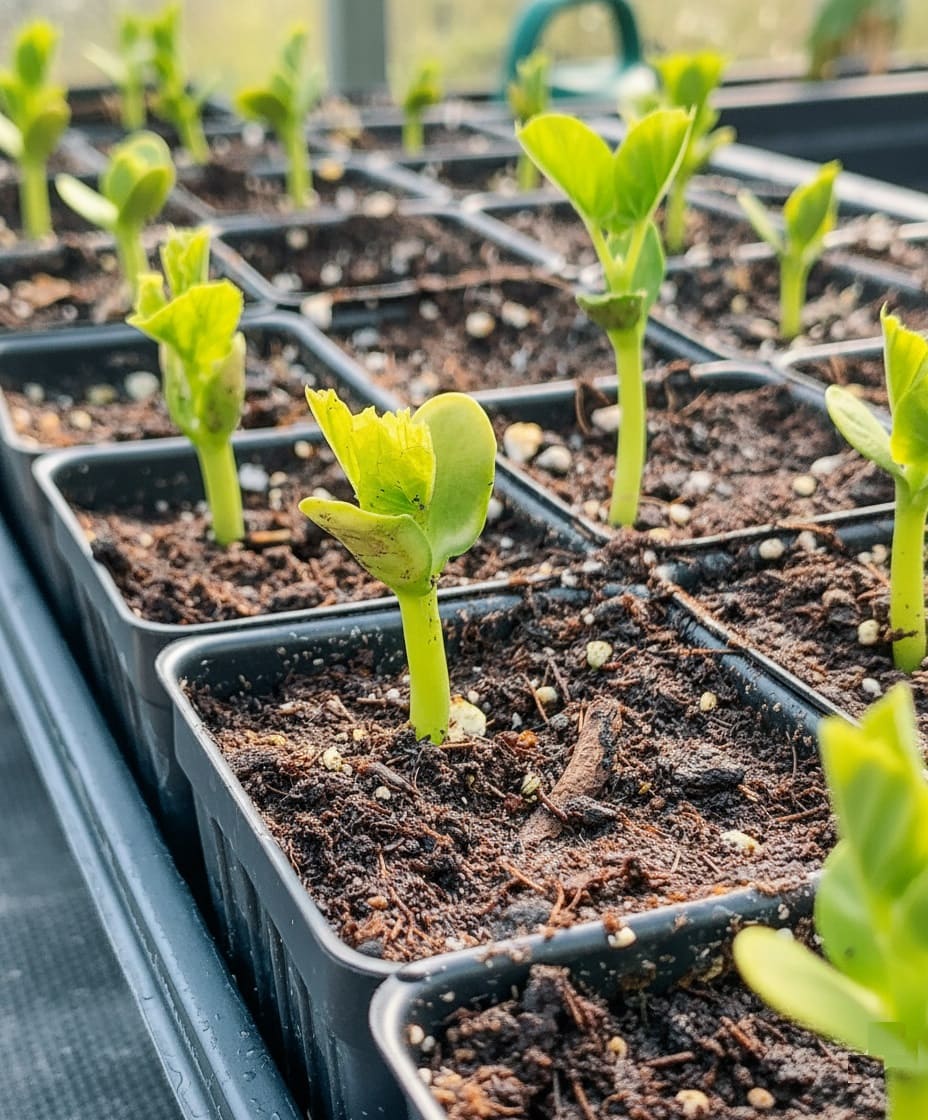
Once seedlings emerge, immediately remove the humidity cover and provide 12-14 hours of bright light daily. When the first true leaves develop, thin to one plant per pot by snipping the weaker seedling at soil level.
Hardening Off: Don’t Rush This Step
About 7-10 days before transplanting, begin hardening off. Start by placing seedlings outside in shade for 1-2 hours, then bring them inside. Gradually increase outdoor time and sun exposure over the week.
Watch weather forecasts obsessively—even mild frost destroys seedlings. Nighttime temperatures should stay consistently above 60°F (15°C) before transplanting.
Site Selection and Soil Preparation
Scout your garden for the sunniest spot possible—bitter melon demands 6-8 hours of direct sunlight minimum, with more being better. In desert climates, some afternoon shade is acceptable, but most regions need maximum sun exposure.
Consider heat accumulation beyond direct sunlight. South-facing locations near walls or fences benefit from reflected heat, potentially extending your season by a week or two on both ends—crucial in marginal climates.
Building Fertile, Well-Drained Soil
Bitter melon tolerates various soil types but performs best in fertile, well-drained soil with pH 5.5-6.7. Heavy clay soils retain too much moisture and cause root rot. Sandy soils drain too quickly unless heavily amended.
Work in a generous 2-3 inch layer of well-aged compost or composted manure about 8-12 inches deep at least two weeks before planting. This organic matter improves drainage in clay, increases water retention in sand, and provides essential nutrients.
For containers, use high-quality potting mix (not garden soil) in containers at least 5 gallons (12-16 inches deep), though bigger is always better. Ensure excellent drainage holes.
Installing Support Structures First
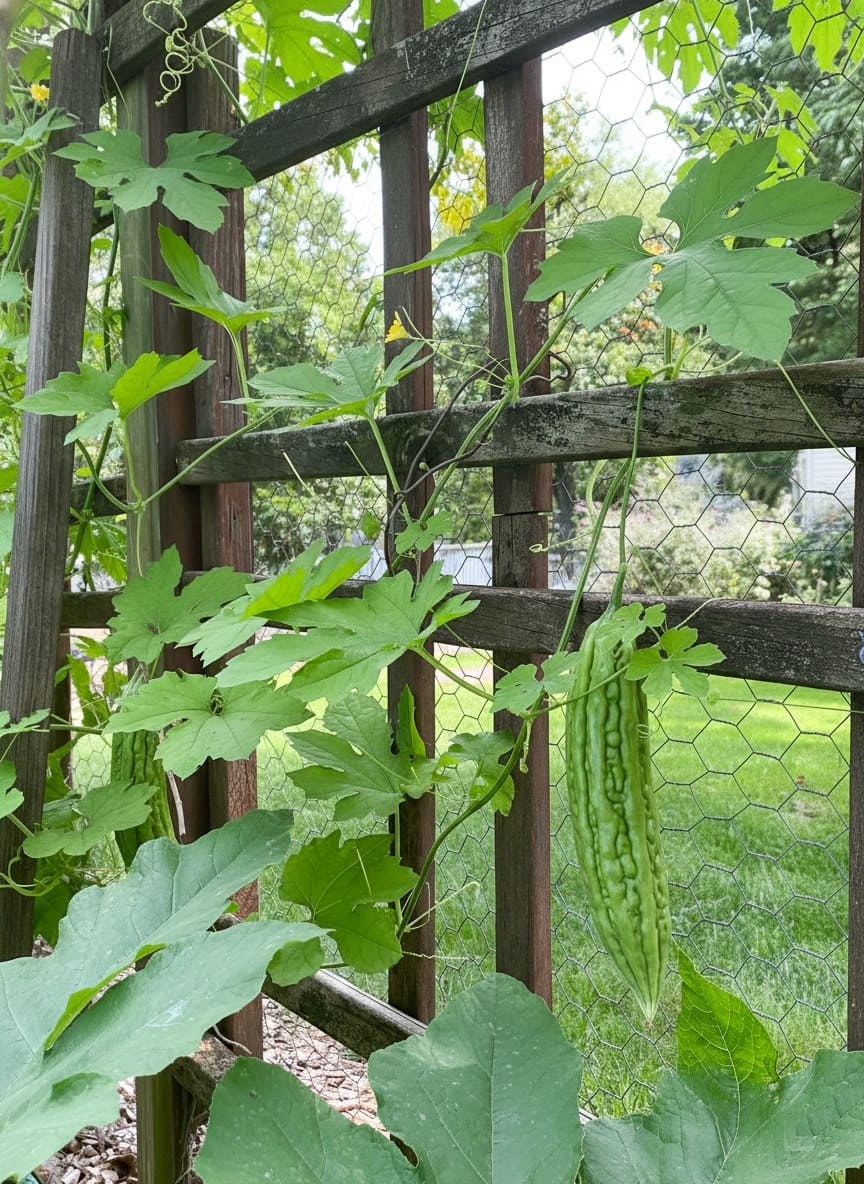
Install trellising before or immediately after planting to avoid damaging roots later. These vines reach 13-16 feet and become heavy with fruit.
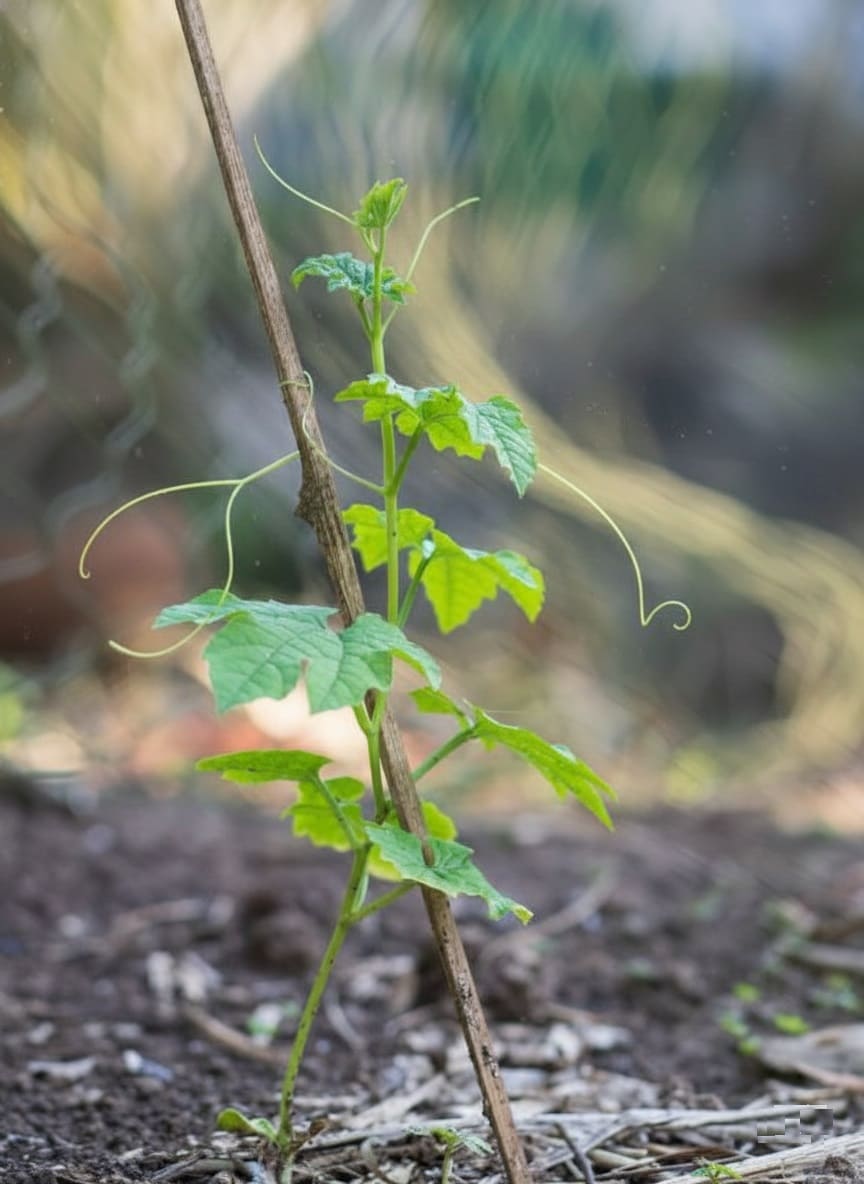
A 6-8 foot tall structure works well. Options include cattle panel arches, A-frame trellises, chain-link fencing, or string/netting systems between sturdy posts.
Whatever you choose, make it robust. Lightweight stakes and flimsy netting collapse under summer storms or simply from vine mass. Use T-posts driven 18 inches deep or equivalent sturdy supports.
👉 Discover 25+ Creative Pole Bean Support Ideas That Actually Work for Your Garden
Planting and Initial Care
Transplanting Seedlings
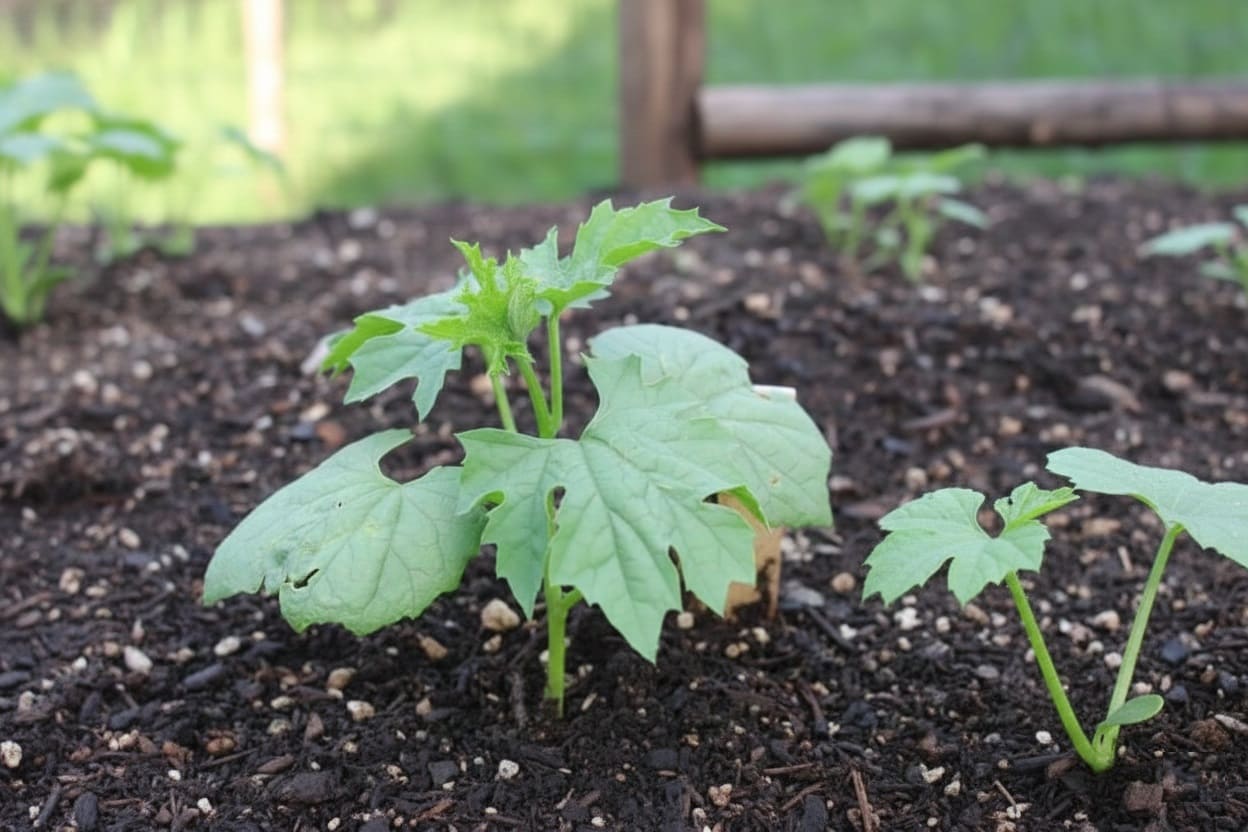
Wait until soil temperatures reach at least 60-65°F and all frost danger has passed. Space transplants 18-24 inches apart—this seems excessive initially but vines become massive.
Dig holes slightly larger than peat pots, place entire pot in the ground at the same depth (don’t bury deeper), and backfill. The peat pot decomposes naturally. Water thoroughly immediately after planting.
Direct Sowing (Zones 9-11 Only)
In hot climates with long seasons, sow pre-treated seeds directly after soil warms. Plant 3-4 seeds per location, 1/2 inch deep, and thin to the strongest seedling once they have 4-6 true leaves.
This simplifies things but delays harvest several weeks compared to transplanting.
Ongoing Care for Thriving Vines
Watering Strategy
Maintain consistent moisture without waterlogging. Check by inserting your finger 2-3 inches into soil—if dry at that depth, it’s time to water. During active growth and fruiting, aim for deep watering 2-3 times weekly rather than shallow daily watering.
Water at the base to minimize fungal disease risk. Drip irrigation or soaker hoses work beautifully, delivering moisture directly to roots while keeping foliage dry. Container plants may need daily watering during peak summer heat.
- Overwatering signs: Yellowing leaves, wilting despite moist soil, mushy stems, or foul odor from soil.
- Underwatering signs: Crispy leaf edges, drooping that improves after watering, slow growth, or flower/fruit drop.
Fertilization Schedule
If you prepared soil well with compost, plants have a solid nutritional foundation. Avoid heavy nitrogen early, which promotes leaves over fruit.
Once flowering begins (4-6 weeks after transplanting), start supplemental feeding with balanced organic fertilizer (10-10-10) or vegetable-specific formula every 2-3 weeks.
Liquid fish emulsion or compost tea make excellent organic options. Side-dress with compost midseason for a nutritional boost.
👉 Here’s How to Add Nitrogen to Soil: 18 Quick Fixes + Long-Term Solutions
Pruning for Maximum Production
Strategic pruning generally increases yield and fruit quality by directing energy toward fruiting rather than endless leaf growth:
- Remove all side shoots from the main vine until it reaches the trellis top
- Pinch off the growing tip once the main vine extends beyond the trellis
- Allow 4-6 strong lateral branches to develop and produce fruit
- Remove weak or overcrowded laterals
This improves air circulation, reducing disease pressure. If your plant produces few fruits despite good conditions, try pruning back excessive foliage—sometimes vines get so focused on leaves they forget their fruiting purpose.
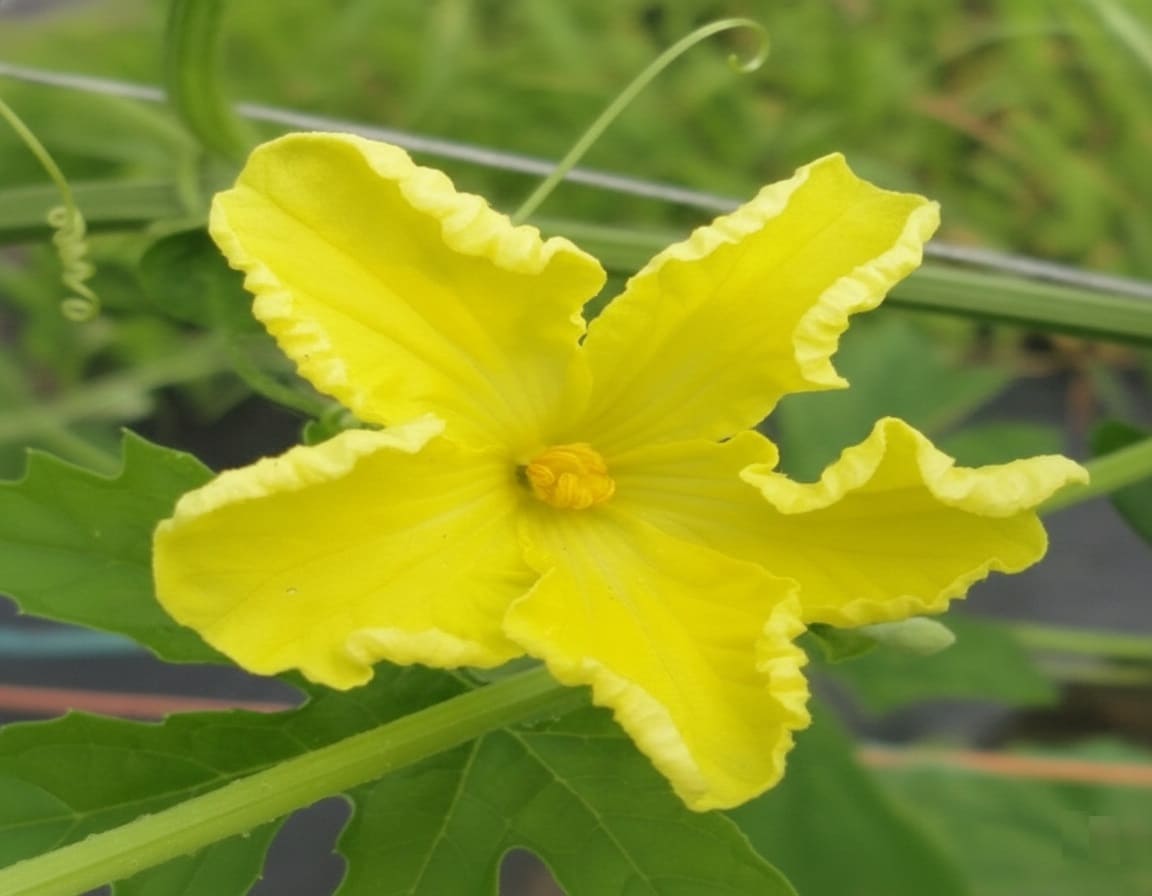
Understanding Pollination
Around 4-6 weeks after transplanting, flowering begins. Male flowers appear first on thin stems with pollen-bearing centers, blooming for about a day before falling off (completely normal).
Female flowers follow 5-7 days later with miniature fruit-like swellings at their base. Only pollinated female flowers develop into full-sized fruit. Bees usually handle pollination automatically.
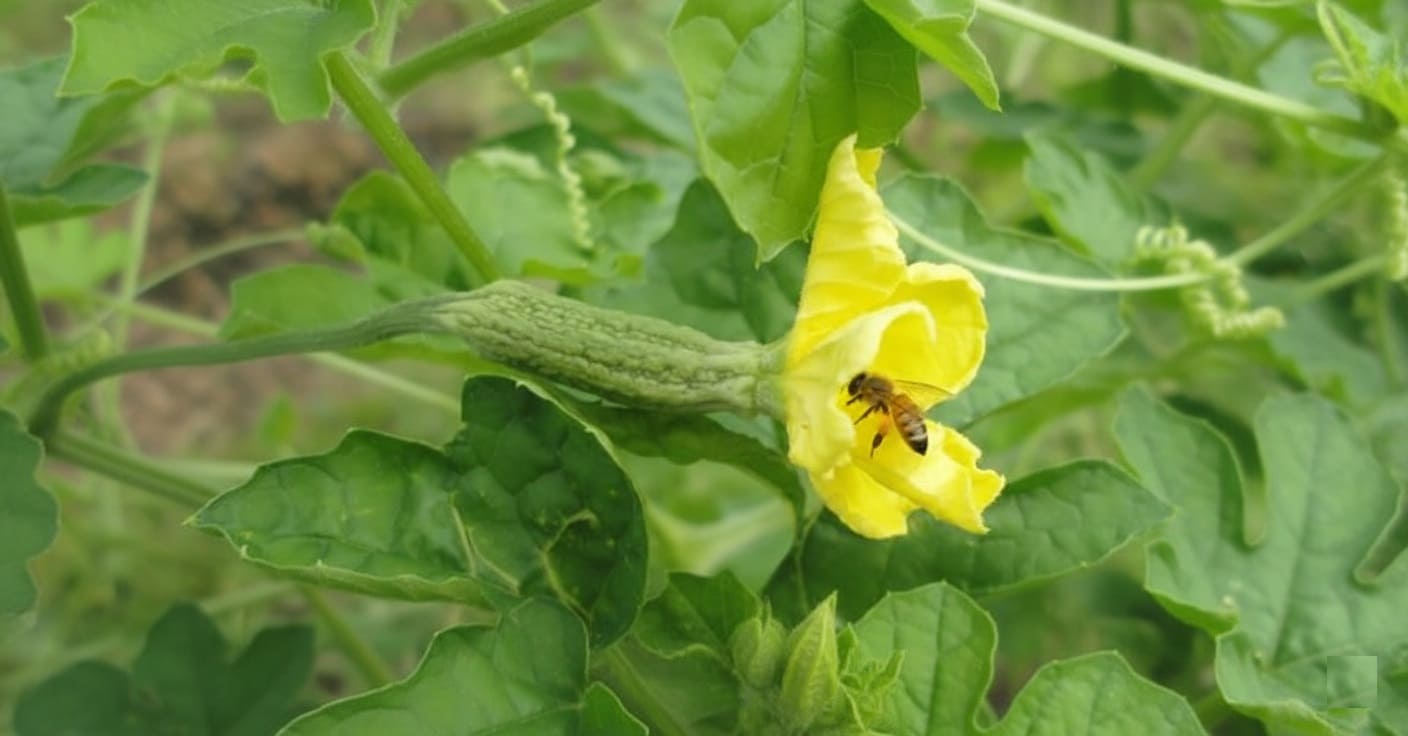
If female flowers fall without fruit development, hand-pollinate in the morning: pick a male flower, remove petals exposing the pollen-covered center, and gently brush against the stigma in female flowers. One male can pollinate 2-3 females.
Managing Pests and Diseases
Bitter melon’s resistance to pests and diseases far surpasses other cucurbits. Those bitter compounds repelling our taste buds also deter insects. Deer, rabbits, squirrels, and groundhogs typically avoid it entirely.
- Cucumber beetles are the main concern, potentially carrying bacterial wilt. Monitor young plants and hand-pick beetles. Severe infestations may warrant organic controls like neem oil or spinosad applied at dusk.
- Aphids occasionally cluster on new growth. A strong hose spray usually dislodges them; persistent problems respond to insecticidal soap.
- Fruit flies can lay eggs in maturing melons. Protect developing fruit by slipping paper bags over individual melons, secured with rubber bands.
- For fungal diseases (powdery mildew or downy mildew appearing in humid conditions), ensure good spacing, prune excess foliage for airflow, and water at soil level. Remove affected leaves promptly. Trellised plants suffer far fewer disease problems than ground-sprawling vines.
Harvesting Your Bounty
Fruit production begins 55-75 days after transplanting. Harvest when fruits are:
- Firm and shiny with no soft spots
- Predominantly green with only minor yellow streaking
- 4-8 inches long (variety-dependent)
- Solid when squeezed gently, not spongy
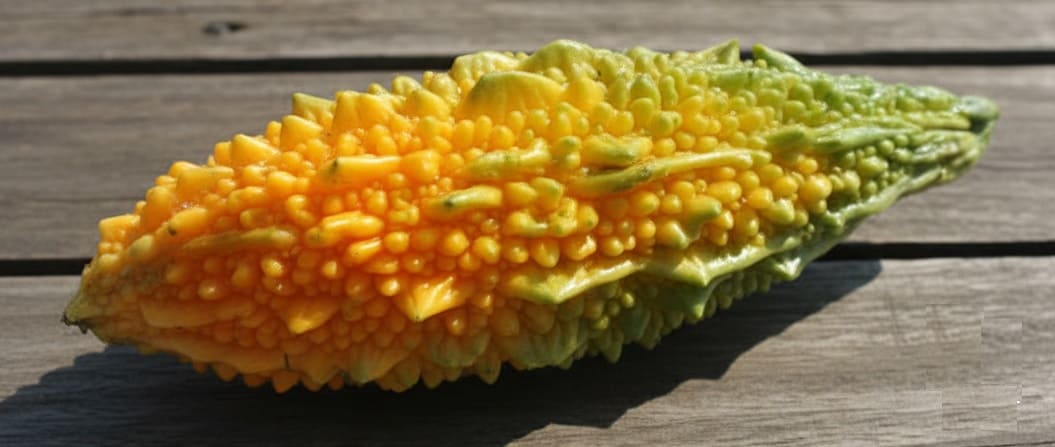
Harvest before full ripeness—as fruits turn yellow-orange, flesh becomes mushy and nearly inedibly bitter. Check vines every 2-3 days once fruiting begins; perfect green fruit today might be overripe three days later.
Cut fruit from vines with scissors, leaving a small stem attached. Frequent harvesting encourages continued production—leaving fruit to fully ripen signals the plant its mission is accomplished, slowing new fruit set.
- Realistic Yield Expectations
A healthy plant typically produces 10-15 fruits over the season, though exceptional plants in ideal conditions might yield 20-30.
First-time growers should expect the lower end while learning. A 10-foot row with 4-5 plants easily provides enough for regular family meals plus sharing.
Storage, Preservation, and Use
Short-Term Storage
Use within 3-5 days for best quality. Store unwashed fruit in perforated plastic bags in the refrigerator crisper. Handle gently—tender skin bruises easily, dramatically shortening storage life.
Longer-Term Preservation
- Freezing: Slice bitter melon, remove seeds and pith, blanch for 2-3 minutes, plunge into ice water, drain well, and freeze in airtight containers for up to 6 months. Use directly from frozen in soups or stir-fries.
- Pickling: The bitter flavor pairs beautifully with sweet-sour pickling solutions. Slice thinly, salt to draw out moisture, rinse, then pickle in a boiled mixture of equal parts vinegar and sugar. Refrigerate for up to a month.
- Drying: Thinly slice, blanch briefly, and dehydrate until crisp. Rehydrate in soups or grind into powder for adding to smoothies or teas.
Preparation and Cooking
Cut lengthwise, scoop out seeds and white pith (especially bitter) with a spoon, then slice as needed. The skin is edible and nutritious—don’t peel.

To reduce bitterness for newcomers: rub slices with salt, let sit 20-30 minutes, rinse thoroughly and squeeze gently; or blanch in boiling water 2-3 minutes, then shock in ice water.
👉 Here’s How to Get Rid of Bitter Taste in Cucumbers With 4 Simple Techniques
Pair with bold flavors—garlic, fermented black beans, chili peppers, rich meats, or coconut milk.
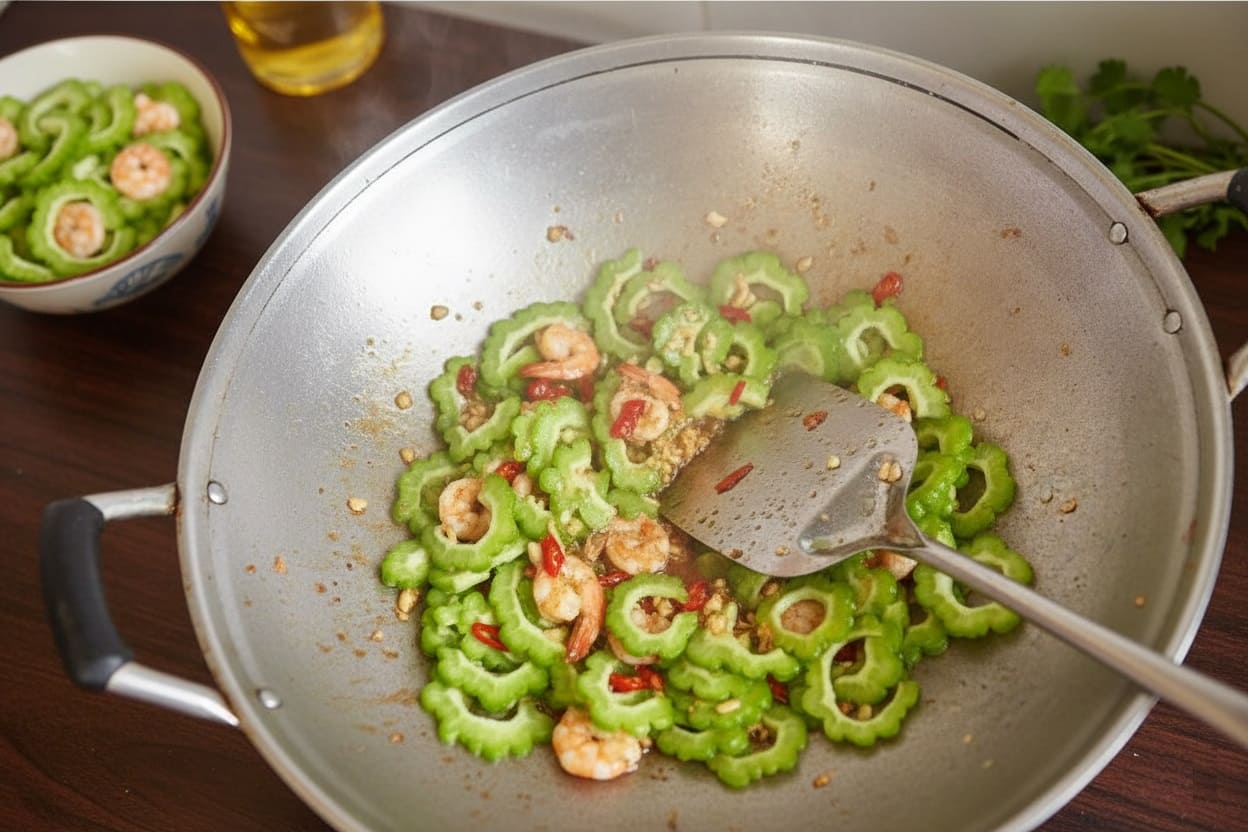
Popular preparations include stir-frying with beef and black bean sauce, scrambling with eggs, stuffing with seasoned pork or shrimp and braising, adding to soups, or pickling.
Troubleshooting Common Problems
- All flowers, no fruit: Be patient—males appear first. If you see both male and female flowers without fruit development, hand-pollinate.
- Vine growing vigorously but few fruits: Prune back excess foliage and switch to lower-nitrogen, higher-phosphorus fertilizer.
- Slow germination: Ensure bottom heat of 75-85°F. Older seeds germinate slower—use fresh seed when possible.
- Yellowing leaves: Could indicate overwatering, nutrient deficiency, or disease. Check soil moisture first, then consider fertilizing if soil is appropriately moist.
- Fruits rotting before maturity: Likely contact with moist soil. Ensure trellising keeps fruit elevated and improve drainage if needed.
- Stunted growth after transplanting: Normal transplant shock lasting a few days. Ensure consistent moisture and protection from extreme heat/wind during establishment.
End-of-Season Considerations
As temperatures drop below 65°F in fall, growth slows and eventually stops. Frost kills vines instantly. Before first frost, harvest all remaining green fruits. You can also let 1-2 fruits fully ripen for seed saving if desired.
After frost kills vines, cut them at ground level. If grown on string or biodegradable netting, let vines dry completely, then burn or compost the entire mass. For permanent structures, remove dead vines and dispose of them to prevent disease carryover.
Rotate planting locations yearly—don’t grow cucurbits in the same spot year after year to minimize disease buildup.
Your Bitter Melon Journey
Growing bitter melon requires upfront effort in germination and understanding its tropical nature, but rewards you with abundant, nutritious harvests in peak summer when many crops struggle.
Start with 2-3 plants to gauge your family’s enthusiasm. As your confidence and palate adapt, you might expand plantings each year.
The beauty of bitter melon lies in its authenticity—it refuses to be something it’s not. In a world of increasingly bland produce, bitter melon stands defiant, demanding we expand our flavor vocabulary and appreciate complexity.
Ready to start? Share your experiences or questions in the comments below!