
A few summers ago, I stood in my garden staring at what should have been a bountiful pepper harvest. Instead, I found myself looking at scraggly plants with a handful of bitter green peppers that barely resembled the colorful, sweet bells I’d dreamed of.
Sound familiar? That disappointing season taught me everything I’m about to share with you – the real secrets to growing the kind of bell peppers that make your neighbors peek over the fence with envy.
Growing bell peppers successfully isn’t just about sticking seeds in the ground and hoping for the best. These sun-loving beauties have specific needs, and when you meet them, they’ll reward you with an abundance of crisp, sweet peppers in gorgeous shades of red, yellow, orange, and purple.
By the end of this guide, you’ll have everything you need to grow your best bell pepper harvest yet.
The Bell Pepper Truth Nobody Tells You
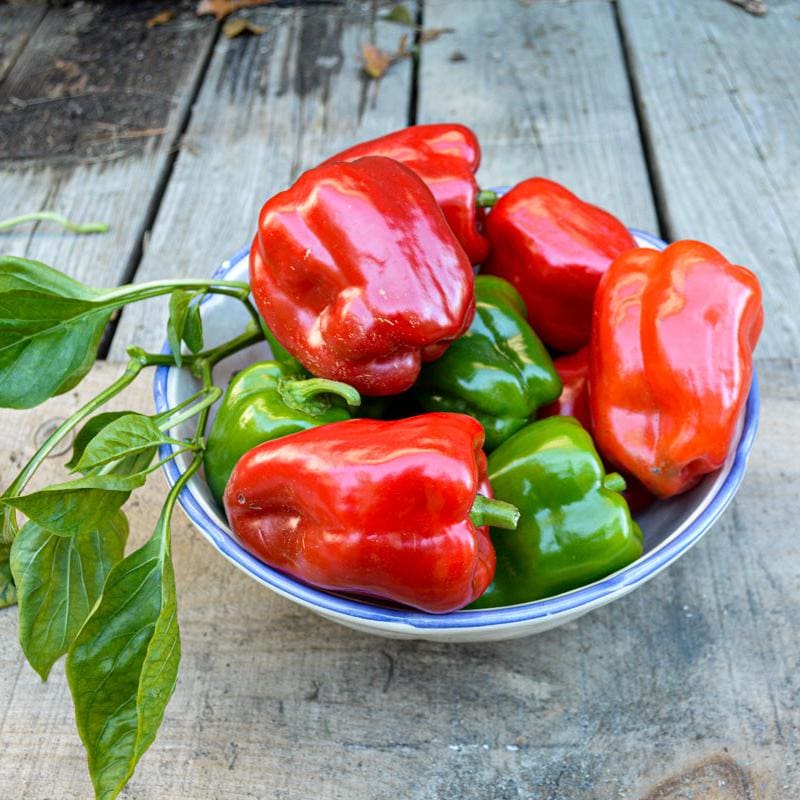
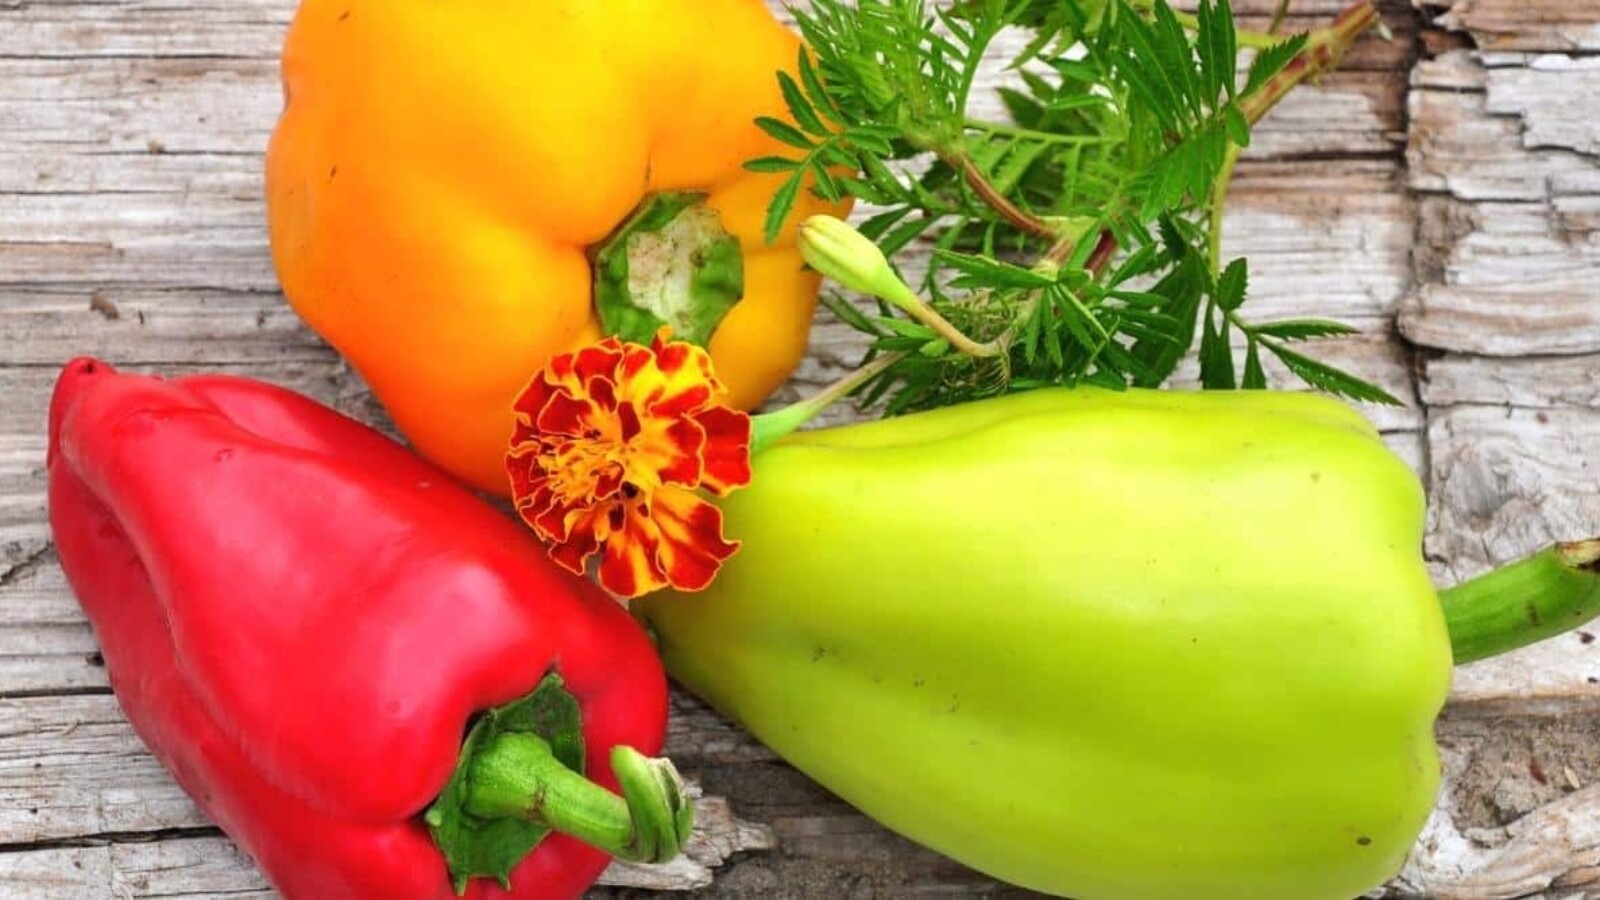
Here’s something that might surprise you: those green bell peppers at the grocery store aren’t actually a different variety – they’re just unripe peppers! Most bell peppers start green and mature into their true colors of red, yellow, orange, or purple.
And here’s the kicker – the ripe, colored peppers are significantly sweeter, more nutritious, and infinitely more flavorful than their green counterparts.
This revelation changes everything about how you approach growing bell peppers. While you can harvest them green for cooking, waiting for full ripeness transforms your peppers from bland and sometimes bitter vegetables into sweet, crunchy treats you’ll want to eat straight from the garden.
The trade-off? Patience. Colored peppers take an additional 2-3 weeks to ripen, and leaving them on the plant longer means fewer total peppers. But trust me – the flavor difference is worth it.
Choosing Your Pepper Varieties and Planning Your Timeline
For Beginners, Start Here
- California Wonder remains the gold standard – a reliable heirloom that produces large, blocky peppers perfect for stuffing.
- Bell Boy offers disease resistance that’s especially valuable for new gardeners, while Ace matures early, making it ideal for shorter growing seasons.
For Maximum Flavor
- Carmen sweet Italian peppers produce abundantly and ripen to a gorgeous red.
- Jimmy Nardello, despite looking like a hot pepper, delivers incredible sweetness.
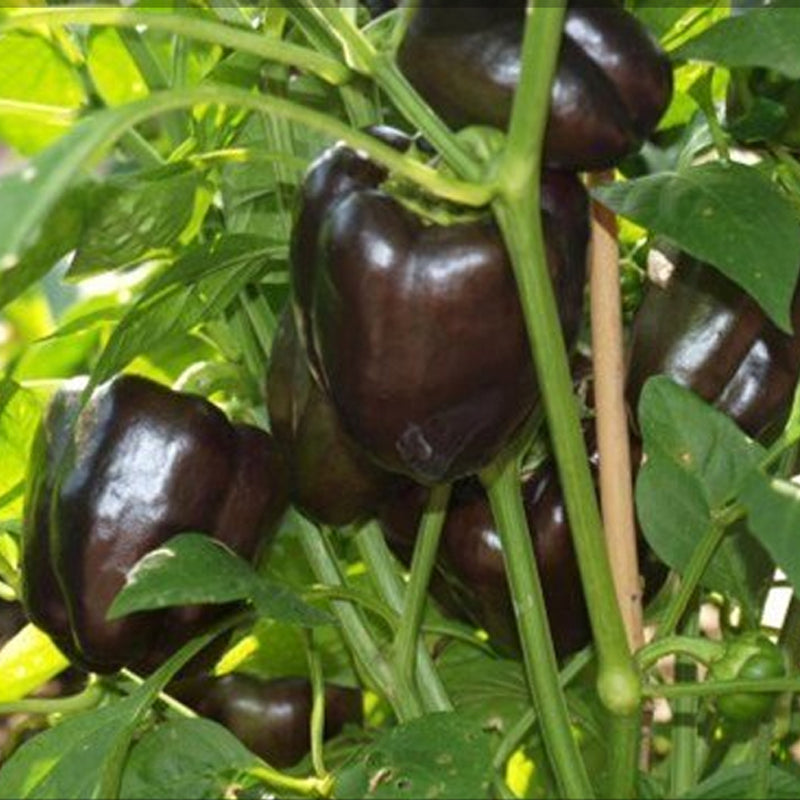
- For something unique, try Chocolate Beauty with its distinctive brown color and exceptional flavor.
For Small Spaces
- Mini Belle produces compact plants perfect for containers, while the Lunchbox series offers snack-sized peppers in multiple colors that are perfect for children and container gardens.
Understanding your timeline is crucial since bell peppers need 75-90 days from transplant to harvest. Start seeds indoors 10-12 weeks before your last expected frost, transplant 2-3 weeks after that date, and plan for harvest from mid-summer through first frost.
Different varieties mature at different rates – early varieties like Ace can be ready in 60 days, while specialty varieties may need 90+ days.
👉 Discover Why Mad Hatter Peppers Are a Must-Grow for Every Gardener
Starting Strong: Mastering the Indoor Start
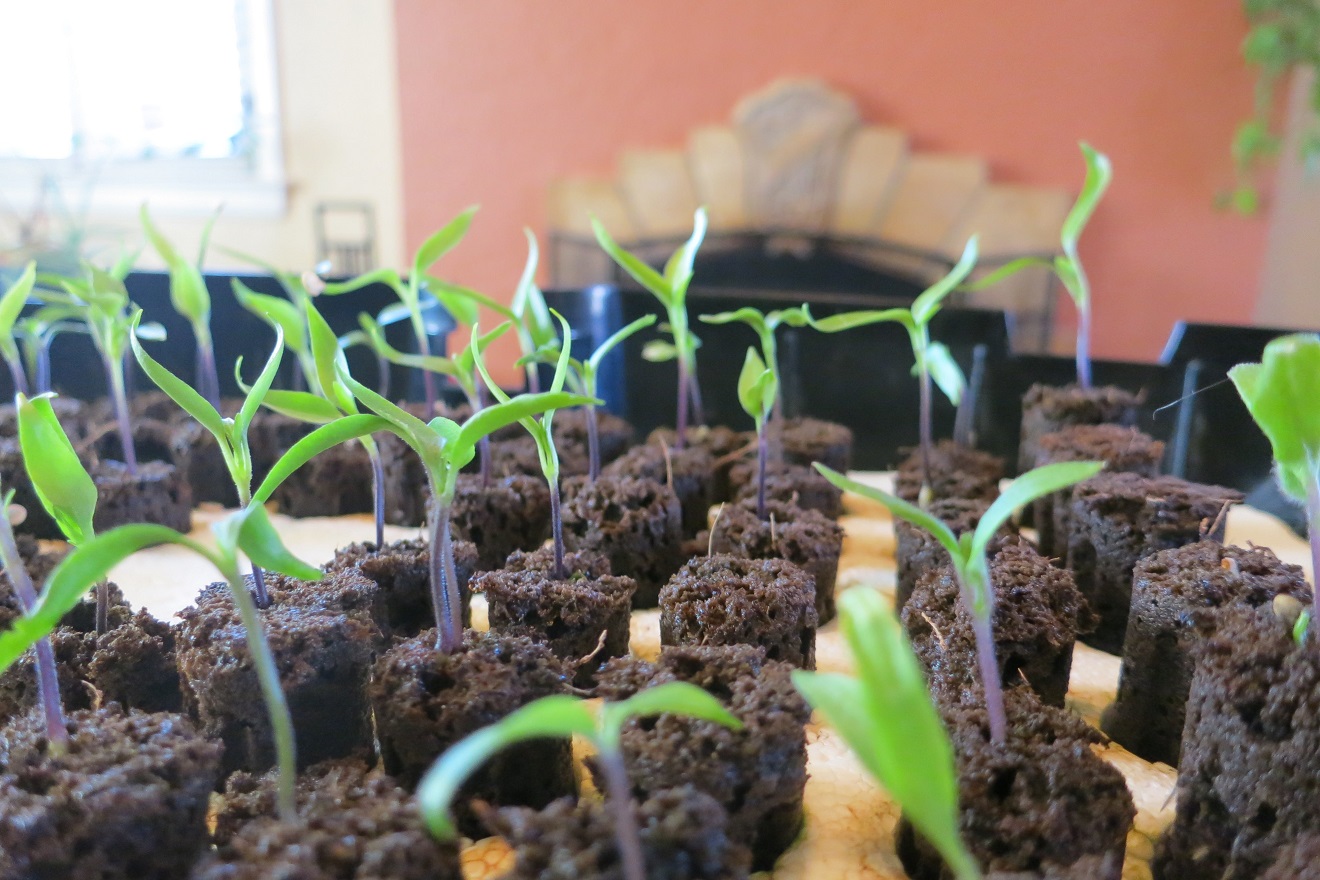
Starting bell peppers from seed indoors isn’t just recommended – it’s essential for success in most climates. These warm-weather lovers need every advantage you can give them, and the controlled environment indoors provides the consistent warmth they crave.
The magic number for pepper seed germination is 80-85°F soil temperature. At these temperatures, seeds typically germinate in 7-14 days. Drop below 70°F, and germination slows dramatically or fails entirely. This is where a heating mat becomes invaluable – it’s one of the best investments you can make for pepper growing success.
Sow seeds ¼ inch deep in quality seed-starting mix, keeping soil consistently moist but never waterlogged. Once seedlings emerge, they need 14-16 hours of bright light daily. A south-facing window works, but grow lights give more consistent results.
The hardening off process deserves special attention because pepper seedlings are particularly sensitive to environmental changes. Start the process 10-14 days before transplanting by placing plants outside for just an hour on a calm, mild day.
Gradually increase outdoor time while protecting them from wind and direct sun initially. By transplant day, they should be outside full-time but still protected from extreme conditions.
Creating the Perfect Growing Environment
Soil: Building the Foundation
Bell peppers are surprisingly particular about their soil conditions. They thrive in well-draining soil with a pH between 6.0-6.8 – slightly acidic to neutral. This pH range ensures nutrients remain available to the plants. If your soil pH is off, even the best fertilizer won’t help much.
Test your soil pH using an inexpensive testing kit. If it’s too acidic (below 6.0), add lime several weeks before planting. If it’s too alkaline (above 7.0), sulfur or organic matter like compost will help lower it gradually.
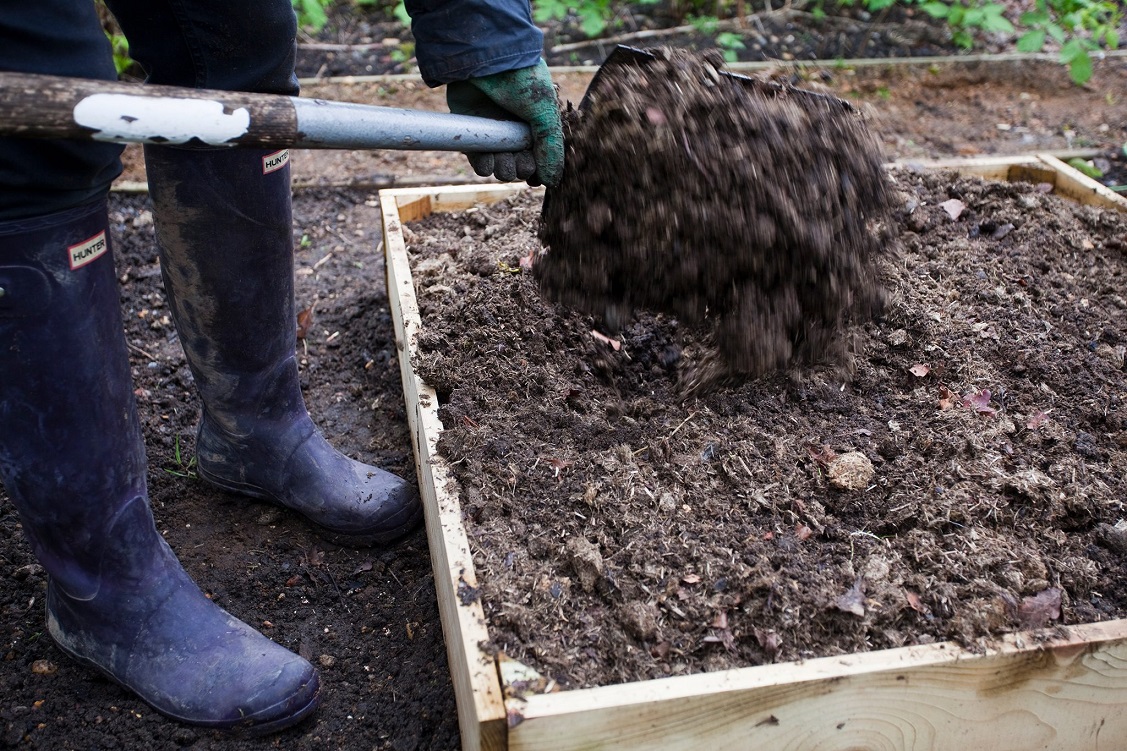
Work 2-4 inches of compost or aged manure into your planting area. This organic matter improves drainage in clay soils and increases water retention in sandy soils while providing slow-release nutrients. Good drainage is non-negotiable – peppers in waterlogged soil develop root rot and other problems quickly.
Location Strategy and Crop Rotation
Choose your sunniest garden spot for peppers – they need 6-8 hours of direct sunlight daily, with more being better. But here’s a critical point many gardeners overlook: never plant peppers where you’ve grown other nightshade family members (tomatoes, potatoes, eggplant, or other peppers) within the past three years.
This crop rotation principle is essential because nightshade plants share diseases and deplete similar soil nutrients. Pepper plants following tomatoes often struggle with bacterial spot, verticillium wilt, or other soil-borne diseases that can devastate your crop.
Instead, choose spots where you previously grew beans, corn, or brassicas like cabbage and broccoli.
👉 Here’s How to Grow a Three Sisters Garden: Corn, Beans, Squash Together
Smart Companion Planting
The right plant neighbors can dramatically improve your pepper harvest while reducing pest problems. Basil planted near peppers improves their flavor and repels aphids and spider mites. Marigolds throughout the pepper patch deter nematodes and various flying pests, while their bright flowers attract beneficial insects.
Carrots make excellent pepper companions because their root systems work different soil levels, and they mature quickly enough to harvest before peppers need the space. Onions, leeks, and garlic planted around pepper plants help repel many pests with their strong scents.
Avoid planting peppers near brassicas like cabbage or fennel, which can interfere with growth. Also resist the temptation to plant peppers next to tomatoes – while they’re relatives, this concentration of nightshades creates an irresistible target for pests and diseases.
👉 Read The Ultimate Companion Planting Guide: 422 Plant Combinations That Actually Work
Transplanting and Early Care
Perfect Planting Conditions
Timing your transplant correctly can make or break your pepper season. Wait until soil temperature consistently reaches 60°F, with 70°F being ideal. Even a few nights below 50°F can shock young plants and stunt their growth for weeks. Use a soil thermometer rather than guessing – it’s worth the small investment.
Choose a cloudy day or late afternoon for transplanting to reduce shock. Dig holes 1.5 times wider than the root ball and add a handful of compost to each hole. Unlike tomatoes, plant peppers at the same depth they were growing in their containers. Deep planting doesn’t benefit peppers and may actually harm them.
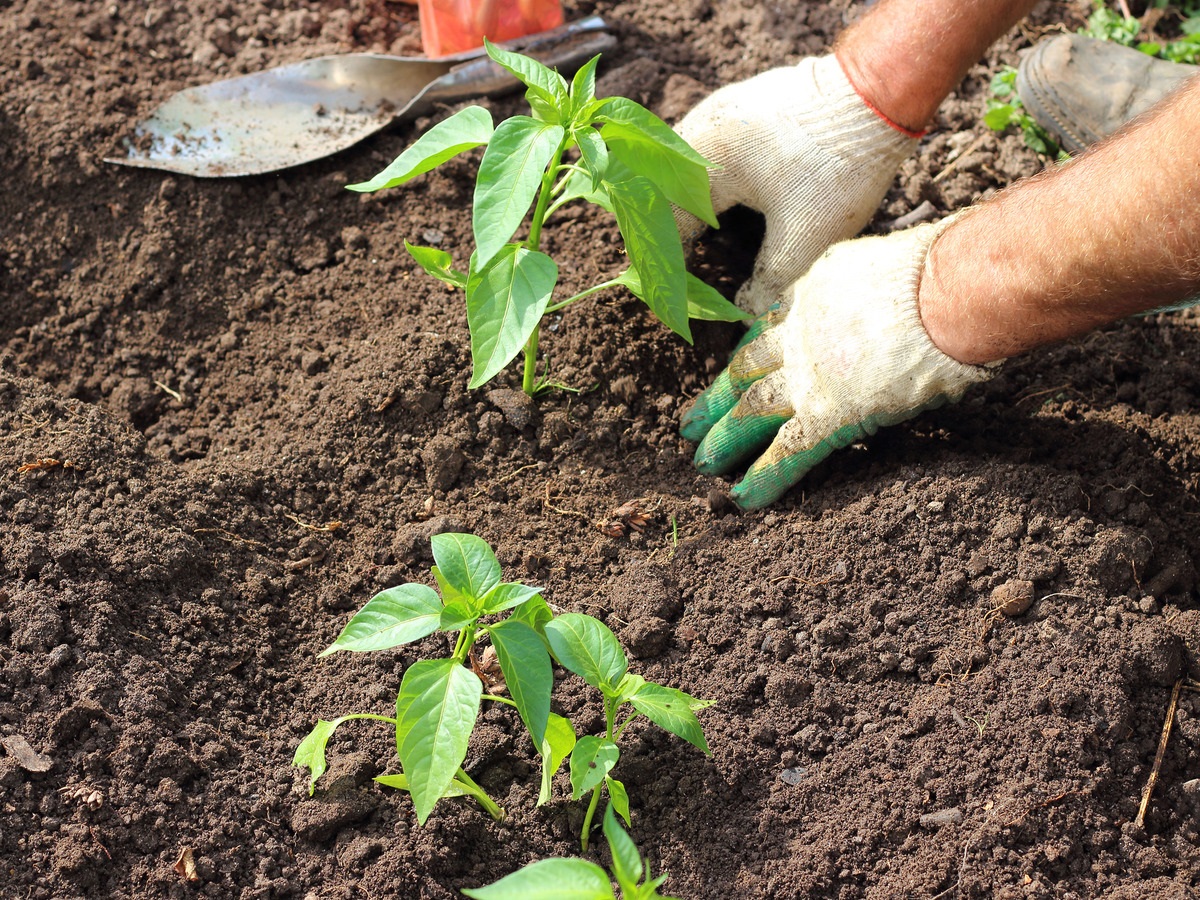
Water thoroughly after transplanting and apply a diluted starter fertilizer. Then comes the critical support decision. Install stakes or cages at planting time, not later when you might damage roots.
Bell pepper plants can reach 3-4 feet tall and become surprisingly heavy with fruit. A 6-foot bamboo stake driven 18 inches deep or a sturdy tomato cage will prevent heartbreaking stem breaks later in the season.
Mulching: Timing and Technique
Wait until plants are established – about 2-3 weeks after transplanting – before applying mulch. This delay allows the soil to warm thoroughly and gives plants time to settle in.
Once you do mulch, apply a 3-4 inch layer of organic material like straw, shredded leaves, or grass clippings around each plant, keeping mulch several inches away from stems to prevent pest and disease problems.
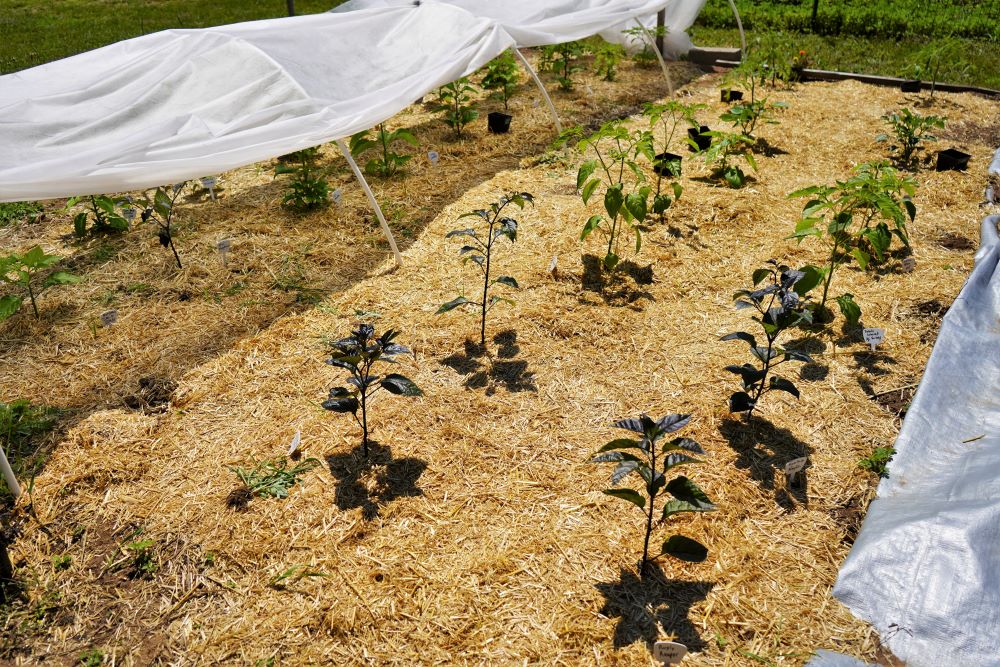
Good mulch serves multiple purposes: it retains soil moisture, moderates soil temperature, suppresses weeds, and prevents soil-borne diseases from splashing onto leaves during watering or rain. In hot climates, organic mulch also helps keep root zones cool during extreme heat.
👉 Learn about Desert Gardening for Beginners: Growing Food & Plants in Extreme Heat
Mastering Pepper Care Through the Season
Understanding Temperature Stress
Temperature management goes beyond just keeping plants alive – it directly affects fruit production. Peppers stop setting fruit when daytime temperatures consistently exceed 90°F or nighttime temperatures drop below 60°F.
During heat waves, flowers often drop before forming fruit, which explains those frustrating periods when plants look healthy but produce nothing.
Combat heat stress with afternoon shade cloth providing 30-50% shade during the hottest part of the day. Even something as simple as a strategically placed tomato plant or trellis can provide enough protection. Consistent moisture also helps plants cope with heat stress, making proper watering even more critical during hot spells.
Watering: The Make-or-Break Factor
Here’s where many gardeners go wrong: they either love their peppers to death with too much water, or stress them with too little. Bell peppers prefer the “Goldilocks” approach – not too wet, not too dry, but just right.
The key is deep, infrequent watering that encourages roots to grow deeply rather than staying near the surface.
Water when the top 1-2 inches of soil feel dry, then water thoroughly until you see it drain from the bottom of containers or penetrate 6-8 inches deep in garden beds. This typically means watering 1-2 times per week, providing about 1-1.5 inches total.
Morning watering reduces disease risk by allowing leaves to dry before nightfall. Avoid getting water on leaves when possible – soaker hoses or drip irrigation work beautifully for peppers.
Inconsistent watering leads to blossom end rot, where pepper bottoms develop dark, sunken spots. This isn’t actually a disease but a calcium uptake problem caused by irregular moisture levels.
Feeding for Maximum Production
Bell peppers are hungrier than most gardeners realize, but their nutrient needs change as they grow. Young plants need nitrogen to develop strong stems and lush foliage. However, too much nitrogen once flowering begins results in beautiful, leafy plants with few peppers.
During the first 6 weeks after transplanting, feed every 2-3 weeks with compost, fish emulsion, or a balanced organic fertilizer. When flowers appear, switch to a lower-nitrogen fertilizer or add phosphorus and potassium through bone meal and wood ash.
Continue feeding every 3-4 weeks through harvest, adjusting based on plant performance rather than sticking rigidly to schedules.
👉 Here’s How to Add Nitrogen to Soil: 18 Quick Fixes + Long-Term Solutions
Strategic Pruning and Plant Training
Most gardeners are afraid to prune their pepper plants, but strategic pruning can significantly increase your harvest. Start by removing any leaves touching the ground to prevent soil-borne diseases. As plants grow, pinch out suckers – the shoots that grow from joints between main stems and branches.
The most controversial pruning practice is removing early flowers. It seems counterintuitive, but removing the first cluster of flowers on young plants redirects energy into developing a stronger root system and more branches.
This ultimately results in more flowers and peppers later in the season. However, if you have a short growing season, this practice may not be worth the delayed harvest.
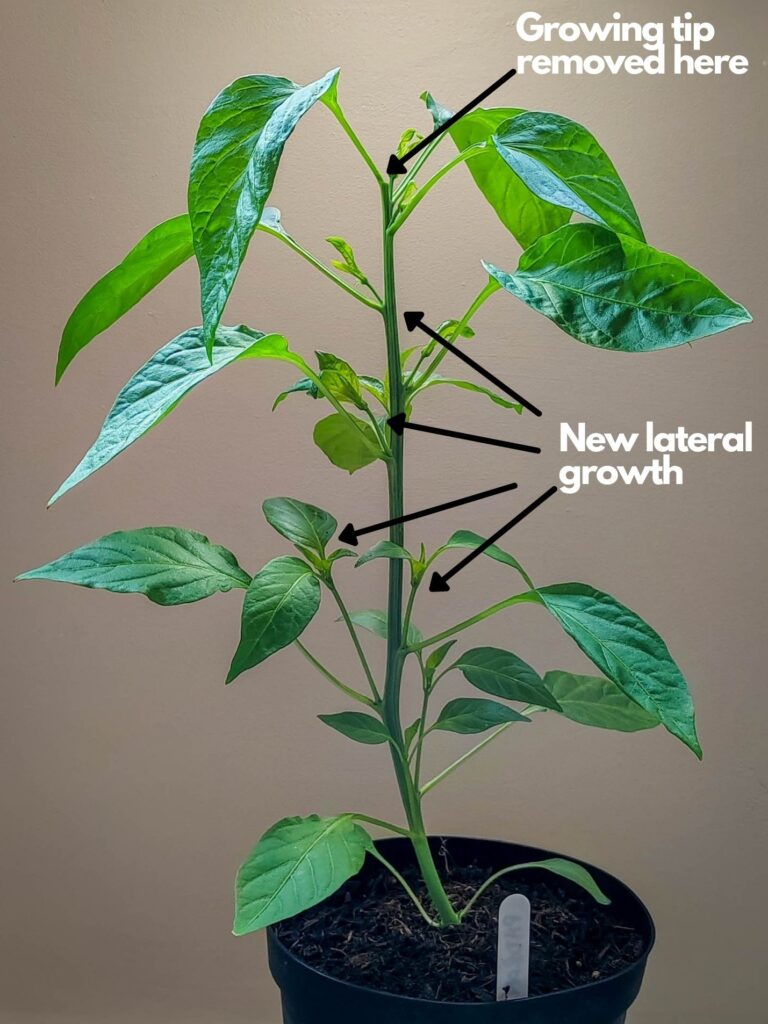
Some gardeners also “top” their plants by pinching the growing tip when plants reach 8-10 inches tall. This encourages bushier growth and more fruiting branches. Again, this technique works best in areas with long growing seasons.
Troubleshooting Common Challenges
Preventing and Managing Pests
The best pest management starts with healthy plants and good garden hygiene. Stressed plants attract more pests than vigorous ones, so proper care is your first line of defense.
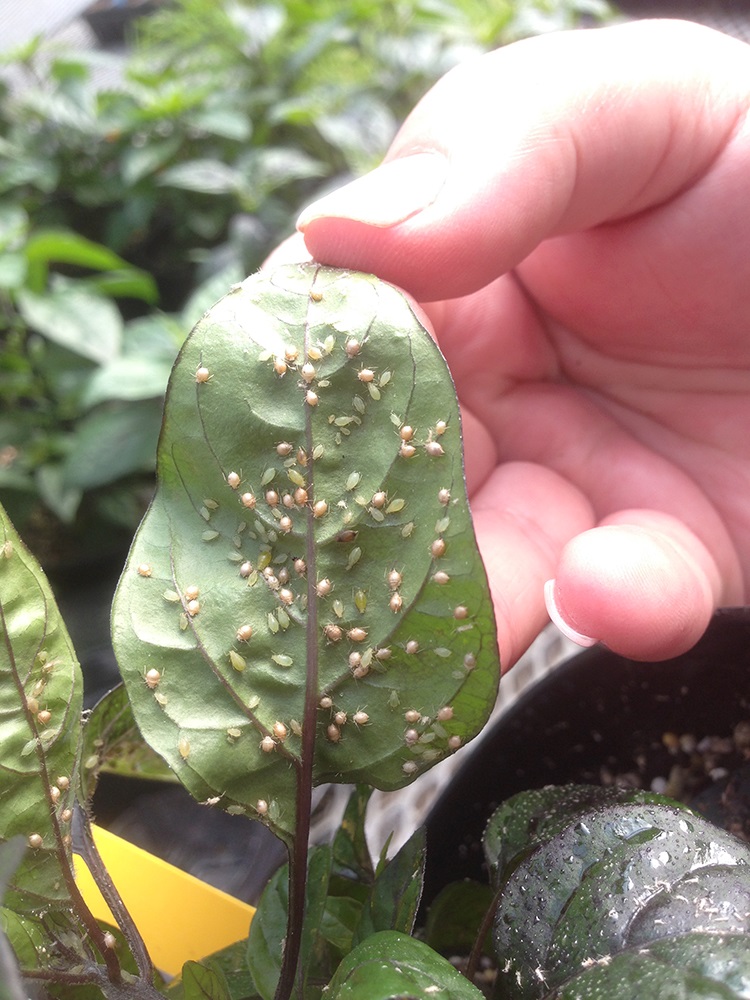
1. Aphids are probably the most common pepper pest, clustering on new growth and under leaves. They reproduce rapidly but are easily controlled early. Blast them off with water, encourage beneficial insects with flowering plants nearby, or use insecticidal soap for heavy infestations.
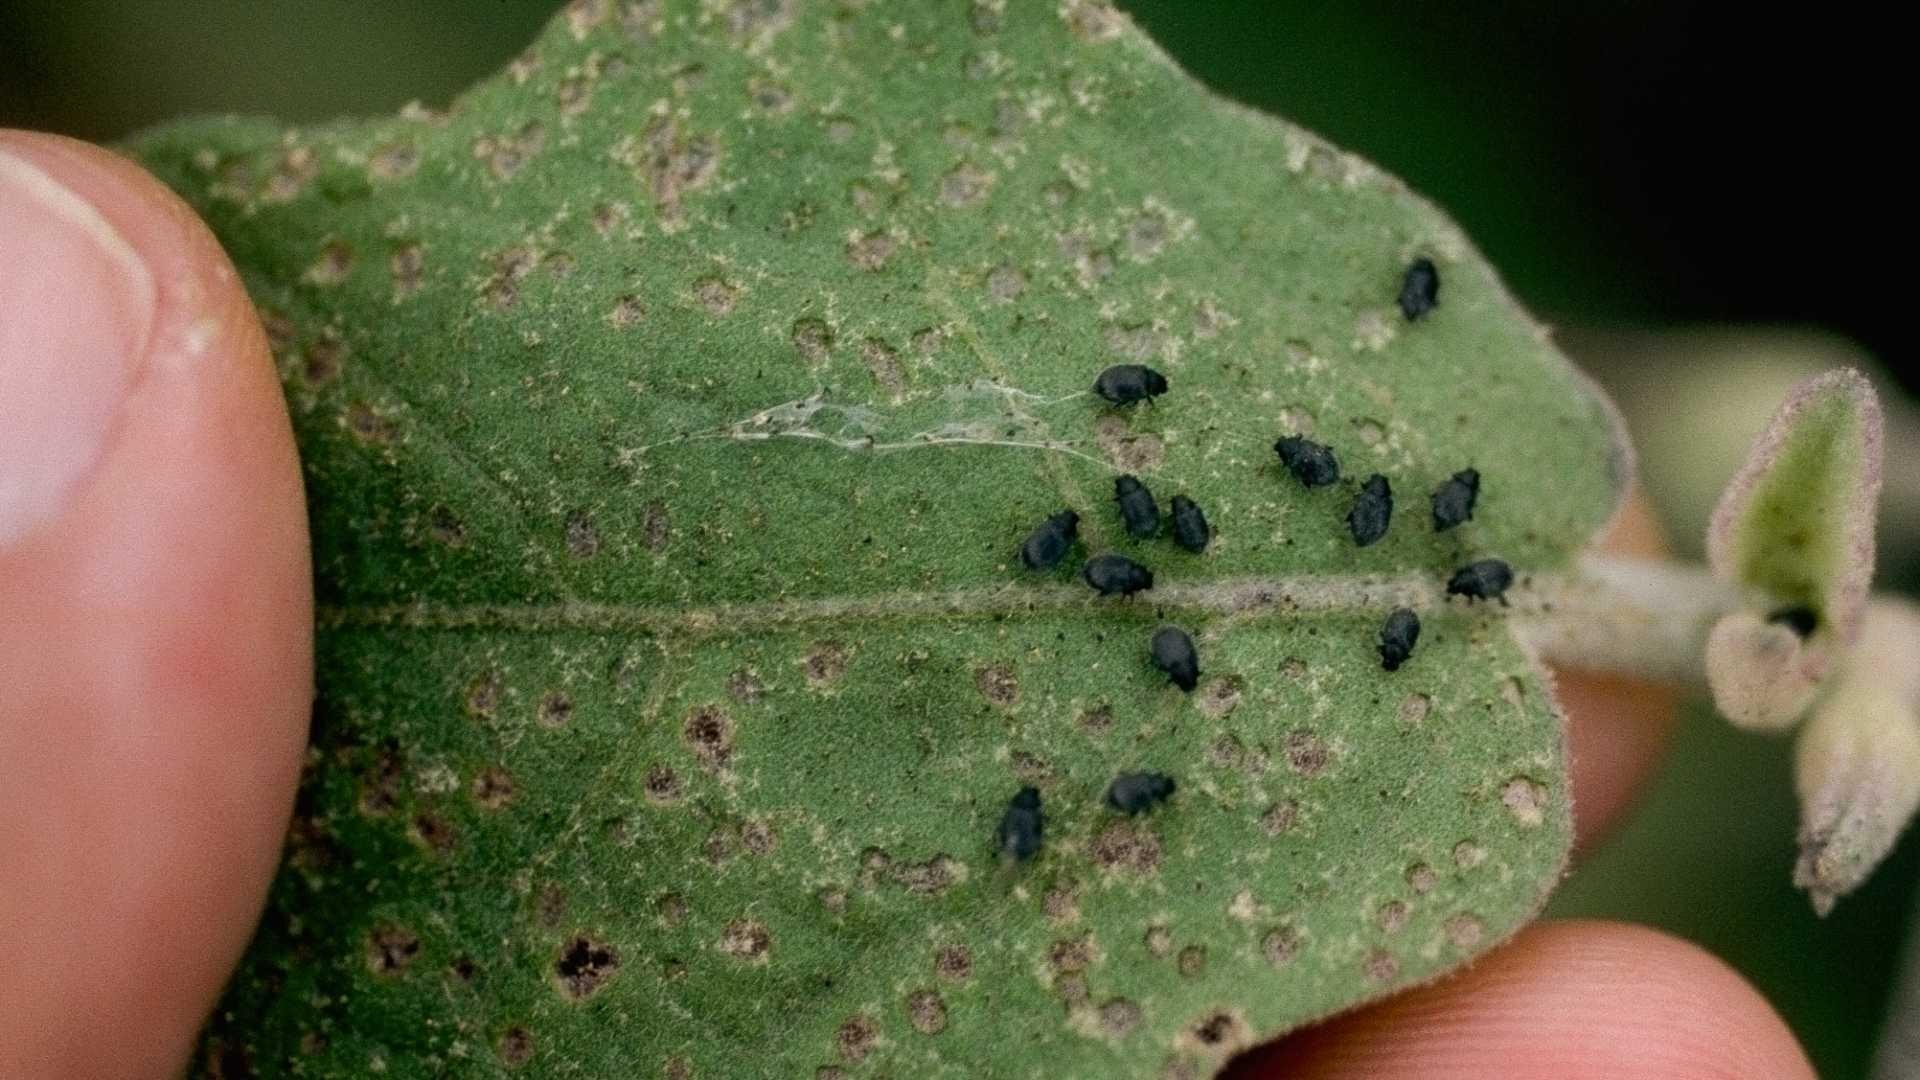
2. Flea beetles create tiny holes in leaves that look like shotgun damage. They’re particularly destructive to young plants but can be controlled with floating row covers during the vulnerable early weeks. Beneficial nematodes applied to soil also help control the larval stage.
3. Hornworms can devastate pepper plants quickly but are usually present in small numbers. Hand-picking works well if you can stomach it (they’re harmless but large). Look for their droppings on leaves as a sign of their presence before you see the actual worms.
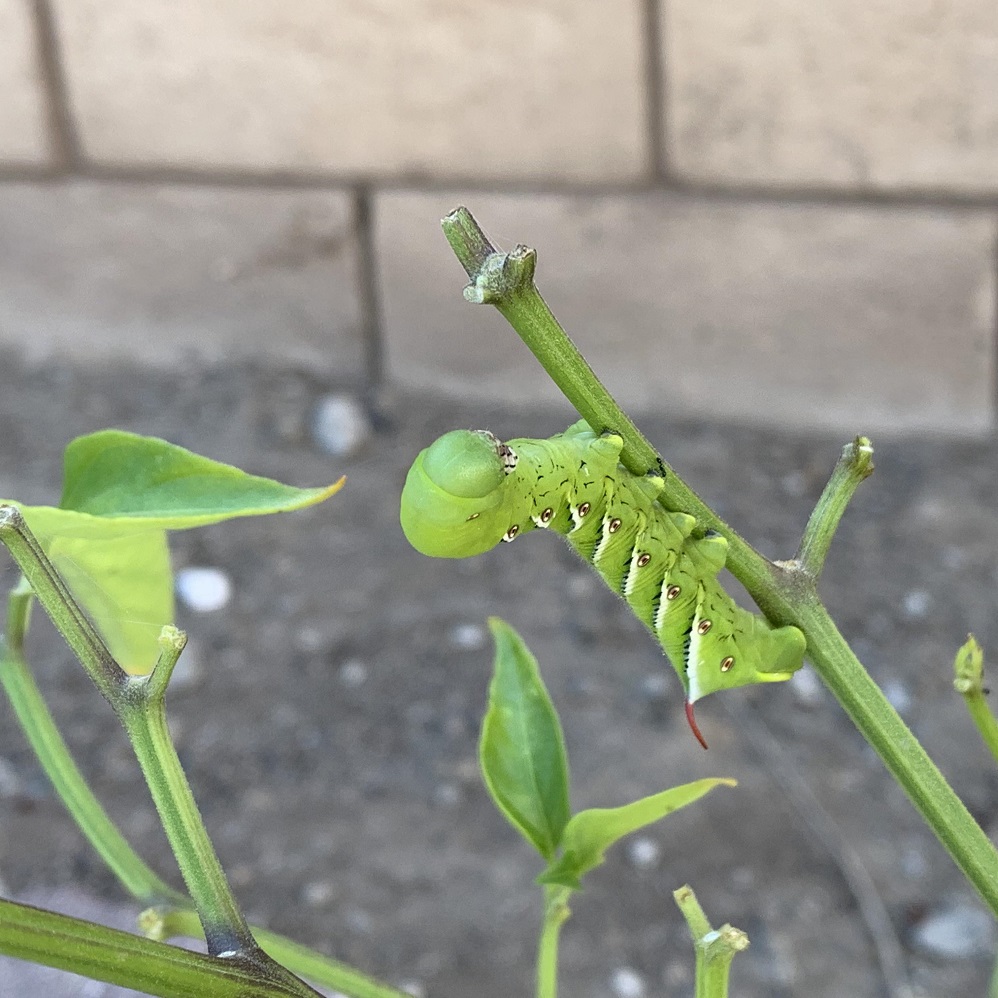
👉 Read the Ultimate Guide to Identifying and Controlling Tomato Hornworms in Your Garden
Disease Prevention and Management
Most pepper diseases are preventable with good cultural practices. Avoid overhead watering, ensure adequate spacing for air circulation, and never work among plants when they’re wet. Remove any diseased plant material immediately and dispose of it in the trash, not the compost pile.
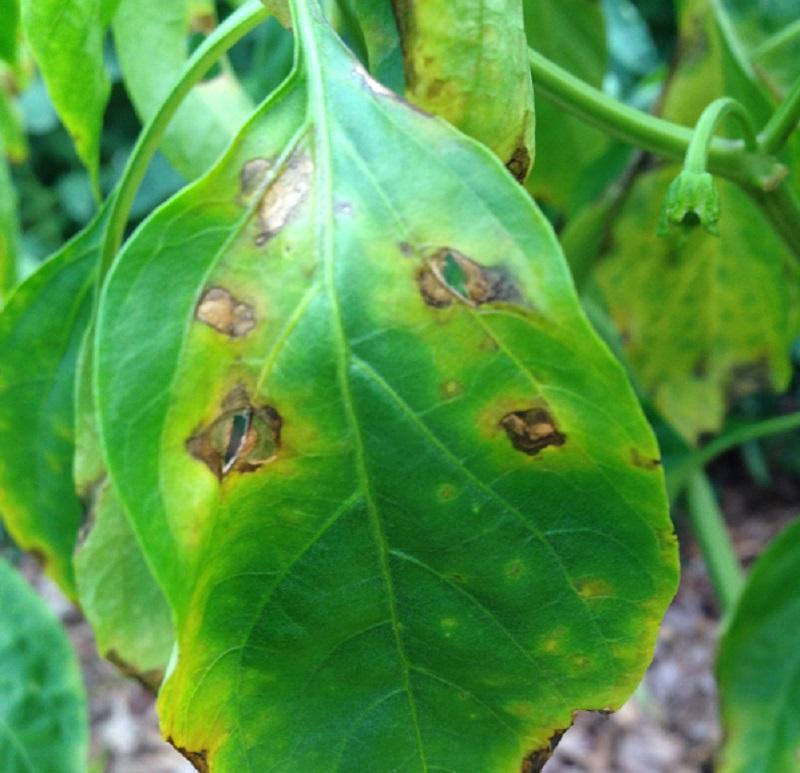
Bacterial spot causes dark lesions with yellow halos on leaves and can spread rapidly in humid conditions. Prevention through proper watering and spacing is much more effective than treatment. If it appears, remove affected leaves and apply copper-based sprays according to label directions.
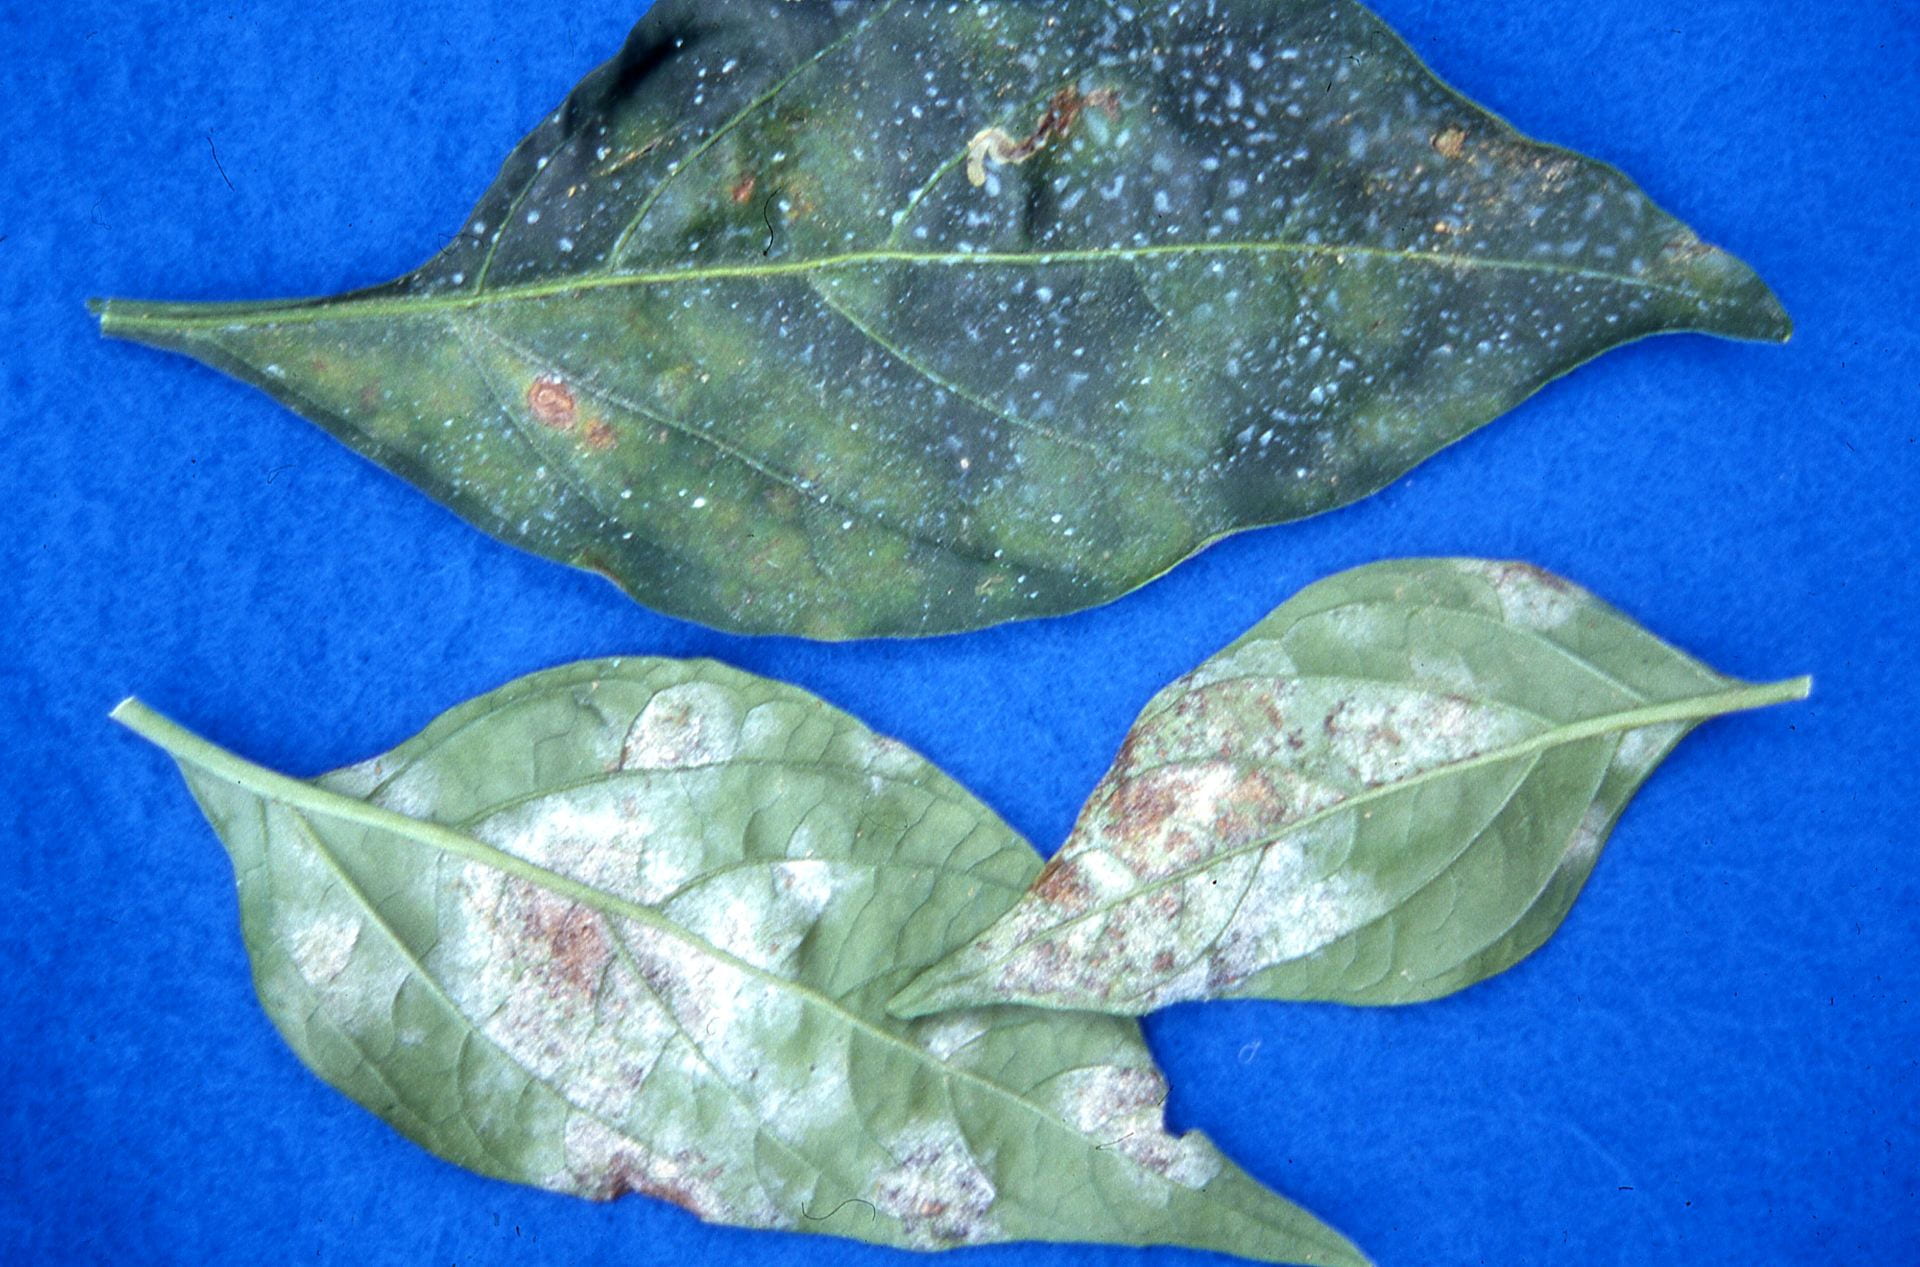
Powdery mildew appears as white, fuzzy growth on leaves and thrives in humid conditions with poor air circulation. It rarely kills plants but reduces their vigor. Improve air movement around plants and try baking soda sprays (1 tablespoon per quart of water) as an organic treatment.
Harvest Timing and Techniques
There’s nothing quite like the moment you realize your peppers are ready for harvest. After months of nurturing, that first perfect pepper feels like a victory worth celebrating.
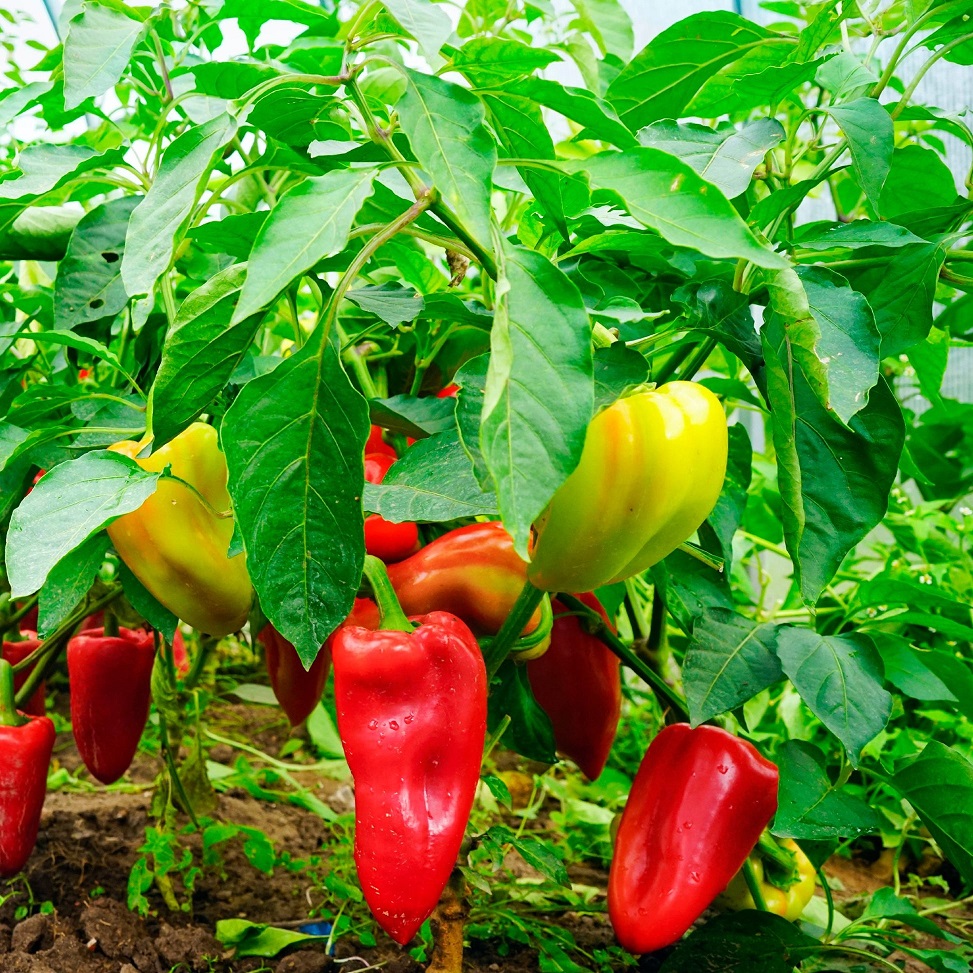
The decision of when to harvest depends on your intended use and patience level. Green peppers can be harvested as soon as they reach full size – typically 3-4 inches for most varieties. They’ll have glossy skin and firm flesh, perfect for cooking applications where you want some bite and fresh pepper flavor.
For the sweetest peppers with maximum nutrition, wait for complete color change. This typically takes an additional 2-3 weeks after the green stage.
Red peppers contain nearly twice the vitamin C of green ones and significantly more beta-carotene. The flavor transformation is remarkable – sweet instead of slightly bitter, with a more complex pepper taste.
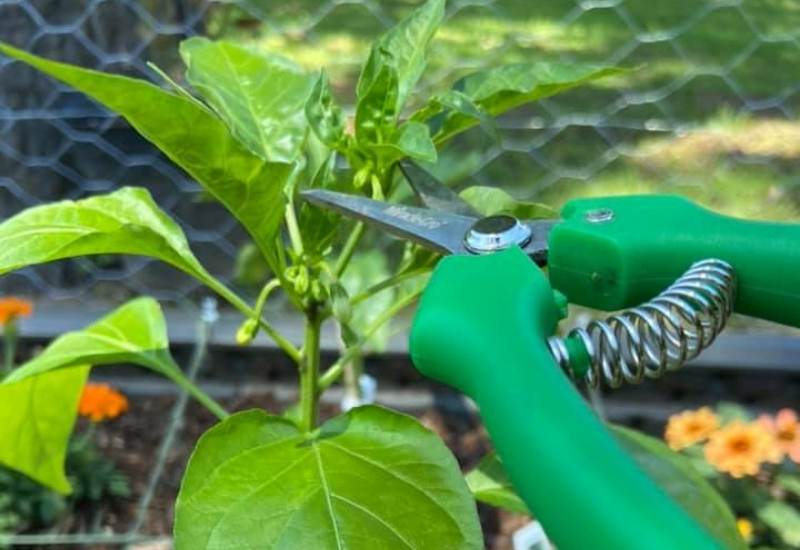
Use clean, sharp scissors or pruning shears to harvest, cutting stems rather than pulling fruit. Leave a small piece of stem attached to each pepper, which helps them store longer. Regular harvesting encourages continued production, so pick peppers as soon as they reach your desired maturity.
👉 Discover When and How to Harvest Vegetables for Peak Flavor: Timing and Tips for Every Crop
Extending Your Season
As temperatures begin dropping in fall, you can extend your harvest with a few simple techniques. Row covers or small hoop tunnels can protect plants from light frosts, potentially adding weeks to your growing season. For container plants, simply move them to a protected location during cold spells.
Before the first hard frost, harvest all peppers regardless of maturity. Large green peppers will continue ripening indoors if kept in a warm room, though they won’t develop the full sweetness of vine-ripened fruit. Small, immature peppers are better used immediately or composted.
Preserving Your Pepper Bounty
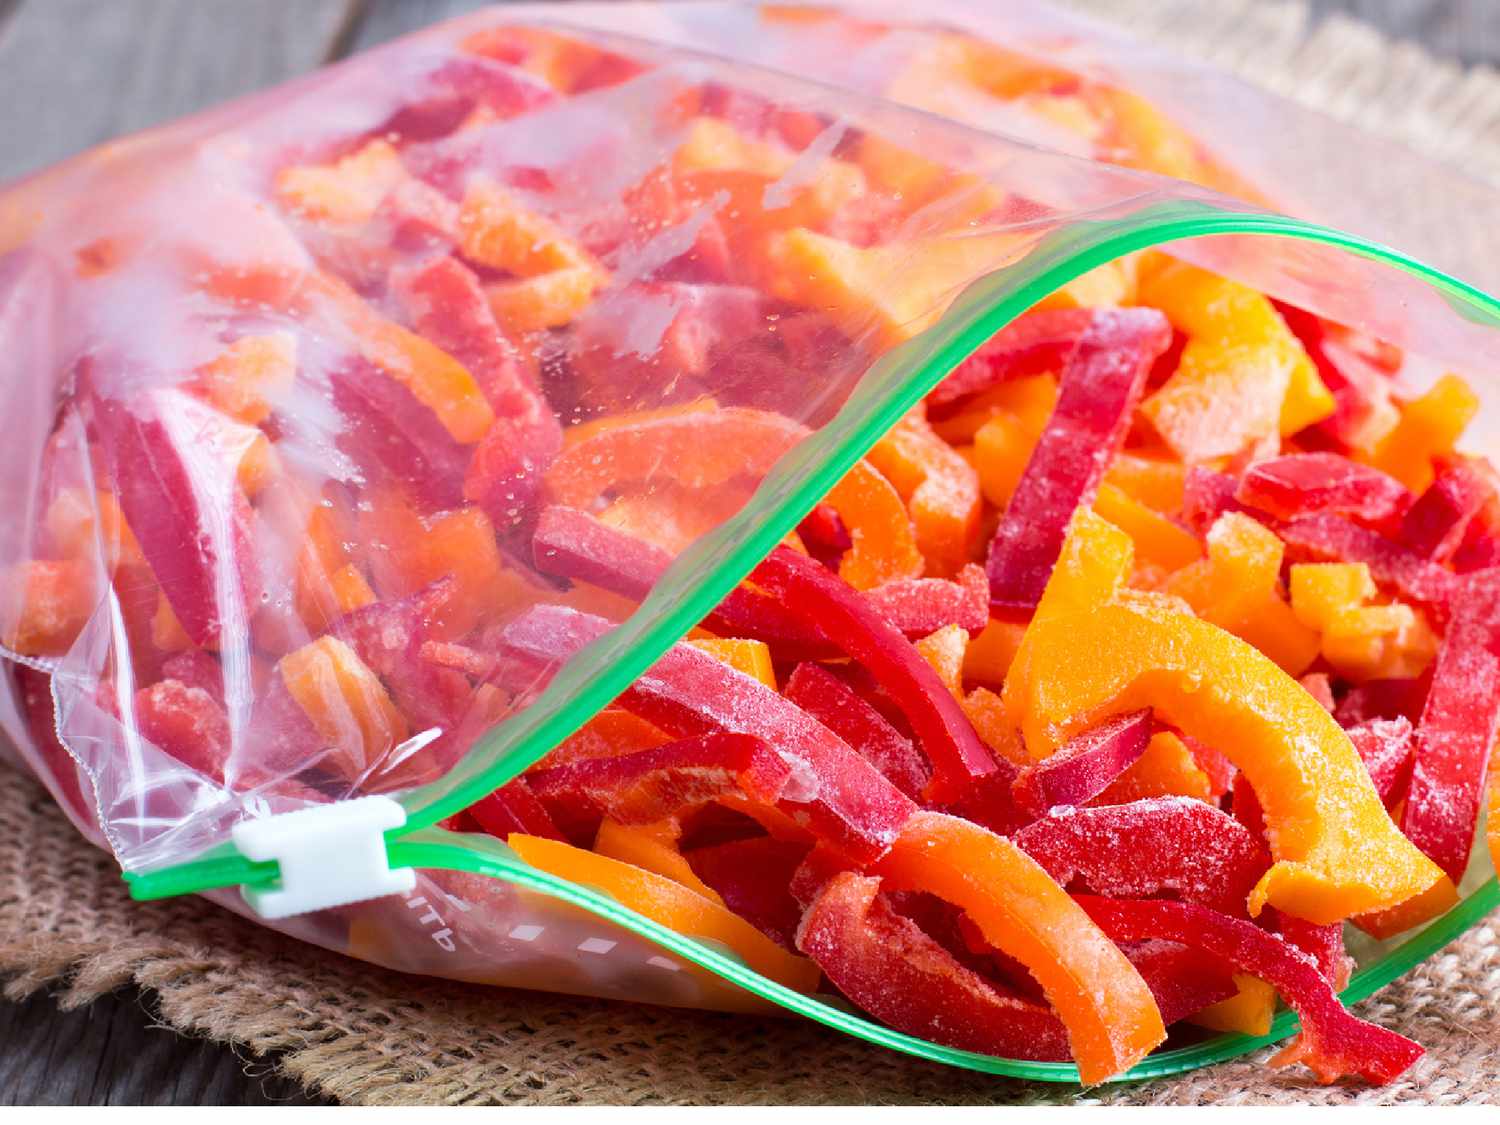
Fresh peppers store best in the refrigerator’s crisper drawer, where they’ll maintain quality for 1-2 weeks. For longer storage, freezing works beautifully. Wash and core peppers, slice them into strips, and freeze on trays before transferring to freezer bags. Frozen peppers work perfectly for cooked dishes, though they lose their crisp texture for fresh applications.
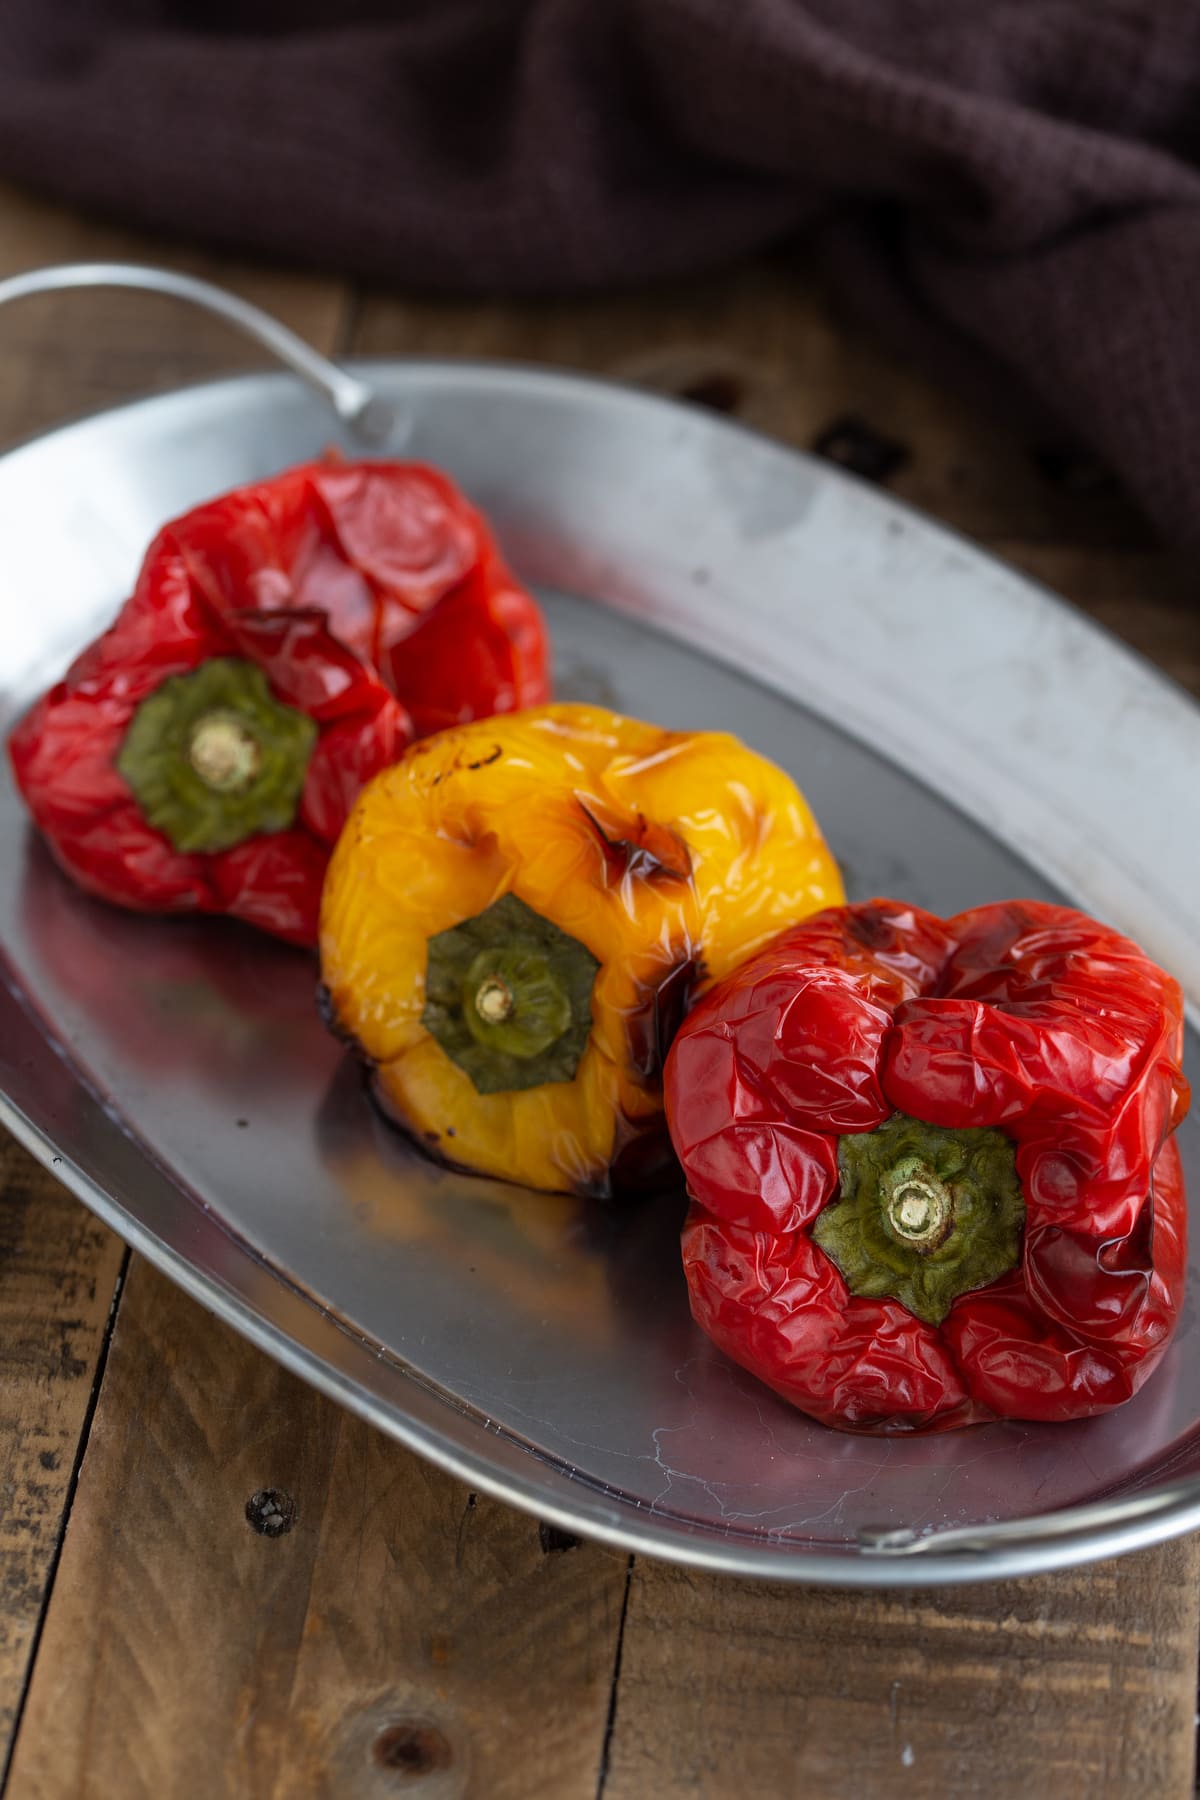
Roasting peppers before freezing adds incredible flavor. Char the skins under a broiler or over an open flame, steam them in closed bags for 15 minutes, then slip off the skins before freezing. Dehydrating creates pepper flakes perfect for seasoning, while pickling in vinegar-based brines preserves peppers with tangy flavor for months.
👉 Here’s How to Dehydrate Apples at Home: Easy Steps for Perfect Results
Your Bell Pepper Success Formula
Growing exceptional bell peppers comes down to understanding their preferences and providing consistent care. They need warmth, consistent moisture, good drainage, full sun, and protection from temperature extremes.
Most importantly, they need patience – both during the long growing season and while waiting for green peppers to ripen into their colorful, sweet final forms.
Start your seeds early indoors with proper heat and lighting. Prepare your garden bed with compost and proper pH. Choose the right location considering both sun exposure and crop rotation. Transplant carefully when conditions are right, then provide consistent care through the growing season.
Remember that every gardener’s journey is different. Your first season might have challenges, but each year you’ll get better at reading your plants’ needs and timing your care perfectly.
The sweet crunch of a homegrown, vine-ripened red bell pepper makes every bit of effort worthwhile. There’s something magical about growing your own food – it connects you to the seasons, teaches patience, and rewards you with flavors you simply can’t buy in any store.
Frequently Asked Questions
- Q: Can I grow bell peppers in containers?
A: Absolutely! Use containers at least 5 gallons in size with excellent drainage. Container peppers need more frequent watering and feeding than garden-grown plants, but they offer the advantage of mobility for optimizing growing conditions.
- Q: Why are my pepper plants flowering but not producing fruit?
A: This usually indicates temperature stress – either too hot (above 90°F) or too cold (below 60°F at night). Inadequate pollination or nutrient imbalances can also cause flower drop. Hand-pollinating flowers with a small brush sometimes helps.
- Q: Should I remove the early flowers from my pepper plants?
A: In long-season areas, removing the first flower cluster can encourage stronger plant development and higher eventual yields. However, in short-season climates, every flower counts, so this technique may not be worth the delayed harvest.
- Q: How do I know when bell peppers are ripe?
A: Bell peppers are edible when green and full-sized, but reach peak flavor and nutrition when they turn their mature color. Wait for complete color change for the sweetest peppers – the transformation from green to red, yellow, or orange typically takes 2-3 weeks.
- Q: Can I save seeds from my bell peppers?
A: Yes, if you’re growing open-pollinated (heirloom) varieties. Let peppers fully ripen on the plant, remove seeds, dry them thoroughly for several weeks, and store in a cool, dry place. Hybrid varieties won’t produce true-to-type plants from saved seeds.
- Q: What causes blossom end rot on peppers?
A: Blossom end rot appears as dark, sunken spots on pepper bottoms and results from inconsistent watering that prevents calcium uptake. Maintain consistent soil moisture through mulching and regular watering schedules rather than trying to add more calcium to the soil.