
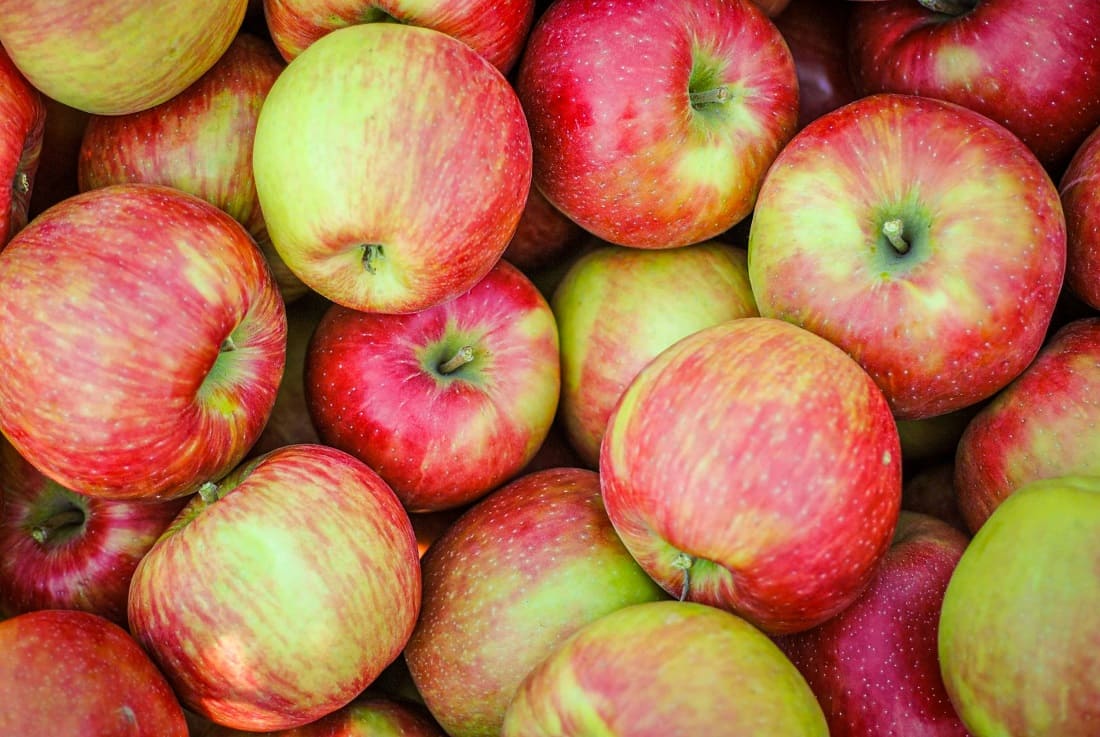
Last fall, I stood in my kitchen staring at three overflowing bushel baskets of apples from our neighbor’s generosity—their old apple tree had produced more fruit than their family could possibly use.
As someone who hates food waste, I knew I had to act fast. That’s when I rediscovered the magic of apple dehydration, a preservation method that has sustained families through winter months for centuries.
Apple dehydration transforms fresh, seasonal fruit into a shelf-stable treasure that captures autumn’s essence in every crispy, concentrated bite.
Whether you’re dealing with an abundant harvest, taking advantage of apple season sales, or simply wanting to create healthy snacks for your family, learning to properly dehydrate apples opens up a world of culinary possibilities that extends far beyond the growing season.
Read The Ultimate Guide for Beginners to Growing Apples and Apple Trees
Why Dehydrate Apples? The Sweet Science Behind the Process
Dehydrating apples removes approximately 85-90% of their moisture content while concentrating their natural sugars and flavors. This ancient preservation method works by creating an environment hostile to bacteria, mold, and yeast—the primary culprits behind food spoilage.
When properly dried and stored, dehydrated apples can maintain their nutritional value and delicious taste for 6-12 months at room temperature, or even longer when frozen.
The Nutritional Powerhouse in Your Pantry
I remember being skeptical when my health-conscious sister claimed that dried apples were “nature’s candy with benefits.” After researching the nutritional profile, I discovered she wasn’t exaggerating.
Dehydrated apples retain most of their original nutrients in concentrated form. A single ounce of properly dried apples provides:
- Fiber: Essential for digestive health and blood sugar regulation
- Potassium: Crucial for heart health and muscle function
- Vitamin C: Though reduced during drying, still present as a valuable antioxidant
- Natural sugars: Fructose that provides sustained energy without artificial additives
- Antioxidants: Compounds that support overall health and may reduce inflammation
The concentration process means you’re getting more nutrients per bite compared to fresh apples, making them an ideal energy-dense snack for hiking, work, or whenever you need a natural energy boost.
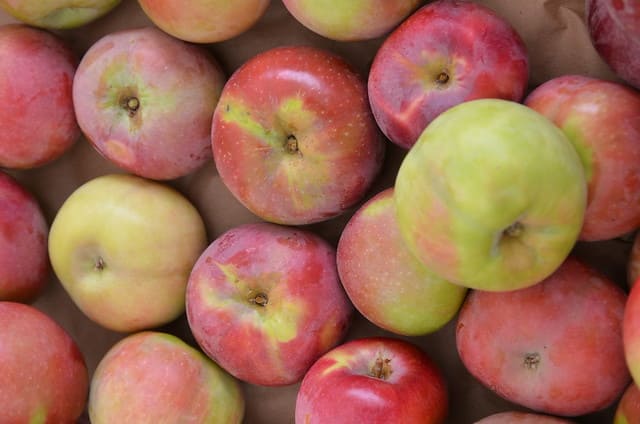
Selecting the Perfect Apples: Your Foundation for Success
Best Apple Varieties for Dehydrating
The secret to exceptional dried apples starts with variety selection. Different apples produce dramatically different results when dehydrated:
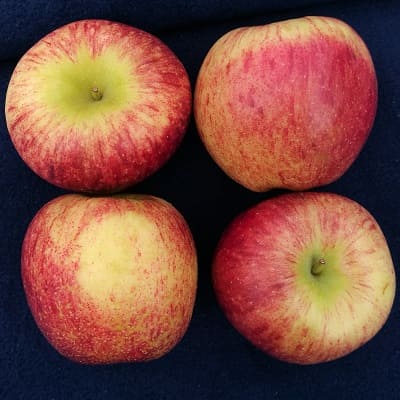
For Sweet, Candy-Like Chips:
- Fuji: Natural sweetness intensifies beautifully during drying
- Gala: Mild flavor makes it perfect for seasoning experiments
- Golden Delicious: Classic choice that maintains good texture
- Honeycrisp: Balances sweet and tart with excellent crisp potential
For Tart, Complex Flavors:
- Granny Smith: Bold tartness that pairs excellently with cinnamon
- Jonagold: Heritage variety with sophisticated flavor notes
- McIntosh: Traditional choice with distinctive taste profile
For Balanced Sweet-Tart:
- Pink Lady: Beautiful color retention with complex flavor
- Braeburn: Excellent flavor concentration
- Envy: Newer variety with exceptional drying characteristics
During my experimentation phase, I discovered that mixing varieties creates the most interesting flavor profiles. My current favorite combination uses 60% Honeycrisp for sweetness and 40% Granny Smith for that perfect tart contrast.
Quality Assessment: What to Look For
Choose apples that are:
- Firm to the touch: Soft or mealy apples won’t improve during drying
- Free from bruises: Damaged areas can introduce bacteria and affect storage life
- Fully ripe: Under-ripe apples lack the sugar content needed for optimal flavor concentration
- Organic when possible: Since you may choose to leave peels on, organic reduces pesticide exposure
Equipment Essentials: Choosing Your Dehydration Method
Food Dehydrators: The Gold Standard
A quality food dehydrator provides the most consistent, controllable results. Key features to consider:
Essential Features:
- Adjustable temperature control: Allows precise heat management (135-145°F range)
- Timer function: Prevents over-drying and provides peace of mind
- Even air circulation: Fan-based systems ensure uniform drying
- Expandable tray system: Accommodate varying batch sizes
Recommended Temperature Settings:
- Start: 145°F for the first hour to quickly evaporate surface moisture
- Finish: 135°F for the remaining 6-11 hours to complete drying without case-hardening
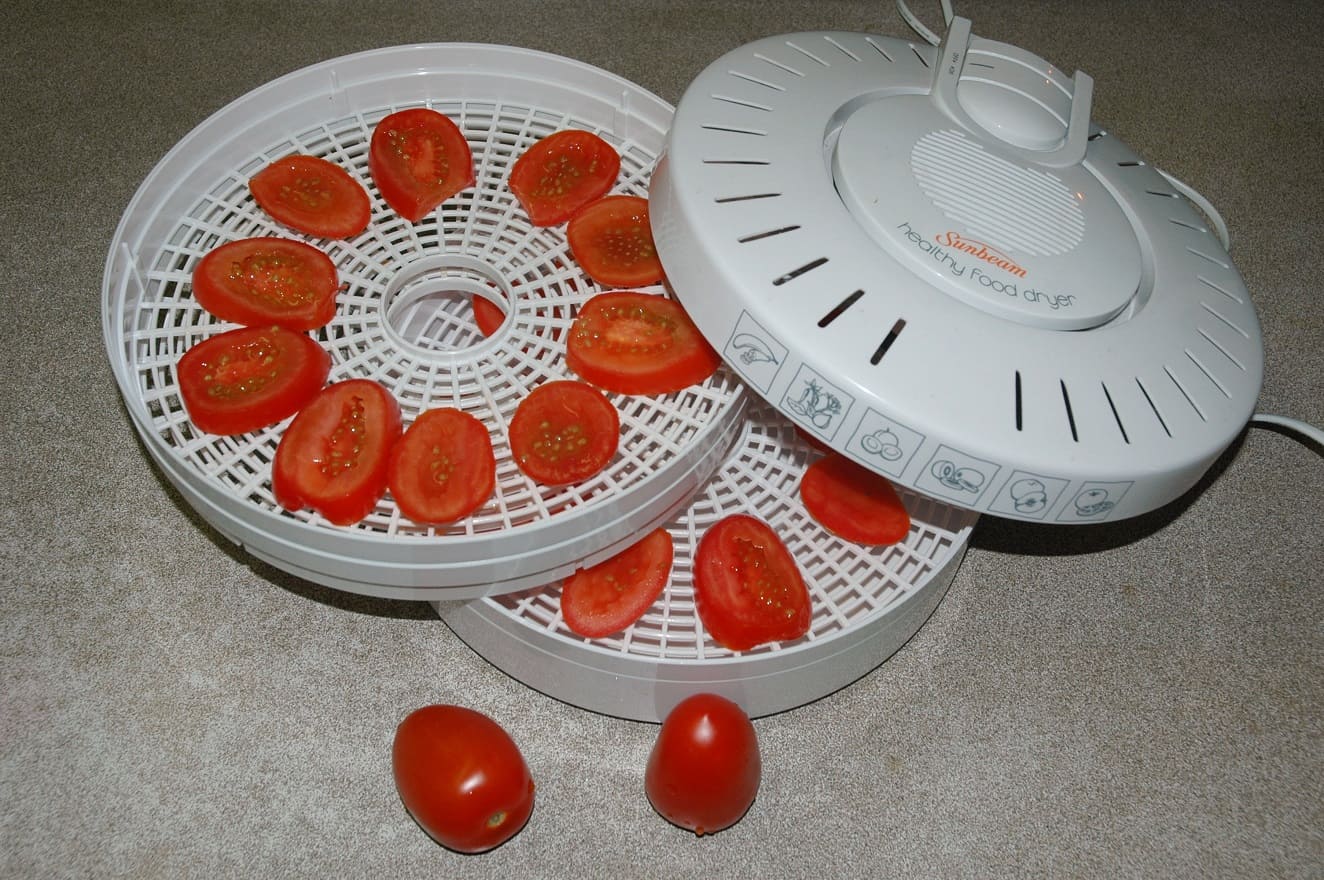
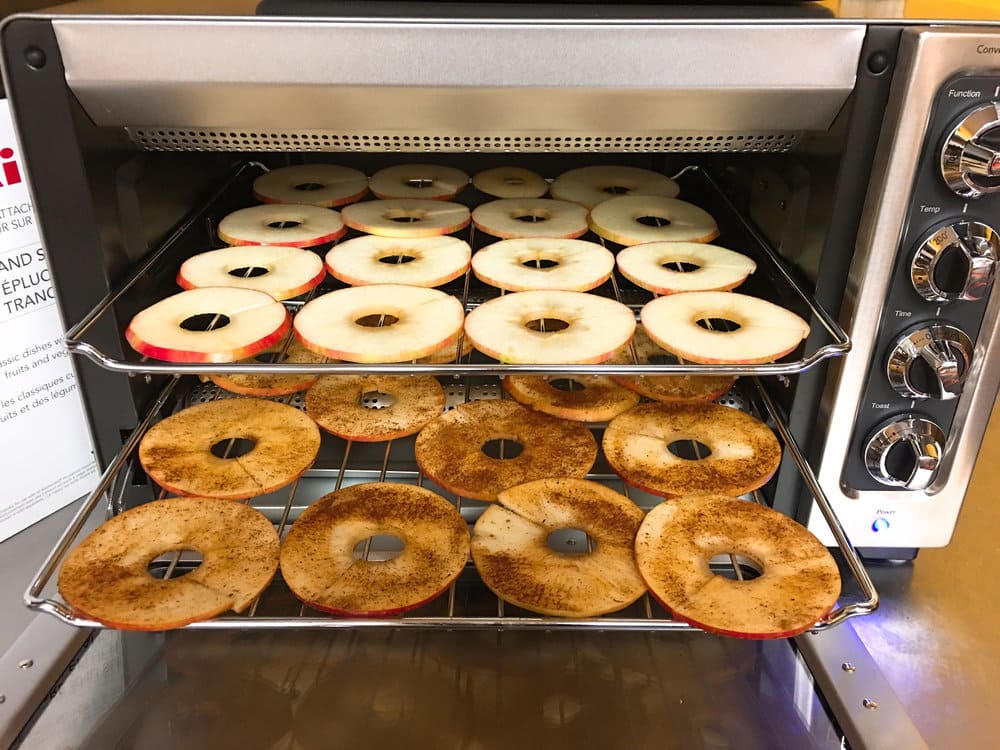
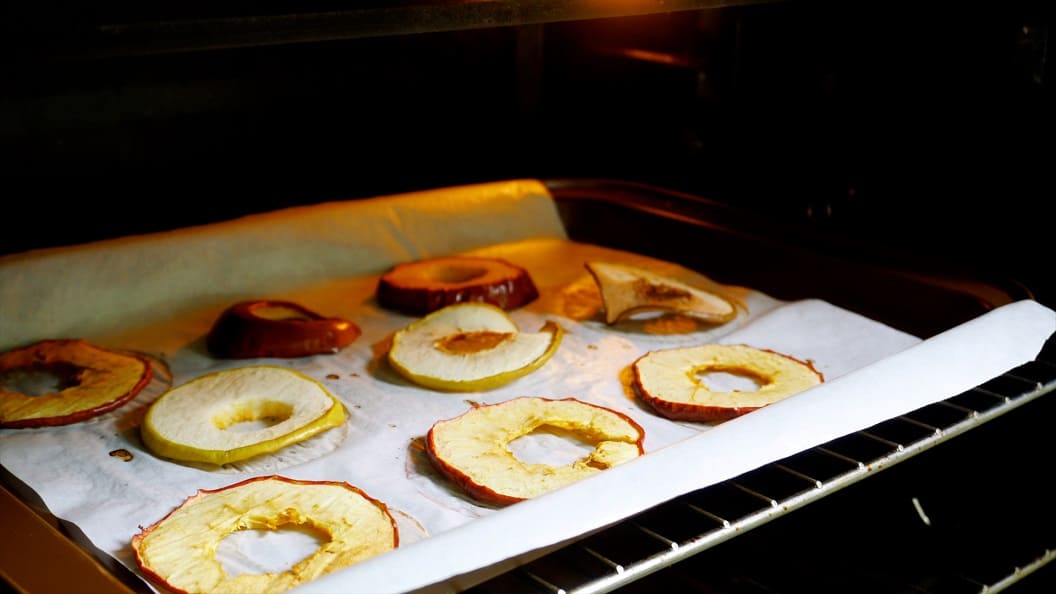
Oven Method: Making Do with What You Have
When I first started dehydrating, I didn’t own a dedicated dehydrator. My old oven, set to its lowest temperature with the door slightly ajar, became my gateway into this preservation method. While not as efficient as a proper dehydrator, it certainly got the job done.
Oven Setup Requirements:
- Temperature: Set to lowest possible setting (ideally 150-175°F)
- Air circulation: Prop door open 2-3 inches for moisture escape
- Rack positioning: Use wire cooling racks over baking sheets for optimal airflow
- Monitoring: Check and rotate every hour for even drying
Limitations to Consider:
- Higher energy consumption compared to dehydrators
- Requires constant attention to prevent burning
- Ties up your oven for 6-12 hours
- Less precise temperature control
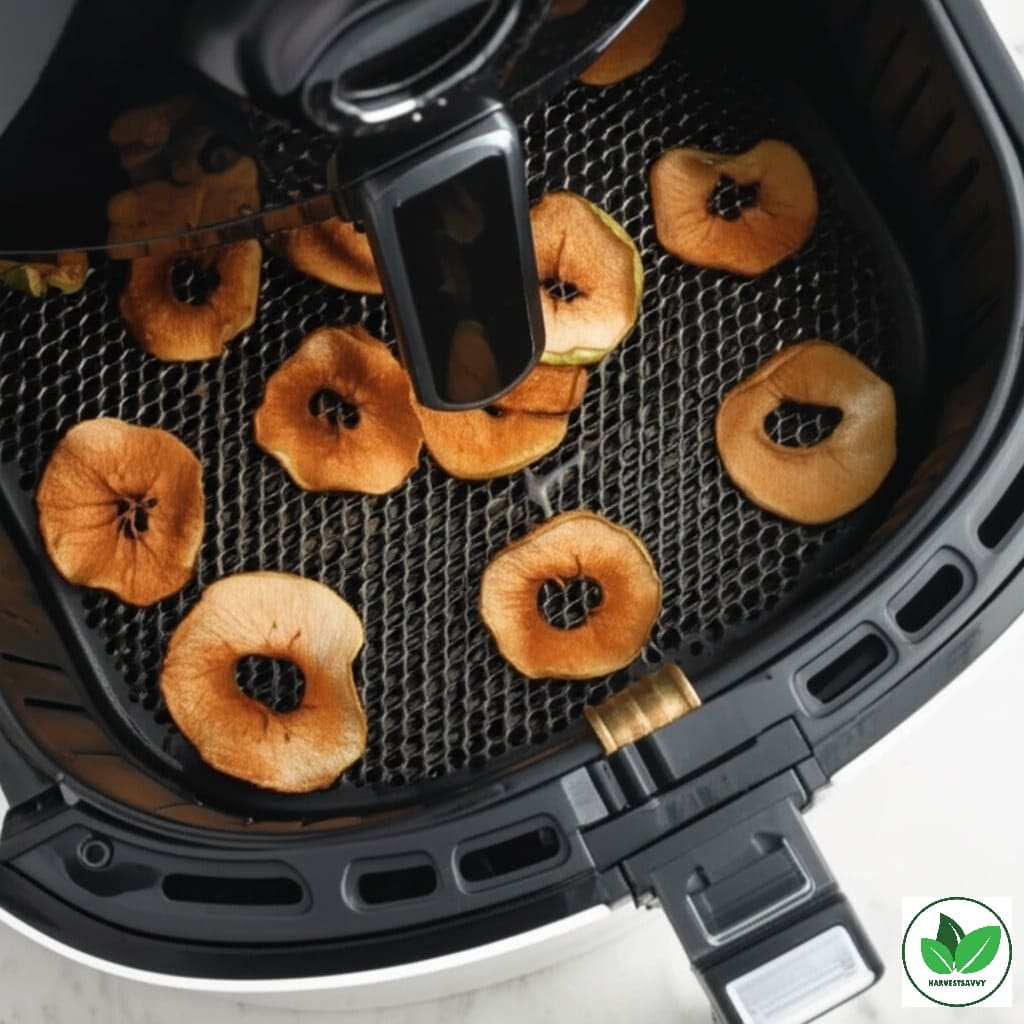
Air Fryer Method: Quick but Limited
Air fryers excel at creating crispy apple chips quickly but have limitations for long-term storage:
Best Practices:
- Temperature: 150-300°F depending on desired crispness
- Time: 15-20 minutes with frequent turning
- Batch size: Limited by basket size, requires multiple batches
- Storage life: Best consumed within 1-2 weeks
Preparation Mastery: Setting Yourself Up for Success
Pre-Preparation Workspace Setup
Organization saves time and reduces waste. I learned this lesson the hard way during my first large batch attempt when poor planning led to hours of extra work and several pounds of apples turning brown while I scrambled to find equipment.
Essential Setup:
- Large, clean workspace: Clear countertop with good lighting
- Sharp knives: Quality paring knife and chef’s knife
- Cutting boards: Separate boards for different tasks
- Large bowls: For pre-treatment solutions and apple storage
- Clean towels: For drying pre-treated apples
- Storage containers: Temporary holding during batch processing
The Art of Apple Preparation
Step 1: Thorough Washing
Wash each apple under cool running water, using a soft brush to remove any surface residue. Avoid soaking in standing water, which can spread contamination between apples.
Step 2: Core Removal
Remove cores using an apple corer or sharp paring knife. Seeds contain small amounts of cyanide compounds and should always be removed.

Step 3: Peeling Decision
Peeling is optional but affects the final product:
- Peeled: Faster drying, softer texture, more uniform appearance
- Unpeeled: More nutrients, additional fiber, interesting texture contrast, time-saving
Read about Banana Peel Fertilizer: Truth vs. Myths About This Popular Garden Hack
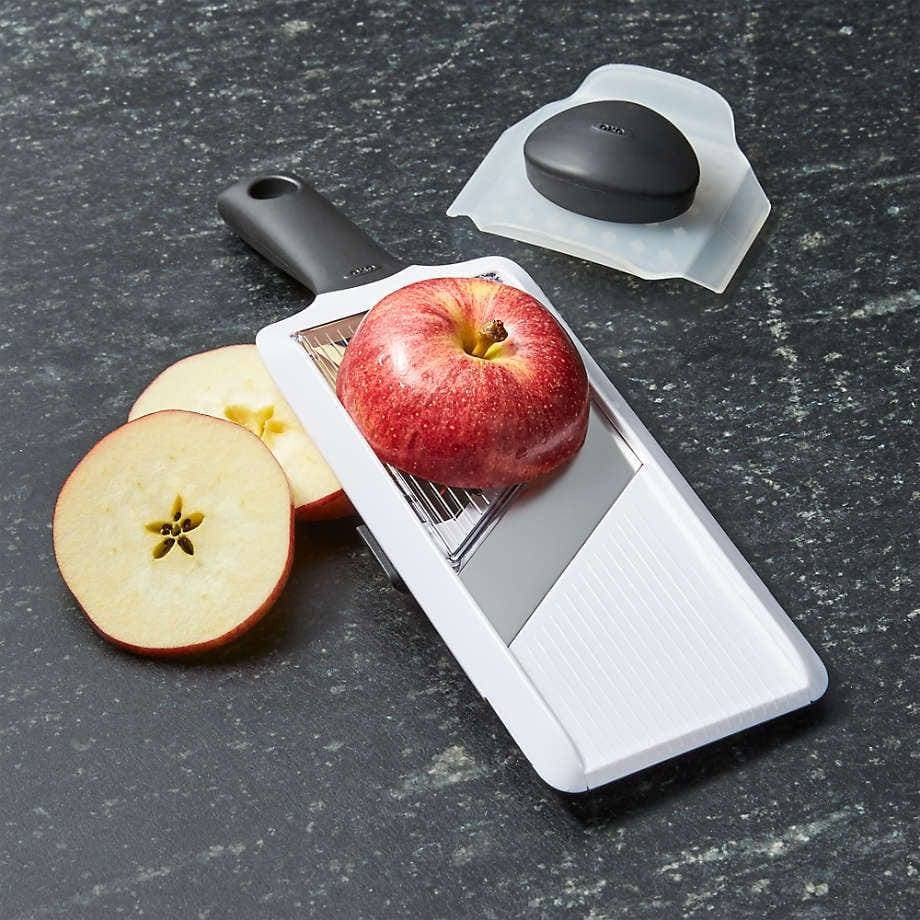
Step 4: Precision Slicing
Slice apples into uniform pieces 1/8 to 1/4 inch thick:
- Thinner slices (1/8 inch): Create crispy chips, dry faster
- Thicker slices (1/4 inch): Produce chewy texture, take longer to dry
- Consistent thickness: Ensures even drying across all pieces
I invested in a mandoline slicer after my third batch, and it revolutionized my prep time. What used to take 45 minutes now takes 15 minutes, and the uniform slices dry much more evenly.
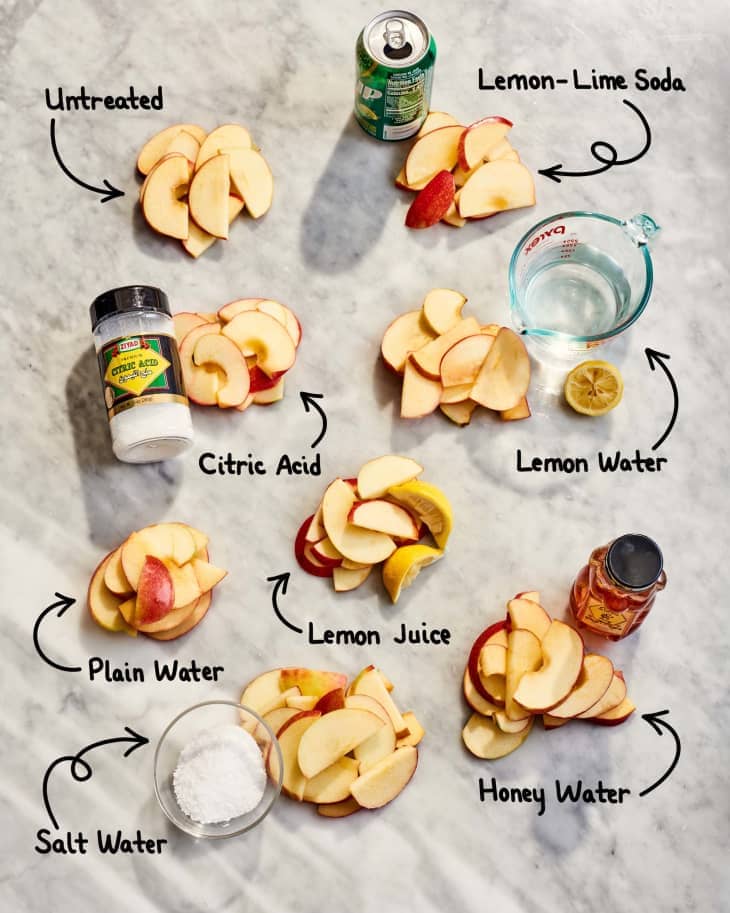
Pre-Treatment: Preventing Oxidation
Apple browning occurs when enzymes react with oxygen. Pre-treatment prevents this while adding potential flavor benefits:
Ascorbic Acid Solution (Recommended):
- 2 tablespoons ascorbic acid powder
- 4 cups cold water
- Soak slices 3-5 minutes
- No rinsing required
Citric Acid Solution:
- 1 teaspoon citric acid
- 4 cups cold water
- Soak slices 10 minutes
- Light rinse recommended
Lemon Juice Solution (Most Accessible):
- Equal parts fresh lemon juice and water
- Soak slices 5-10 minutes
- Adds subtle tartness to final product
When to Skip Pre-Treatment:
- Using naturally high-acid varieties like Granny Smith
- Prefer completely natural flavor without any tartness
- Processing immediately with minimal air exposure
Dehydration Techniques: Step-by-Step Excellence
Food Dehydrator Method (Recommended)
Hour 1: High-Heat Moisture Removal
- Arrange pre-treated apple slices on dehydrator trays in single layer
- Ensure pieces don’t touch or overlap
- Set temperature to 145°F
- This initial high heat quickly removes surface moisture, preventing bacterial growth
Hours 2-12: Steady Completion
- Reduce temperature to 135°F
- Continue drying without opening unit frequently
- Check progress every 2-3 hours after hour 6
- Rotate trays if your dehydrator doesn’t have rear-mounted fan

Oven Method: Maximizing Your Kitchen Equipment
Setup Phase:
- Preheat oven to lowest setting (150-175°F)
- Place wire cooling racks over rimmed baking sheets
- Arrange apple slices on racks in single layer
- Position oven racks in center positions for even heat distribution
Drying Process:
- Place loaded sheets in oven
- Prop door open 2-3 inches using wooden spoon handle
- Flip apple slices every hour for first 3 hours
- Rotate pans between racks every 2 hours
- Total time: 6-12 hours depending on thickness and desired texture
Air Fryer Method: Speed and Convenience
For Crispy Chips:
- Preheat air fryer to 300°F
- Arrange thin apple slices in single layer
- Cook 8-10 minutes, flipping every 3 minutes
- Increase to 325°F for final 2-4 minutes if extra crispness desired
For Softer Texture:
- Use 150°F setting if available
- Cook 15-20 minutes with frequent monitoring
- Flip every 5 minutes to prevent sticking
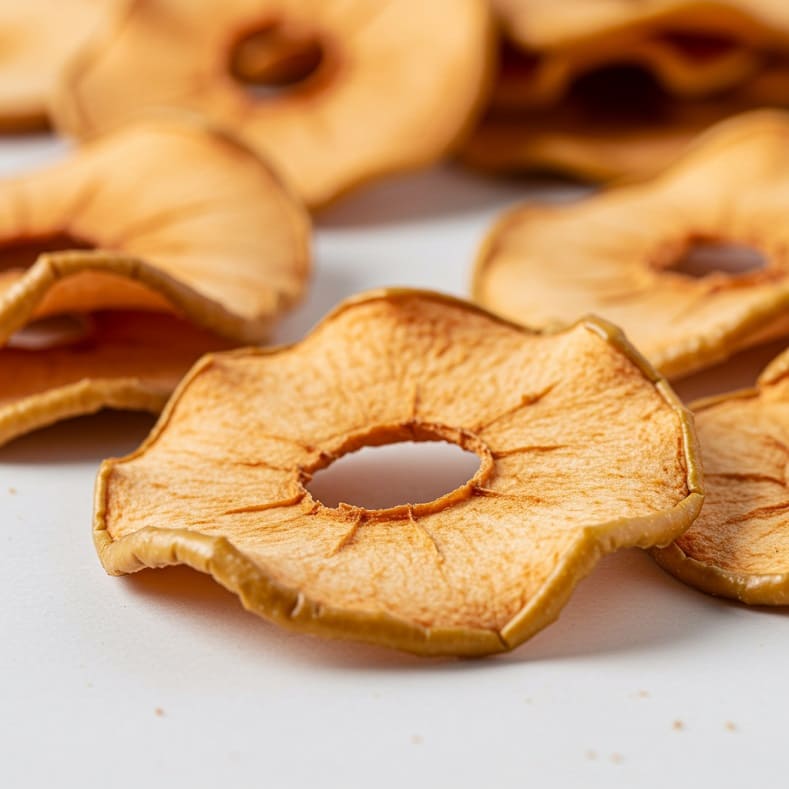
Achieving Perfect Results: Testing for Doneness
The Touch Test
Properly dried apples should feel:
- Leathery but pliable: Can bend without breaking
- Dry to touch: No surface moisture detectable
- Non-sticky: Pieces don’t adhere when pressed together
The Tear Test
This is the method I’ve found most reliable after years of practice. Take a cooled piece and tear it in half—if any moisture beads appear along the tear, continue drying.
- Remove a test piece and let cool completely
- Tear piece in half
- Examine tear line for moisture beads
- Squeeze gently—no moisture should emerge
The Bend Test
For crispy chips:
- Should snap cleanly when bent
- Audible “crack” indicates proper dehydration
- No flexible bending
For chewy texture:
- Should bend without breaking
- Some resistance to folding
- No wet or sticky feel

Storage Mastery: Preserving Your Investment
Conditioning: The Critical First Week
I learned about conditioning the hard way when my first batch developed mold spots after two weeks in storage. This step equalizes moisture content and prevents spoilage.
Conditioning Process:
- Cool completely: Allow 30-60 minutes cooling time
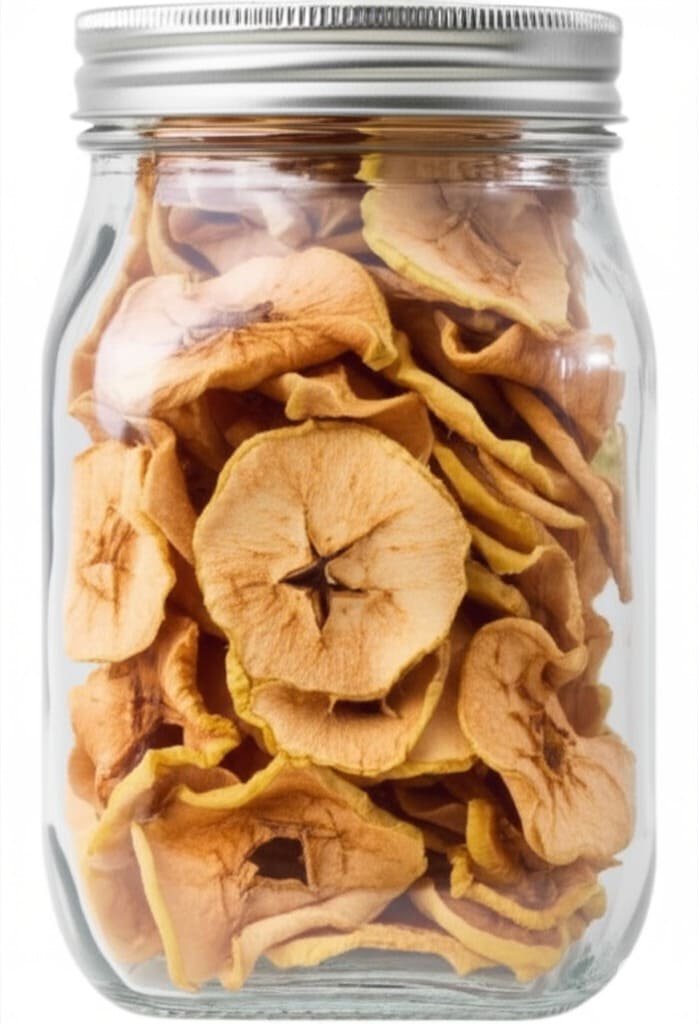
- Loose packing: Fill clean glass jars only 2/3 full
- Daily monitoring: Shake jars and check for condensation
- Week-long process: Continue checking for 7-10 days
- Return to dehydrator: If any moisture appears, dry further
Long-Term Storage Solutions
Short-Term Storage (1-2 weeks):
- Airtight containers at room temperature
- Zip-top bags with excess air removed
- Perfect for immediate snacking
Medium-Term Storage (2-6 months):
- Glass mason jars with tight-fitting lids
- Cool, dark pantry locations
- Label with contents and date
Long-Term Storage (6-12 months):
- Vacuum-sealed bags or jars
- Freezer storage for maximum longevity
- Oxygen absorber packets for extra protection
Storage Environment Requirements:
- Temperature: Cool (below 70°F ideal)
- Humidity: Low (below 60% relative humidity)
- Light: Dark or opaque containers
- Air exposure: Minimal oxygen contact
Here’s How to Keep Strawberries Fresh for Weeks Using a Glass Jar
Troubleshooting Common Issues
Problem: Apples Turn Brown Despite Pre-Treatment
Causes:
- Oxidation during slicing process
- Insufficient pre-treatment time
- Pre-treatment solution too dilute
Solutions:
- Work in smaller batches to reduce air exposure
- Increase pre-treatment soaking time
- Use fresh ascorbic acid solution
Problem: Uneven Drying Results
Causes:
- Inconsistent slice thickness
- Overcrowded trays
- Poor air circulation
Solutions:
- Invest in mandoline slicer for uniform cuts
- Leave space between pieces on trays
- Rotate trays during drying process
Problem: Case Hardening (Hard Outside, Moist Inside)
Causes:
- Temperature too high initially
- Insufficient air circulation
- Rushing the process
Solutions:
- Follow proper temperature guidelines (145°F then 135°F)
- Ensure adequate spacing between pieces
- Allow full drying time regardless of schedule
Problem: Pieces Stick to Trays
Causes:
- Insufficient drying
- Sticky apple varieties
- Poor tray preparation
Solutions:
- Continue drying until completely moisture-free
- Use parchment paper on mesh trays
- Clean trays thoroughly between batches
Creative Applications: Beyond Basic Snacking
Culinary Applications
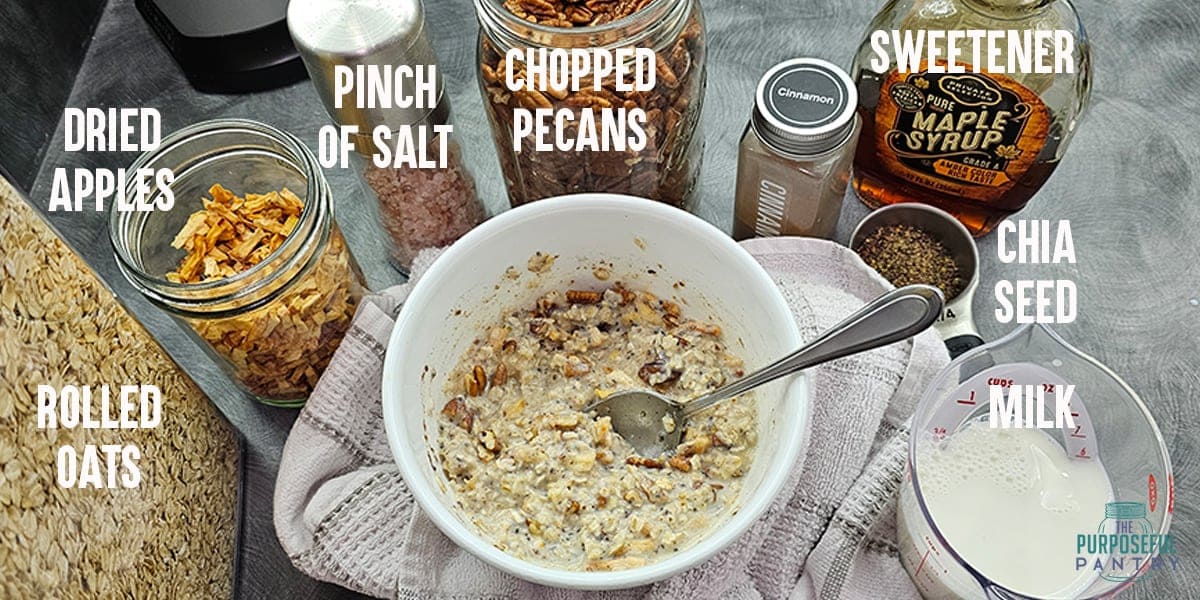
Breakfast Enhancements:
- Chopped into oatmeal for natural sweetness
- Granola and muesli additions
- Yogurt parfait toppings
- Pancake and waffle mix-ins
Baking Integrations:
- Rehydrated for pie fillings
- Chopped into bread and muffin batters
- Cookie and scone additions
- Homemade trail mix components
Savory Applications:
- Stuffing and grain pilaf additions
- Cheese board accompaniments
- Salad toppings for texture contrast
- Braised meat dish sweetener
Rehydration Techniques
For Baking:
- Soak dried apples in hot water 15-20 minutes
- Drain and proceed with recipe
- Reserve soaking liquid for additional apple flavor
For Compotes:
- Simmer with small amount of water and spices
- Add sweetener if desired
- Cook until desired consistency reached
Flavoring Variations
Experimentation is where dehydrating becomes truly creative. My family’s favorite discovery has been a chai-spiced version using cardamom, ginger, and black pepper—it transforms ordinary apple chips into something extraordinary.
Sweet Variations:
- Cinnamon Classic: Light dusting before drying
- Apple Pie Spice: Cinnamon, nutmeg, allspice blend
- Vanilla: Extract misted lightly before drying
- Maple: Real maple syrup brushed on thin
Read about Freeze Concentration: A Game-Changer for Maple Syrup Makers
Adventurous Combinations:
- Chai Spiced: Cardamom, ginger, cinnamon, clove
- Citrus Zest: Orange or lemon zest before drying
- Chili-Lime: Subtle heat with citrus brightness
- Rosemary: Unexpected herbal complexity
Here’s How to Grow Ginger at Home: The Complete Guide for Gardeners
Safety Considerations and Best Practices
Food Safety Fundamentals
Hygiene Protocols:
- Wash hands thoroughly before and after handling
- Use clean cutting boards and knives
- Sanitize all equipment before use
- Avoid cross-contamination with other foods
Source Selection:
- Never use fallen or ground apples
- Inspect for signs of pest damage or disease
- Choose firm, fresh fruit without soft spots
- Wash thoroughly under running water
Pasteurization for Extra Safety
For unpeeled apples or when concerned about potential insect eggs:
Freezer Method:
- Store finished product at 0°F for 48 hours
- Easier for home situations
- No equipment required beyond freezer space
Oven Method:
- Heat dried apples at 160°F for 30 minutes
- More immediate results
- Requires careful temperature monitoring
Scaling Up: Processing Large Quantities
When our local orchard offered “seconds” at a fraction of regular price, I found myself with 50 pounds of perfectly good apples that just had minor cosmetic issues. That’s when I learned the importance of systematic batch processing.
Batch Processing Strategy
Planning Phase:
- Calculate capacity: Determine maximum processing volume
- Schedule timing: Plan multiple batch rotations
- Prepare storage: Have containers ready before starting
- Organize workflow: Set up assembly-line style preparation
Execution Tips:
- Process 10-15 pounds at a time for manageable workflow
- Prepare next batch while current batch dries
- Label each batch with variety and date
- Maintain consistent quality standards throughout
Economic Considerations
Cost Analysis:
- Fresh apples: $2-4 per pound depending on season and quality
- Dried apples (commercial): $8-12 per pound
- Home dehydrated: Approximately $3-5 per pound including energy costs
- Savings: 40-60% compared to commercial dried apples
Time Investment:
- Active preparation: 15-20 minutes per 5 pounds
- Passive drying: 6-12 hours (hands-off time)
- Return on investment: Significant savings plus quality control
Environmental Impact and Sustainability
Reducing Food Waste
Dehydrating transforms potentially wasted produce into valuable pantry staples:
- Preserves surplus harvest quantities
- Extends usability of slightly past-prime fruit
- Reduces reliance on imported dried fruits
- Minimizes plastic packaging waste from commercial products
Energy Efficiency Tips
Dehydrator Optimization:
- Run full loads to maximize energy efficiency
- Group similar drying times together
- Use residual heat for final conditioning
- Maintain equipment for optimal performance
Seasonal Timing:
- Process during mild weather to reduce kitchen heating
- Take advantage of abundant harvest seasons
- Coordinate with other preservation activities
Frequently Asked Questions
- Do I need to remove apple peels before dehydrating?
Peeling is entirely optional and comes down to personal preference. Leaving peels on provides additional nutrients, fiber, and attractive color variation in your finished product. However, peeled apples dry slightly faster and have a more uniform texture. Consider your intended use: peeled for baking applications, unpeeled for snacking.
- Why do my dehydrated apples taste bland?
Bland dried apples usually result from starting with under-ripe or low-sugar apple varieties. Choose fully ripe, naturally sweet varieties like Fuji or Honeycrisp for the best flavor concentration. Pre-treatment with lemon juice can also mute natural apple flavor—try reducing treatment time or skipping it entirely for certain varieties.
- How can I tell if my dried apples have gone bad?
Signs of spoilage include visible mold growth, off odors, unusual texture changes (becoming slimy or excessively hard), or any signs of insect activity. Properly dried and stored apples should maintain their appearance and have a pleasant, concentrated apple scent. When in doubt, discard questionable products.
- Can I mix different apple varieties in the same batch?
Absolutely! Mixing varieties creates complex flavor profiles and interesting texture contrasts. However, be aware that different varieties may have slightly different drying times due to varying moisture and sugar content. Monitor closely and remove pieces as they reach optimal dryness rather than waiting for the entire batch.
- What’s the best way to rehydrate dried apples for baking?
For baking applications, soak dried apples in hot water, apple juice, or even wine for 15-30 minutes until they reach desired plumpness. The soaking liquid can often be incorporated into recipes for additional apple flavor. For faster rehydration, briefly simmer in liquid for 5-10 minutes.
- How do I prevent dried apples from sticking to dehydrator trays?
Ensure apples are adequately pre-dried (not overly wet from treatment), use food-grade dehydrator sheets or parchment paper when necessary, and avoid under-drying which leaves sticky residues. Some naturally high-sugar varieties may require shorter initial high-heat periods to prevent caramelization.
- Can I dehydrate apple sauce or puree?
Yes! Apple sauce can be dried into fruit leather using special fruit leather trays or by spreading thinly on dehydrator sheets. This creates a completely different product—chewy, portable fruit leather rather than crispy chips. Add spices like cinnamon for enhanced flavor.
Explore the Powerful Ways Cinnamon Can Transform Your Garden Naturally
- How much fresh apple do I need for a pound of dried apples?
Generally, 10-12 pounds of fresh apples will yield approximately 1 pound of dried apples, depending on the variety’s moisture content and how thoroughly you dry them. Plan accordingly when purchasing or harvesting apples for dehydration projects.
Conclusion: Embracing the Dehydration Journey
Mastering apple dehydration opens up a world of possibilities that extends far beyond simple food preservation. It connects us to traditional preservation methods while providing modern convenience and nutrition.
Whether you’re drawn by the economic benefits, the satisfaction of self-sufficiency, or simply the incredible flavor of properly dried apples, this skill will serve you well for years to come.
As I write this, jars of this year’s apple harvest line my pantry shelves—each one a testament to autumn’s abundance captured for winter enjoyment. The process that once seemed daunting has become one of my favorite seasonal rituals, combining practical preservation with creative culinary expression.
Start small with a single variety and method, then expand your techniques as you gain confidence. Remember that each batch teaches you something new about timing, temperature, and technique.
Most importantly, don’t be discouraged by initial imperfections—even slightly imperfect dried apples are infinitely better than store-bought alternatives and represent your growing mastery of this ancient, valuable skill.
The investment in time and equipment pays dividends not just in pantry staples, but in the deep satisfaction of transforming seasonal abundance into year-round nourishment. Your future self will thank you when reaching for a jar of perfectly dried apples on a cold February afternoon, tasting sunshine and autumn in every concentrated, flavorful bite.