
How a simple Amazon delivery box changed my entire approach to gardening—and could revolutionize yours too
Picture this: It’s 2 AM, and I’m standing in my pajamas staring at my overgrown flower bed through the kitchen window, wondering how three weeks of vacation could turn my once-pristine garden into what looked like a miniature jungle.
The bindweed had staged a complete takeover, weaving through my prized roses like nature’s own barbed wire. That’s when my eyes fell on the stack of cardboard boxes by the recycling bin—remnants from my pre-vacation online shopping spree—and a lightbulb moment struck.
Little did I know that this middle-of-the-night revelation would not only solve my immediate weed crisis but introduce me to one of the most effective, eco-friendly, and budget-conscious gardening techniques I’ve ever used.
Six months later, my garden is virtually weed-free, my soil health has improved dramatically, and I’ve become that neighbor who actually gets excited about deliveries—not for what’s inside the box, but for the box itself.
If you’re tired of the endless cycle of weeding, concerned about chemical herbicides, or simply looking for a sustainable solution that actually works, cardboard weed control might just be the game-changer your garden needs.
Read The Complete Guide to Garden Weeding: Tips, Tools & Natural Methods
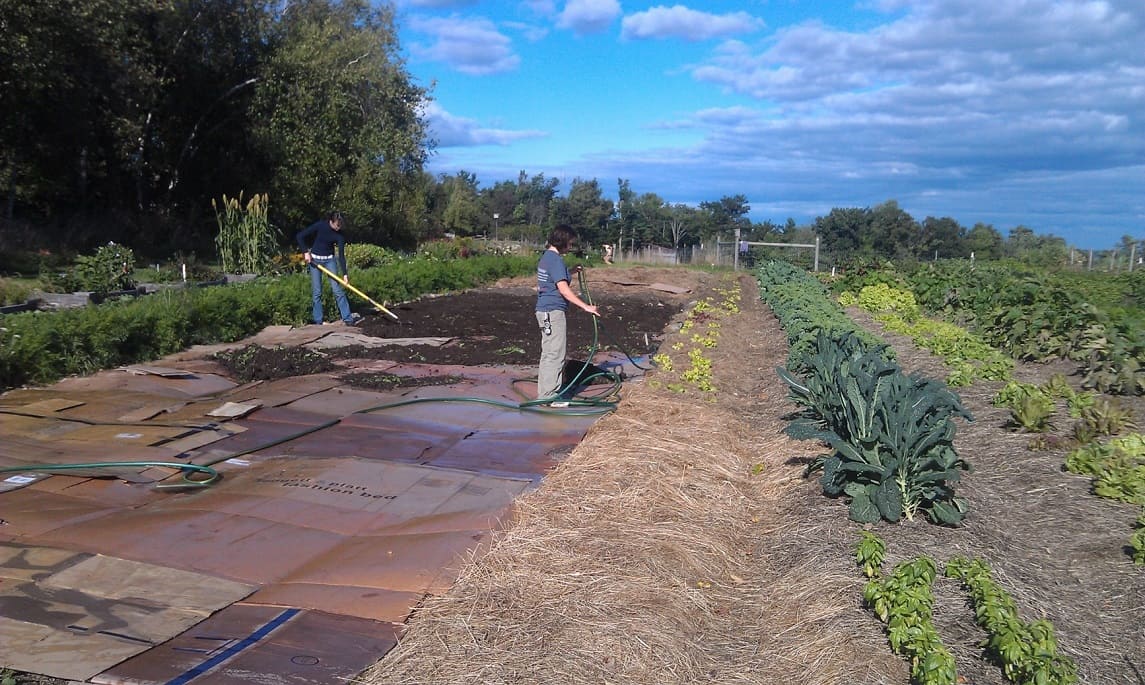
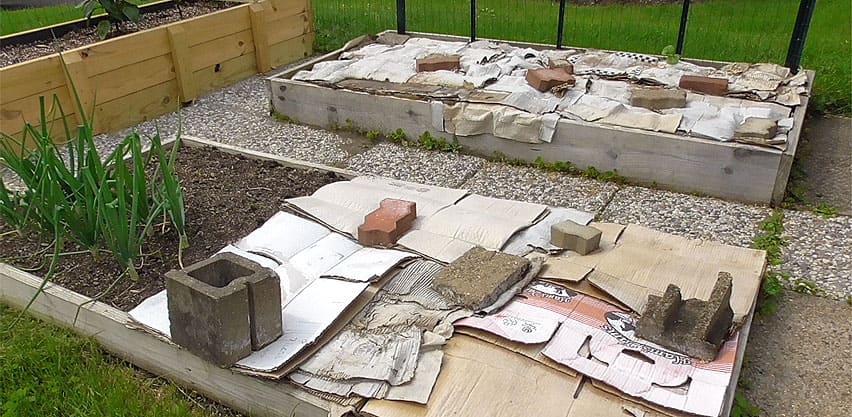
What Is Cardboard Weed Control and Why Does It Work?
Cardboard weed control, also known as sheet mulching, is a permaculture technique that uses large pieces of cardboard as a biodegradable barrier to suppress weeds while enriching your soil.
Unlike synthetic landscape fabrics that create long-term problems, cardboard provides temporary suppression that gradually decomposes, feeding your soil and supporting beneficial organisms.
The Science Behind the Success
Weeds need three essential elements to thrive: sunlight, water, and nutrients. Cardboard disrupts this equation by:
- Blocking Photosynthesis: The opaque barrier prevents sunlight from reaching existing weeds and germinating seeds, essentially starving them of the energy they need to grow.
- Creating Physical Obstruction: Most weed shoots cannot penetrate properly installed cardboard, forcing them to exhaust their energy reserves trying to reach the surface.
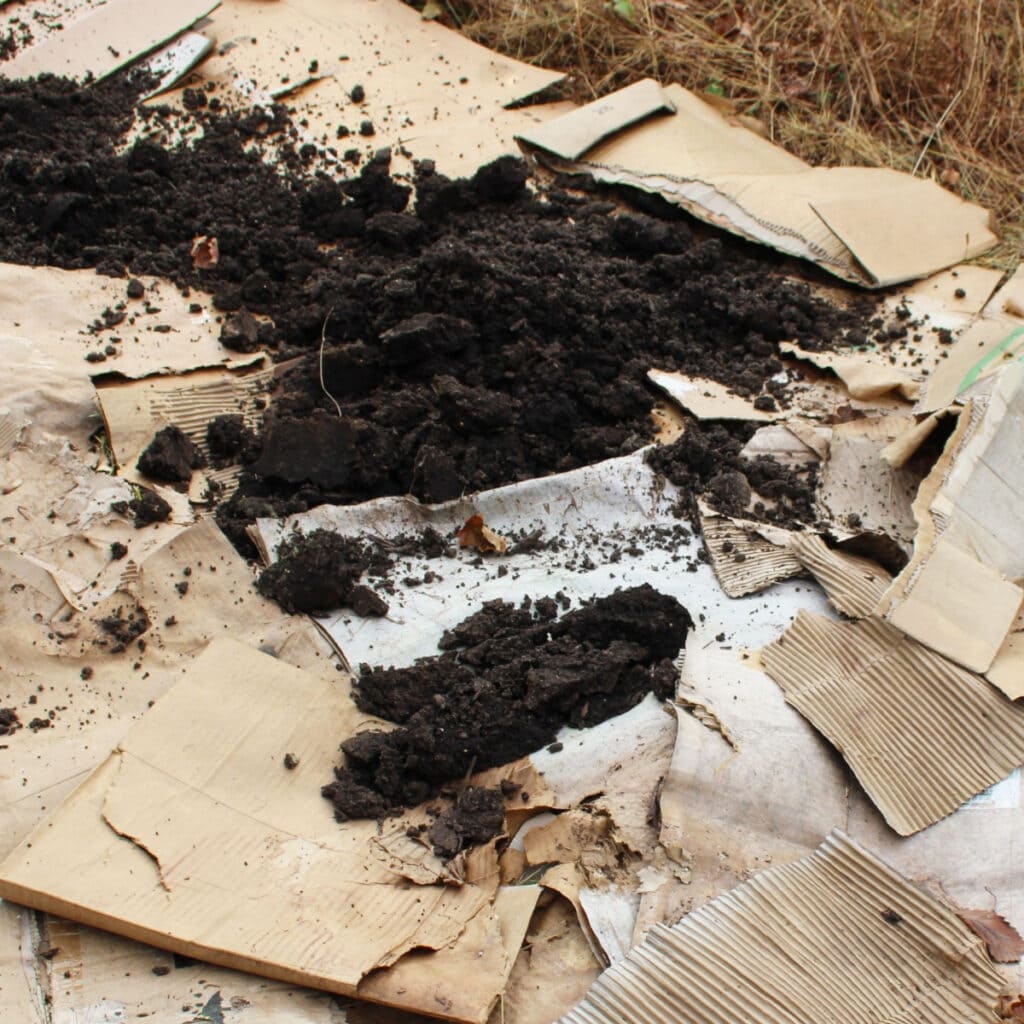
- Encouraging Decomposition: As the cardboard breaks down, it adds carbon to your soil while creating an environment that earthworms and beneficial microorganisms love.
- Retaining Moisture: The cardboard layer helps conserve soil moisture for your desired plants while making it harder for drought-resistant weeds to establish.
The Comprehensive Benefits: Why Cardboard Beats the Alternatives
Environmental Advantages
- Zero Chemical Impact: Unlike herbicides that can persist in soil and groundwater, cardboard leaves no toxic residue. In fact, modern cardboard uses soy-based inks that are completely biodegradable.
- Waste Reduction: Instead of sending cardboard to recycling facilities (which requires energy and transportation), you’re giving it a second life in your garden.
- Soil Health Enhancement: As cardboard decomposes, it adds organic matter, improves soil structure, and increases the cation exchange capacity—essentially creating better growing conditions for your plants.
- Wildlife Support: Unlike plastic barriers, cardboard allows earthworms, beneficial insects, and soil microorganisms to thrive and eventually penetrate the barrier as it decomposes.
Find out How ‘Rural Earthworms’ Transformed Worm Farming Success in Australia
Economic Benefits
- Cost-Effective: Free if you use household cardboard, or extremely affordable if purchased specifically for gardening.
- Long-Term Savings: Reduces the need for repeated herbicide applications, replacement of landscape fabric, and hours of manual weeding.
- No Special Tools Required: Unlike landscape fabric installation, cardboard application requires only basic tools you likely already own.
Practical Advantages Over Landscape Fabric
- No Long-Term Cleanup: Landscape fabric eventually tears, gets overgrown, and becomes a nightmare to remove. Cardboard simply disappears into your soil.
- Better Water and Air Permeability: While landscape fabric can become clogged with decomposing mulch, cardboard maintains better soil breathing and water infiltration.
- Easier Plant Installation: Cutting through cardboard for new plantings is simpler than dealing with synthetic materials.
- No Root Girdling: Perennial plants won’t get strangled by decomposing cardboard the way they can with synthetic barriers.
Types of Cardboard: Choosing Your Weapon Wisely
Best Options for Weed Control
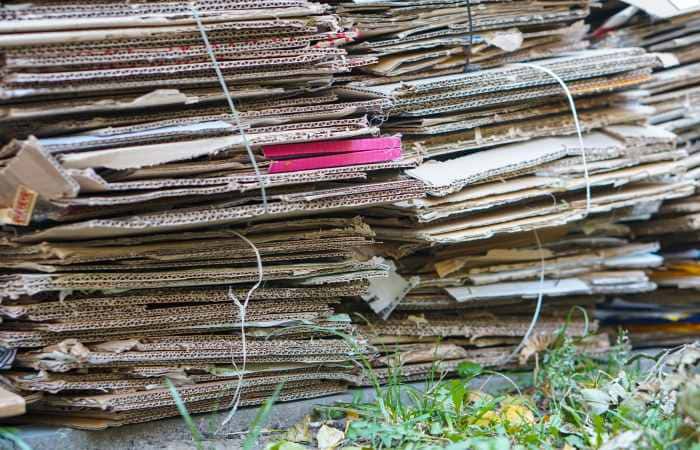
- Corrugated Cardboard: The gold standard for sheet mulching. Its layered structure provides excellent weed suppression while maintaining adequate water permeability. Amazon boxes, appliance packaging, and moving boxes fall into this category.

- Single-Wall vs. Double-Wall: Single-wall (one corrugated layer) works well for most applications and decomposes in 4-8 months. Double-wall (two corrugated layers) provides longer-lasting suppression for particularly stubborn weeds but may take 8-12 months to fully decompose.
- Large Format Pieces: Refrigerator, washing machine, or furniture boxes provide the most efficient coverage with fewer seams where weeds can escape.
Cardboard to Avoid
- Waxed or Glossy Cardboard: Often used for produce boxes or frozen food packaging. The wax coating repels water and significantly slows decomposition.
- Heavily Printed Materials: While small amounts of ink are fine, avoid cardboard with extensive color printing, especially metallics or plastics-based inks.
- Treated or Laminated Cardboard: Any cardboard with plastic coating, foil backing, or chemical treatments should be avoided.
- Pizza Boxes: Contrary to popular belief, most pizza boxes are actually fine to use, as the small amount of food residue decomposes quickly and the grease spots are minimal.
The Complete Installation Guide: Step-by-Step Success
Phase 1: Preparation and Planning
Timing Considerations:
The best time to install cardboard depends on your goals and climate:
- Fall Installation: Ideal for most climates. Gives winter moisture time to break down existing vegetation and begin cardboard decomposition.
- Late Winter/Early Spring: Works well if you want to plant in the same season. Allows 2-3 months for initial breakdown.
- Mid-Spring: Can work but requires more vigilance as growing weeds have more energy to push through gaps.
Site Assessment:
- Identify your most problematic weed areas first
- Note existing desirable plants that need protection
- Consider drainage patterns and slope
- Plan your cardboard layout to minimize seams in high-traffic areas
Material Calculation:
Plan for 10-15% extra cardboard to account for overlaps and mistakes. A general rule: 1,000 square feet requires approximately 15-20 large boxes, depending on their size.
Phase 2: Site Preparation
Weed Management: You have several options depending on the severity of your weed problem:
- Light Weed Pressure: Simply mow or trim weeds as short as possible. The cardboard will handle the rest.
- Moderate Weed Pressure: Cut weeds to 2-3 inches, then proceed with cardboard installation. The short stubble actually helps the cardboard conform to ground contours.
- Heavy Weed Pressure: For areas with thick grass or persistent perennial weeds, consider removing the most vigorous specimens by hand first, focusing on deep-rooted perennials like dandelions or dock.
Special Consideration for Aggressive Perennials:
Some weeds deserve extra attention before cardboard installation. From my experience, bamboo, mint, and certain grasses can be persistent enough to eventually penetrate even well-installed cardboard. For these, I’ve learned to dig out the main root systems first—a bit of extra work that saves major headaches later.
Soil Preparation:
- Remove large rocks, debris, or tree branches that could create gaps under the cardboard
- If your soil is extremely compacted, consider light cultivation (just enough to improve water infiltration)
- For poor soil conditions, add a thin layer of compost before cardboard installation
Here’s How to Prepare Land for Planting With A Comprehensive Guide for Gardeners and Farmers
Phase 3: Cardboard Installation
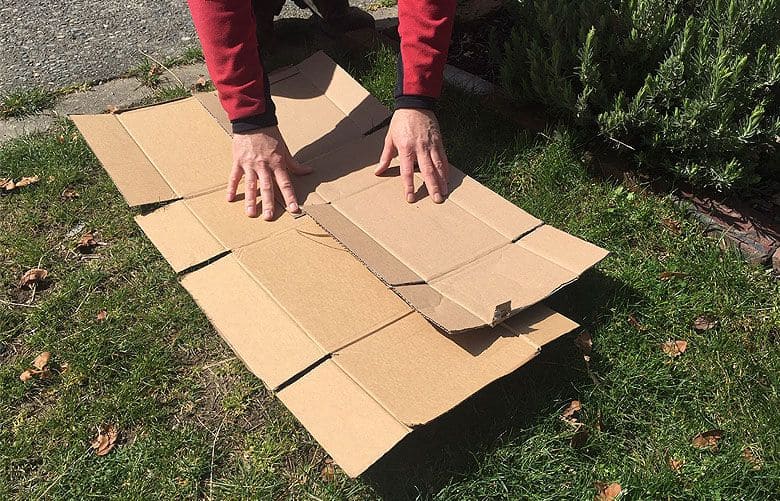
Preparation of Materials:
- Remove all tape, staples, labels, and plastic components
- Keep corrugated structure intact—don’t flatten the boxes completely as some air pockets actually aid in water movement
- Have your hose ready for immediate watering
Layout Strategy:
Start from one end and work systematically to avoid walking on already-installed cardboard. I learned this the hard way during my first installation when I created several foot-shaped holes that later became perfect weed escape routes.

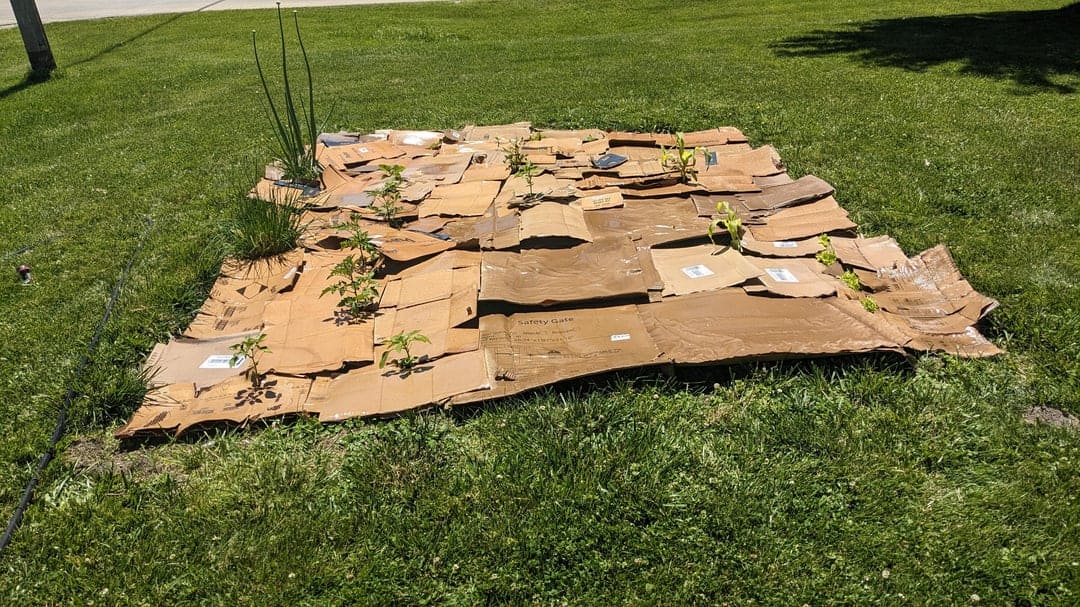
Overlap Technique:
- Overlap pieces by 6-8 inches minimum
- Pay special attention to box flaps and seams—these are the most common failure points
- For slopes or windy areas, increase overlap to 10-12 inches
Edge Management:
Create clean edges by either:
- Digging a shallow (2-3 inch) trench along borders to tuck cardboard edges
- Using landscape edging to hold cardboard in place
- Ensuring cardboard extends slightly beyond your planned mulch area
Immediate Watering:
This step is crucial and often overlooked. Thoroughly saturate the cardboard immediately after installation. This serves multiple purposes:
- Adds weight to prevent wind displacement
- Begins the decomposition process
- Helps cardboard conform to ground contours
- Creates better contact with soil below
I remember one breezy spring day when I thought I could skip the watering step and apply mulch the next morning. I came out to find half my cardboard installation had relocated to my neighbor’s yard—a lesson in the importance of immediate saturation!
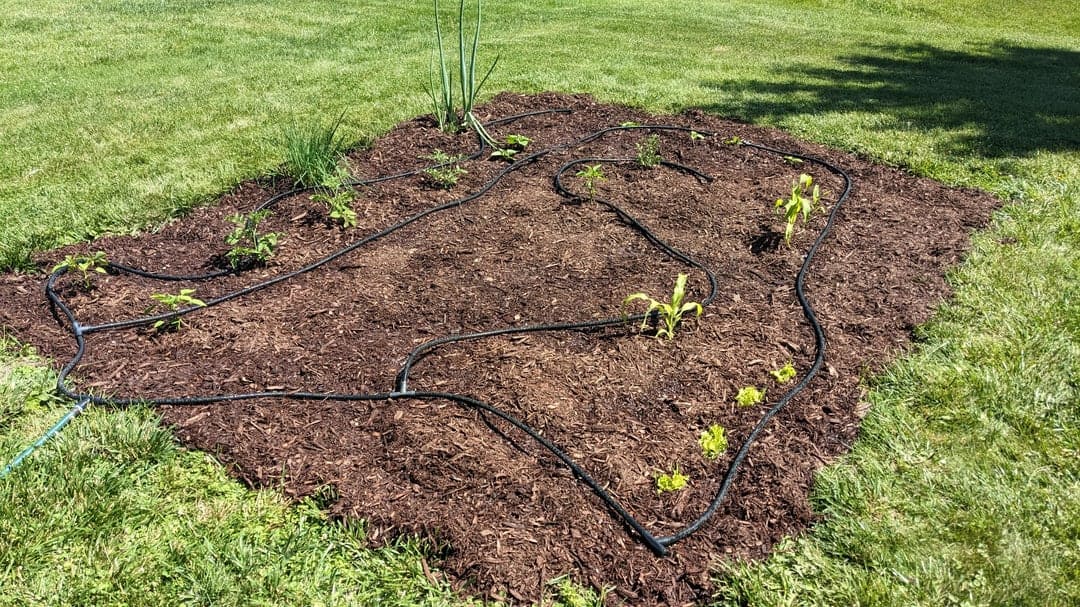
Phase 4: Mulch Application
Mulch Selection by Purpose:
For Ornamental Beds:
- Shredded hardwood bark: attractive, moderate decomposition rate
- Pine needles: excellent for acid-loving plants, good weed suppression
- Leaf mold: enriches soil quickly, may need more frequent replenishment
Explore 11 Creative Ways to Use Pine Cones in Your Garden
For Vegetable Gardens:
- Straw: allows easy planting through cardboard, excellent weed suppression
- Grass clippings: quick breakdown, high nitrogen content
- Compost: immediate soil improvement, supports rapid plant establishment
For Pathways:
- Wood chips: long-lasting, professional appearance
- Crushed leaves: free and effective, though may blow in windy areas
Here’s How to Turn Fall Leaves into Soil Enriching Mulch For a Nutrient-Rich Garden
Application Depth:
- Minimum 4 inches for effective weed suppression
- 6 inches for areas with persistent weed problems
- 8 inches for pathways or areas that won’t be planted
Special Mulching Techniques:
For the most professional appearance, apply mulch in two stages: a thin base layer (2 inches) immediately after cardboard installation, then the remaining depth after the cardboard has had a week to settle and conform to the ground.
Planting Through Cardboard: Making It Work
When to Plant
Timing Guidelines:
- Immediate Planting: Possible with larger transplants and adequate mulch depth
- 4-6 Weeks Later: Ideal for most situations, allows initial cardboard softening
- 6+ Months Later: Best for soil health, full cardboard decomposition
Planting Techniques
- The X-Cut Method: Make an X-shaped cut in the cardboard where you want to plant. For small plants, make cuts about 4 inches long on each side. For larger shrubs or perennials, expand to 8-12 inches.
- The Plug Method: Remove a circular section of cardboard completely. This works well for areas where you plan multiple plants in close proximity.
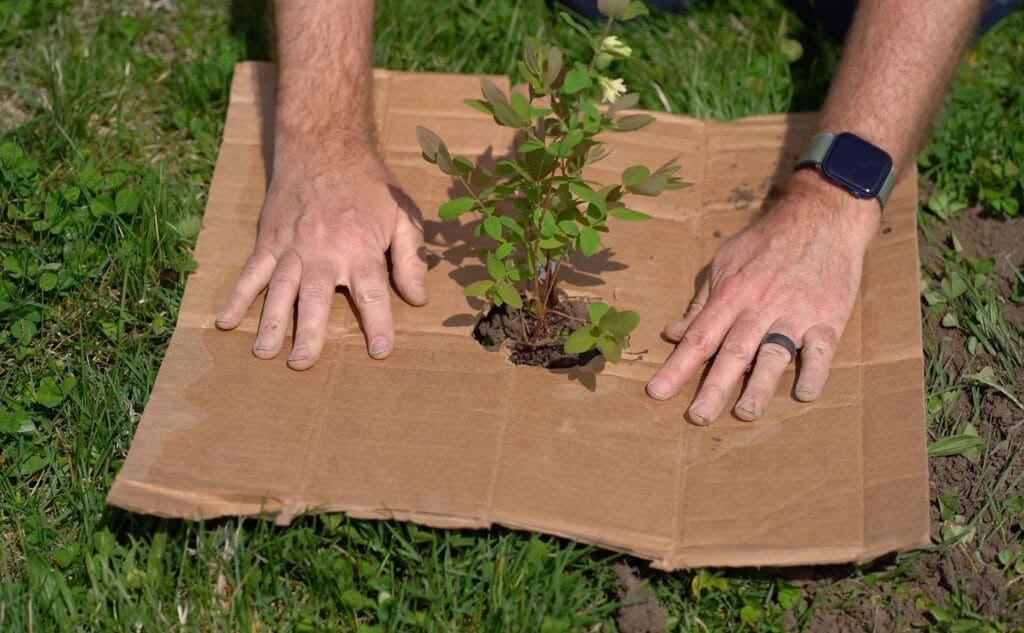
- The Fold-Back Technique: Instead of removing cardboard entirely, cut three sides of a square and fold the flap back. This allows planting while maintaining maximum weed suppression around the plant.
Plant-Specific Considerations
- Vegetables: Work best with the plug method and rich compost added to the planting hole. Root crops may need larger openings for proper development.
- Perennials: Generally handle X-cuts well, but consider their mature size when determining opening size.
- Shrubs and Trees: Often benefit from removing cardboard in a 3-foot diameter circle around the planting site to ensure unrestricted root development.
Troubleshooting Common Problems
Weed Breakthrough Issues
- Problem: Weeds growing through cardboard seams; Solution: Add additional cardboard patches with generous overlap, or spot-treat with thicker mulch application
- Problem: Vigorous perennials pushing through cardboard; Solution: Apply a second layer of cardboard specifically over problem areas, or remove the persistent weed manually and patch the hole
Decomposition Problems
- Problem: Cardboard not breaking down after 8+ months; Solution: Usually indicates insufficient moisture. Increase watering frequency and ensure mulch is allowing water penetration. Pull back mulch and check moisture levels regularly.
- Problem: Cardboard decomposing too quickly (less than 3 months); Solution: Often occurs in very wet climates or with thin cardboard. Plan for this by having replacement material ready, or use double-wall cardboard initially.
Installation Issues
- Problem: Cardboard shifting or lifting; Solution: Increase watering frequency, add more weight with additional mulch, or use temporary weights (rocks, bricks) while cardboard settles
- Problem: Difficulty cutting through cardboard for planting; Solution: Use a sharp utility knife and work when cardboard is slightly moist but not saturated
Seasonal Maintenance and Long-Term Management
Spring Maintenance
- Inspect for winter damage or shifted cardboard
- Add fresh mulch as needed
- Address any weed breakthrough promptly
- Plan new installations for areas where cardboard has fully decomposed
Summer Care
- Monitor moisture levels under mulch
- Watch for pest issues (rare but possible)
- Maintain mulch depth as materials decompose
- Document successful and problematic areas for future reference
Fall Preparation
- Install new cardboard areas while soil is still warm
- Collect fallen leaves for additional mulch material
- Plan next year’s expansion areas
Long-term Soil Health
After 1-2 years of cardboard mulching, most gardeners notice:
- Improved soil structure and increased organic matter
- Enhanced earthworm populations
- Better water retention and drainage
- Reduced need for fertilizers due to improved soil biology
Regional Considerations and Climate Adaptations
Hot, Dry Climates
- Use thicker cardboard or double layers for longer-lasting suppression
- Apply extra mulch depth (6-8 inches) for moisture retention
- Consider lighter-colored mulch to reflect heat
- May need supplemental watering during establishment
Wet, Humid Climates
- Choose well-draining mulch materials to prevent fungal issues
- Monitor for faster cardboard decomposition
- Be prepared to refresh installations more frequently
- Watch for slug and snail populations (they love moist cardboard)
Cold Winter Areas
- Install cardboard in fall for spring planting
- Use freeze-thaw cycles to your advantage for breaking down tough weeds
- Snow cover can actually help insulate and maintain cardboard moisture
High Wind Areas
- Use extra stakes or weights during initial installation
- Choose heavier mulch materials
- Install windbreaks if necessary
- Consider partial installations rather than large open areas
Integration with Different Garden Styles
Vegetable Gardens
Cardboard works excellently in vegetable gardens but requires specific techniques:
- Create permanent pathways with cardboard and durable mulch
- Use seasonal installations in beds between crops
- Plan for easy removal when tilling is necessary
- Consider raised bed integration for permanent weed suppression
Here’s How to Create a Fun and Educational Vegetable Garden for Kids
Perennial Borders
- Install cardboard around established plants, leaving adequate root space
- Plan for long-term plantings by using degradable stakes for marking
- Integrate with existing irrigation systems
- Consider aesthetic impacts during the decomposition period
Native Plant Gardens
- Excellent for establishing new native plantings
- Helps suppress invasive species during establishment
- Choose mulch materials that complement native plant requirements
- Plan installation timing to align with optimal native plant planting seasons
Formal Landscapes
- Focus on hidden areas and utility spaces
- Use refined mulch materials for aesthetic appeal
- Plan installations during dormant seasons to minimize visual impact
- Consider professional installation for highly visible areas
Safety Considerations and Environmental Impact
Termite Considerations
In termite-prone areas, take precautions:
- Don’t install cardboard within 12 inches of building foundations
- Monitor for increased termite activity (rare but possible)
- Consider alternative materials for permanent installations near structures
- Consult local extension services for region-specific recommendations
Pet and Wildlife Safety
- Cardboard is generally safe for pets and wildlife
- Avoid using cardboard treated with pesticides (rare in consumer packaging)
- Monitor for temporary increases in rodent activity during initial decomposition
- Ensure adequate airflow to prevent anaerobic conditions that might create unpleasant odors
Learn about Creating a Dog-Friendly Garden With Smart Design Tips for Pet Owners
Water Quality Protection
- Cardboard installation can actually improve water quality by reducing runoff and increasing infiltration
- Avoid installation on steep slopes where erosion might be a concern
- Use organic mulch materials to prevent contamination
- Consider impact on nearby water features or drainage systems
Cost-Benefit Analysis: Is It Worth It?
Initial Investment
- Free Option: Using household and business cardboard waste
- Low-Cost Option: $50-100 for purchased cardboard and basic mulch for 1,000 sq ft
- Premium Option: $150-300 including high-quality organic mulch and soil amendments
Long-term Savings
- Reduced Labor: 60-80% reduction in weeding time after first year
- Lower Input Costs: Reduced need for herbicides, fertilizers, and soil amendments
- Water Savings: 20-30% reduction in irrigation needs due to improved moisture retention
- Plant Health: Reduced plant replacement costs due to improved growing conditions
Comparison with Alternatives
- vs. Landscape Fabric: Lower upfront cost, better long-term soil health, easier maintenance
- vs. Chemical Control: Comparable initial cost, significant savings over time, environmental benefits
- vs. Manual Weeding: Higher upfront investment, massive time savings, better long-term results
Advanced Techniques and Innovations
Lasagna Gardening Integration
Combine cardboard with layered organic materials for accelerated soil building:
- Install cardboard as base layer
- Add alternating layers of carbon-rich (dried leaves, straw) and nitrogen-rich (grass clippings, kitchen scraps) materials
- Top with finished compost
- Plant directly into the constructed bed
Seasonal Sheet Mulching
Use cardboard strategically for different seasons:
- Winter Protection: Cover sensitive plants with cardboard and mulch for insulation
- Summer Cooling: Install cardboard pathways to reduce soil temperature
- Fall Preparation: Create new beds while garden is winding down
Cardboard and Cover Crops
Combine cardboard suppression with cover crop establishment:
- Install cardboard with strategic openings
- Plant cover crops in openings
- Allow cover crops to establish while cardboard suppresses weeds
- Till cover crops into soil after cardboard decomposes
Common Myths and Misconceptions Debunked
- “Cardboard Prevents Oxygen from Reaching Soil”
Reality: While cardboard does reduce air exchange initially, this effect is temporary and minimal compared to synthetic barriers. Properly installed cardboard with adequate mulch actually improves long-term soil aeration as it decomposes.
- “Cardboard Attracts Termites”
Reality: Termites are attracted to cellulose, but cardboard doesn’t significantly increase risk when used properly. The bigger concern is maintaining appropriate distances from structures and monitoring existing termite activity.
- “You Can’t Plant Through Cardboard”
Reality: Planting through cardboard is not only possible but often beneficial, as the decomposing material provides slow-release nutrients right at the root zone.
- “Cardboard Weed Control Doesn’t Work Long-term”
Reality: While cardboard itself is temporary, the soil improvements and reduced weed seed bank create lasting benefits that extend well beyond the cardboard’s decomposition.
Frequently Asked Questions
- Q: How long does cardboard take to decompose completely?
A: Decomposition time varies from 4-12 months depending on cardboard thickness, moisture levels, soil temperature, and microbial activity. Single-wall corrugated typically decomposes in 4-6 months, while double-wall may take 8-12 months.
- Q: Can I use cardboard from online deliveries?
A: Yes, most shipping boxes are perfect for weed control. Just remove tape, labels, and staples. Avoid boxes with excessive wax coating or plastic elements.
- Q: Will cardboard prevent my plants from getting water?
A: Initially, cardboard may slow water penetration slightly, but as it begins to decompose (within 2-4 weeks), water movement improves. Proper mulching and initial saturation help ensure adequate moisture reaches plant roots.
- Q: What’s the biggest mistake people make with cardboard weed control?
A: The most common failure is inadequate overlap at seams. Weeds are incredibly persistent and will find even small gaps to exploit. Always overlap by at least 6 inches and pay extra attention to box flaps and corners.
- Q: Can I use colored or printed cardboard?
A: Small amounts of printing are fine, as most modern inks are soy-based and biodegradable. Avoid heavily printed materials, metallics, or plastic-based inks. When in doubt, choose plain brown cardboard.
- Q: Is cardboard weed control safe for vegetable gardens?
A: Yes, cardboard is safe for food production. Modern cardboard uses food-safe adhesives and soy-based inks. Many organic farms use cardboard mulching as a standard practice.
- Q: How do I handle slopes and uneven terrain?
A: For slopes, increase overlap to 10-12 inches and use additional weights or stakes during installation. Consider terracing or installing across the slope rather than up and down to prevent shifting.
- Q: What should I do if weeds start growing through the cardboard?
A: Small breakthrough weeds can be hand-pulled easily. For larger problems, add additional cardboard patches or increase mulch depth. The key is addressing breakthrough quickly before weeds become established.
Conclusion: Embracing the Cardboard Revolution
As I write this, it’s been two full growing seasons since that late-night epiphany changed my approach to garden maintenance.
My flower beds, once a source of weekend-consuming frustration, now require minimal intervention while supporting healthier, more vigorous plants than ever before. The soil that was once compacted and depleted now teems with earthworms and beneficial microorganisms.
But perhaps the most surprising benefit has been the shift in mindset that cardboard mulching created. Instead of seeing garden maintenance as a battle against nature, I now view it as a collaboration.
The weeds still appear, but they’re manageable. The soil still needs attention, but it’s improving each season rather than degrading. My garden has become a living system that works with me rather than against me.
The technique isn’t perfect—no garden method is. There are situations where other approaches work better, climates where modifications are necessary, and plants that require special consideration.
But for the vast majority of gardeners dealing with the universal challenge of weed control, cardboard offers a solution that’s simultaneously effective, sustainable, economical, and environmentally responsible.
Whether you’re starting a new garden bed, renovating an existing space, or simply tired of the endless cycle of weeding and re-weeding, cardboard weed control offers a path forward that works with natural processes rather than against them.
The next time you receive a delivery, before you break down that box for recycling, consider its potential as a garden ally. Your soil, your plants, your back, and your schedule will thank you.
The transformation won’t happen overnight, but it will happen. And six months from now, when you’re admiring your thriving, virtually weed-free garden while your neighbors are still battling bindweed and crabgrass, you’ll understand why this simple brown material has become such a powerful tool in the sustainable gardener’s arsenal.
Sometimes the best solutions are hiding in plain sight—or in this case, hiding in your recycling bin.