
Picture this: You’re standing in your garage, surveying the aftermath of a weekend woodworking project. Sawdust coats every surface like golden snow, and you’re faced with the age-old question—what do you do with all this wood debris?
Three years ago, I found myself in exactly this situation after building raised beds for my vegetable garden. My neighbor, watching me sweep piles of sawdust into trash bags, shook his head and said something that changed my composting game forever: “You’re throwing away garden gold.”
That conversation led me down a fascinating rabbit hole of sawdust composting that transformed both my garden and my approach to waste.
Here’s everything I’ve learned about turning sawdust from workshop burden into composting treasure—including the mistakes that taught me the most valuable lessons.
Why Sawdust Is Composting Gold (When Done Right)
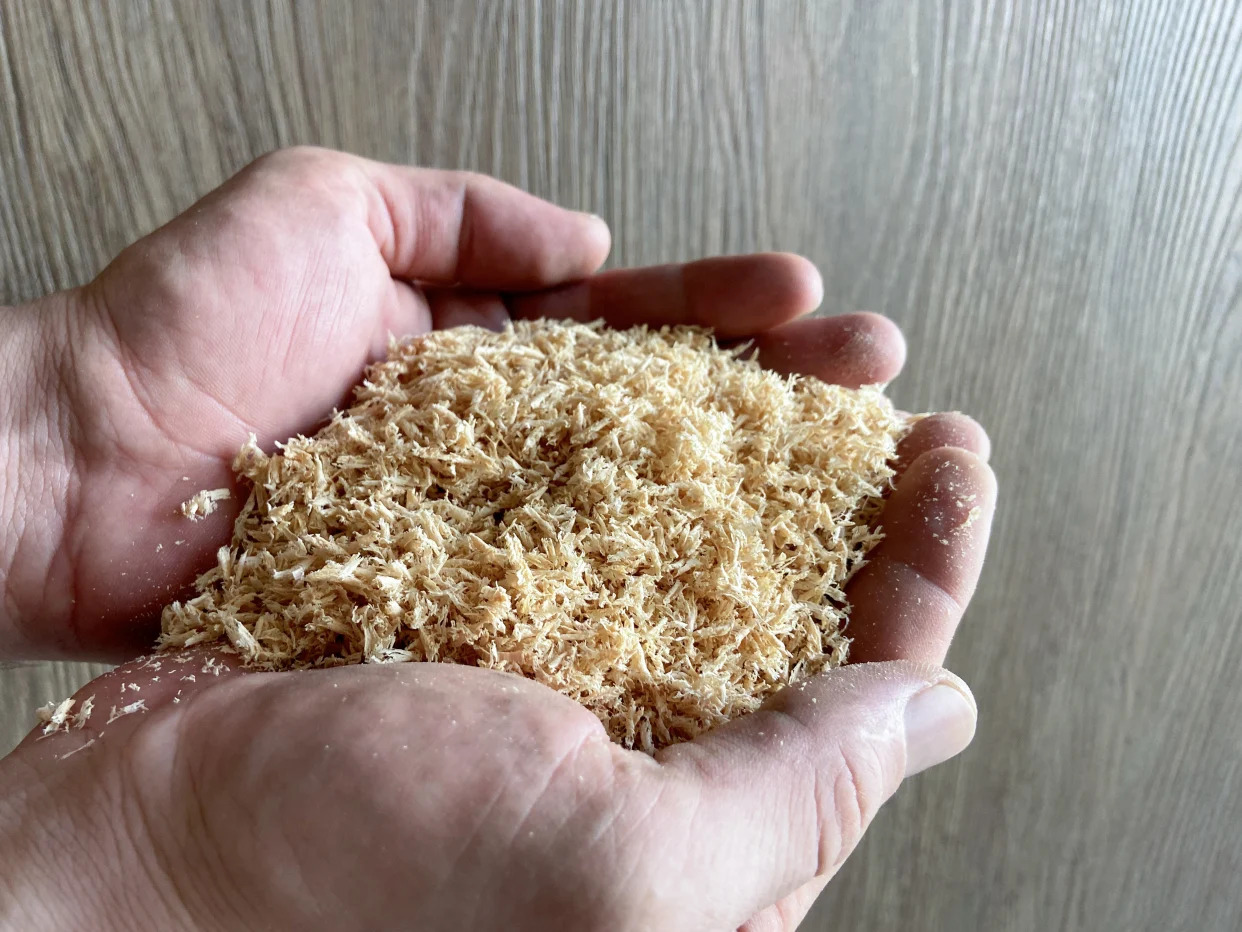
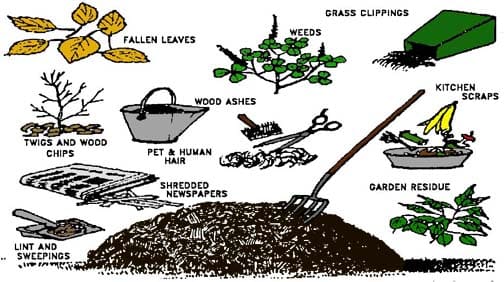
Sawdust is essentially nature’s confetti—tiny particles of once-living wood that are loaded with carbon. In composting terms, it’s what we call a “brown” material, joining the ranks of dry leaves, cardboard, and straw. But sawdust brings some unique advantages that make it worth the extra effort.
The magic happens because sawdust contains lignin, a complex compound that gives wood its strength. While lignin resists quick decomposition (which is why your deck doesn’t dissolve in the rain), it eventually becomes the backbone of rich, stable soil organic matter.
Think of lignin as nature’s slow-release soil amendment that acts like microscopic glue, binding soil particles together and creating those coveted aggregates that hold water and nutrients while still allowing proper drainage.
This process creates what soil scientists call “stable humus”—the dark, rich organic matter that can improve your soil structure for decades. Unlike quick-decomposing materials that provide a temporary nutrient boost, properly composted sawdust becomes a permanent soil improvement.
The Critical Safety Warning: Not All Sawdust Is Safe
Here’s where many composting guides fail you—they don’t adequately warn about the sawdust that can turn your compost pile into a toxic waste site. Not all sawdust is created equal, and some varieties pose serious risks to both your garden and your health.
The Hidden Dangers in Modern Wood Products
Last spring, I visited a community garden where volunteers had been unknowingly adding contaminated sawdust to their compost for months.
The source? A well-meaning woodworker who hadn’t realized that his MDF and plywood offcuts contained formaldehyde-based glues. The result was compost that stunted or killed every plant they tried to grow in it.
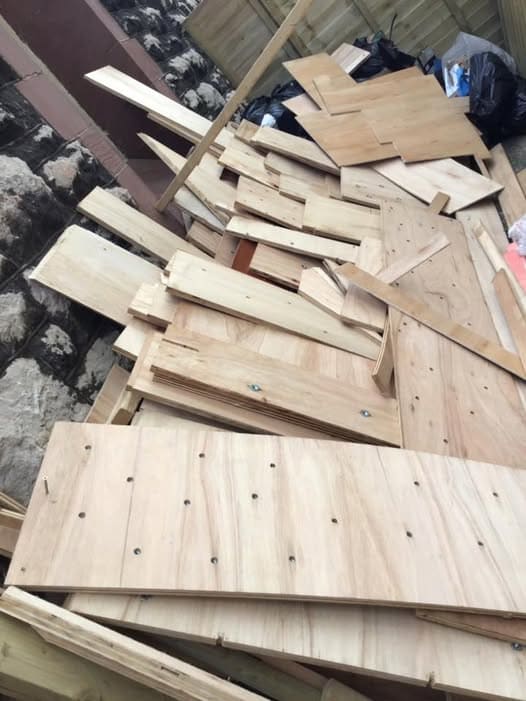
Never use sawdust from these materials:
- Engineered Wood Products – MDF, particleboard, and plywood contain urea-formaldehyde or phenol-formaldehyde adhesives. When these break down, they release formaldehyde, a probable carcinogen that also inhibits beneficial soil microorganisms.
- Treated Lumber – CCA (chromated copper arsenate) treated wood contains arsenic, chromium, and copper. Even decades-old treated lumber can leach these heavy metals into your soil, where they accumulate and can enter your food chain.
- Painted or Finished Wood – Paints, stains, varnishes, and other finishes contain various toxic compounds including heavy metals, volatile organic compounds, and synthetic resins.
- Melamine-Coated Products – The plastic coating contains formaldehyde-based resins that don’t break down safely in compost.
How to Identify Safe Sawdust Sources
The safest approach is controlling your source from the start. Here’s my hierarchy of sawdust safety:
Ideal Sources:
- Your own sawdust from known, untreated solid wood
- Local sawmills processing natural lumber
- Woodworkers who use only solid, untreated wood
- Tree service companies (fresh sawdust from tree removal)
Red Flag Sources:
- Cabinet shops (often use plywood and MDF)
- Construction sites (mixed materials, often treated)
- Furniture manufacturers (engineered products, finishes)
- Unknown origin sawdust (never worth the risk)
Simple Safety Check: When in doubt, ask these questions: What type of wood? Has it been treated? Are there any glues or finishes involved? If you can’t get clear answers, find another source.
Understanding the Science: Carbon-to-Nitrogen Ratios
This is where sawdust gets tricky. While most brown materials have modest carbon-to-nitrogen ratios, sawdust is in a league of its own. Fresh sawdust typically has a C:N ratio between 200:1 and 500:1, while your compost pile needs a ratio around 25-30:1 for optimal decomposition.
To put this in perspective, if regular composting is like cooking a balanced meal, composting with sawdust is like trying to balance a meal that’s 90% bread. You need massive amounts of protein (nitrogen) to make it work.
The Real Math Behind Successful Sawdust Composting
Through years of trial and error, I’ve developed working ratios that actually function in the real world:
For new compost piles:
- 2 parts sawdust (by volume)
- 3 parts high-nitrogen materials
- 1 part soil or finished compost (for microbial inoculation)
For adding sawdust to existing piles:
- Never more than 25% of total pile volume
- Always add extra nitrogen sources when adding sawdust
- Increase moisture monitoring frequency
Nitrogen Sources That Actually Move the Needle
- Fresh grass clippings are excellent but timing-sensitive. Grass loses its nitrogen punch within days, so use clippings within 48 hours of cutting for maximum impact.
- Kitchen scraps work well in combination with other nitrogen sources. Vegetable peels, fruit scraps, and coffee grounds all contribute, but you’ll need large quantities to balance significant amounts of sawdust.
- Manure is the powerhouse nitrogen source. Fresh chicken, rabbit, or horse manure provides both nitrogen and beneficial microorganisms. A few shovelfuls can transform a sluggish sawdust pile.
- The unconventional solution that works incredibly well is human urine. With a C:N ratio of about 0.8:1, diluted urine (1 part urine to 10 parts water) can jump-start even the most stubborn sawdust pile. It sounds strange, but it’s scientifically sound and remarkably effective.
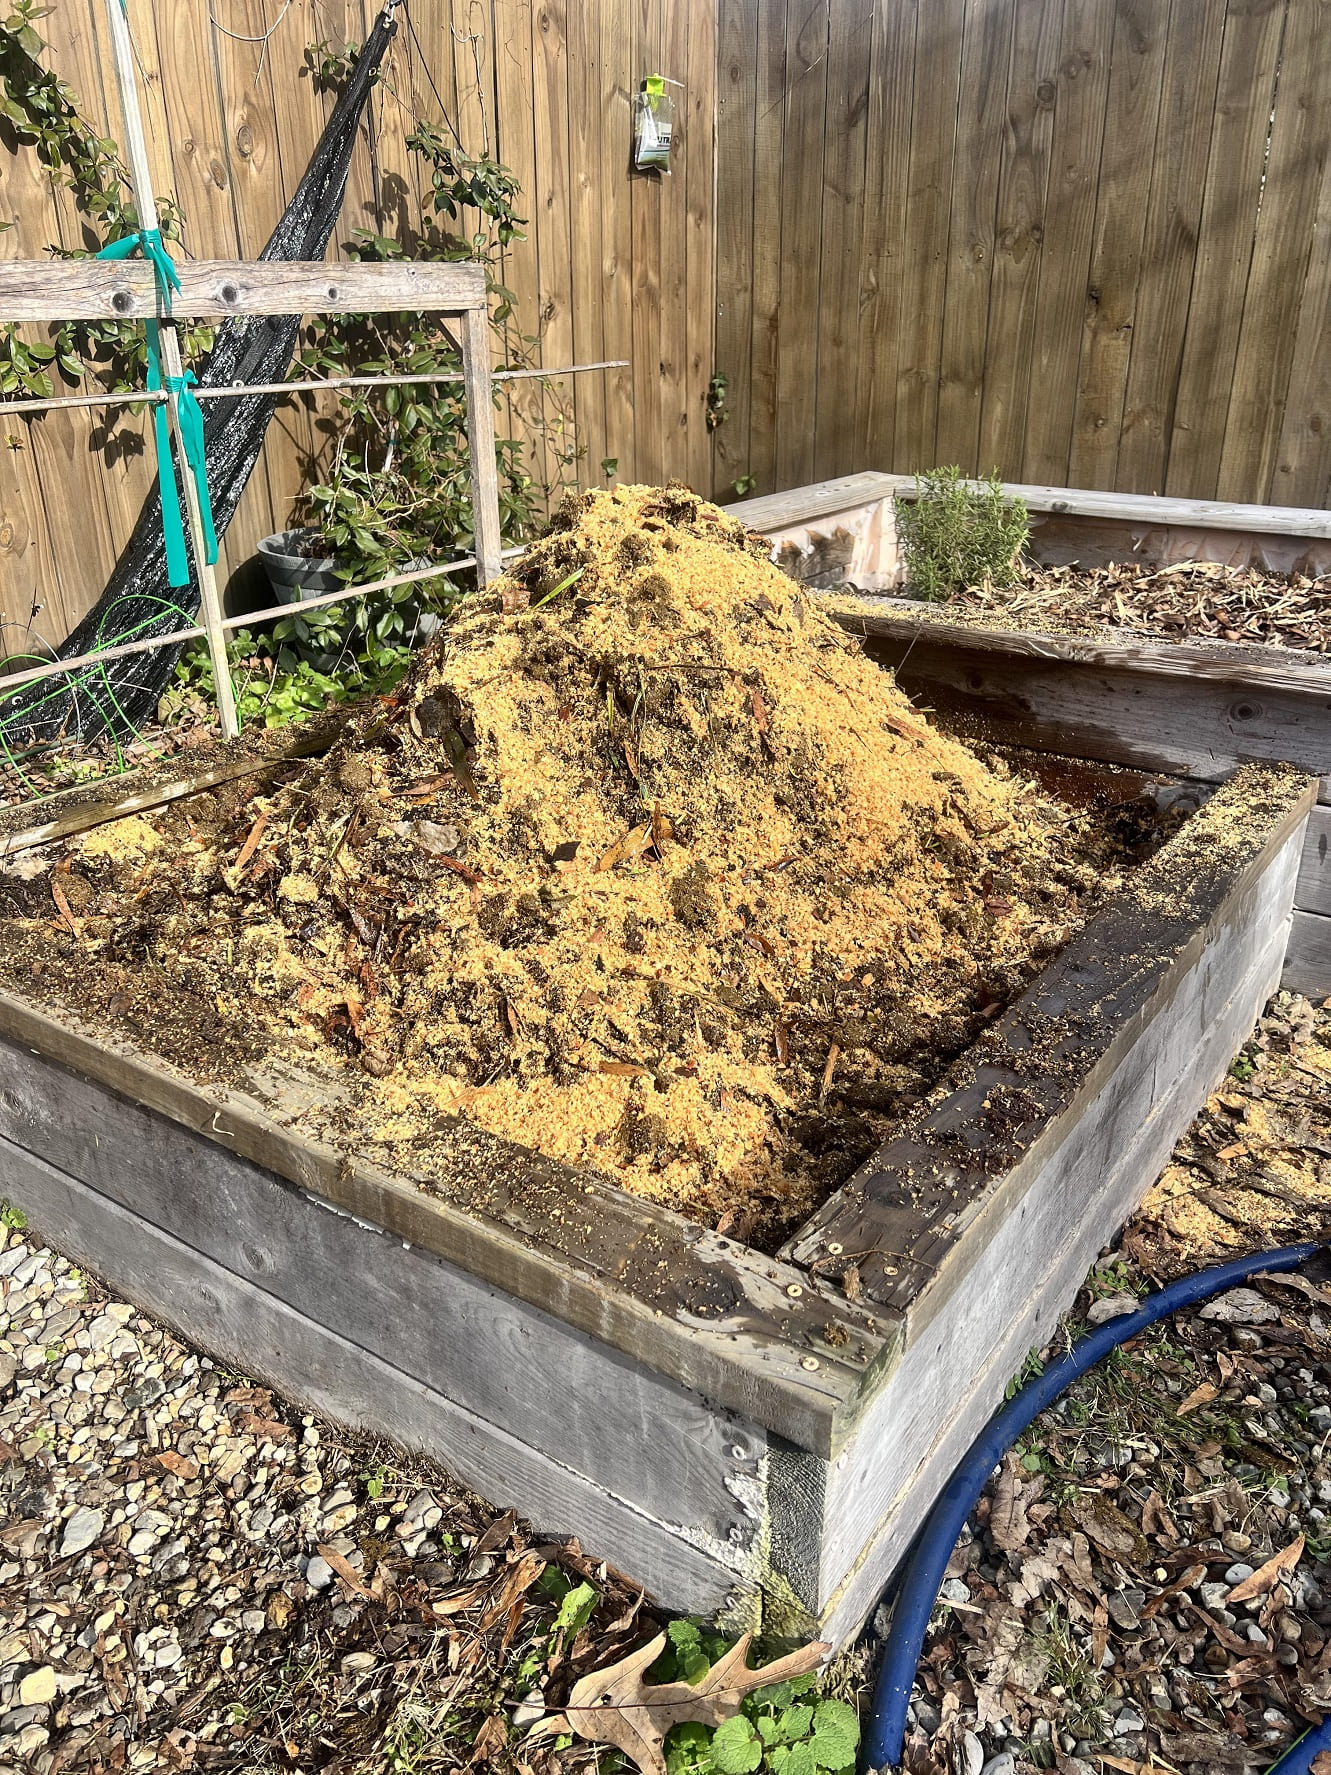
Building Your Sawdust Compost Pile: A Step-by-Step System
Foundation and Structure
Sawdust’s fine texture creates both opportunities and challenges. The increased surface area speeds decomposition, but the particles can compact into an airless mass that stops composting cold.
- Start with proper drainage: Begin with 6 inches of coarse material—small branches, corn stalks, or wood chips. This creates air channels that prevent the anaerobic conditions that turn compost piles into smelly messes.
- Layer strategically: Never add more than 2-3 inches of sawdust at once. Thick sawdust layers create impermeable barriers that block air and water movement. Think lasagna, not layer cake.
- Mix as you go: Unlike traditional composting where you can layer and leave, sawdust composting requires integration. Lightly mix each layer to prevent stratification.
The Critical First Month: Setting Up for Success
The first month determines whether your pile will thrive or stagnate. During this crucial period, you’re establishing the microbial community that will drive decomposition.
- Temperature monitoring: A successful sawdust pile should reach 130-140°F within the first week. If temperatures stay below 100°F after a week, you need more nitrogen or better moisture distribution.
- Moisture management: Sawdust has a peculiar relationship with water—it’s hydrophobic when dry but hygroscopic when moist. This means it initially repels water but then absorbs massive amounts. The pile should feel like a wrung-out sponge throughout.
- Aeration schedule: Turn the pile every 3-4 days during the first month. This prevents anaerobic conditions, distributes moisture, and ensures even decomposition. Look for steam rising when you turn—that’s active decomposition.
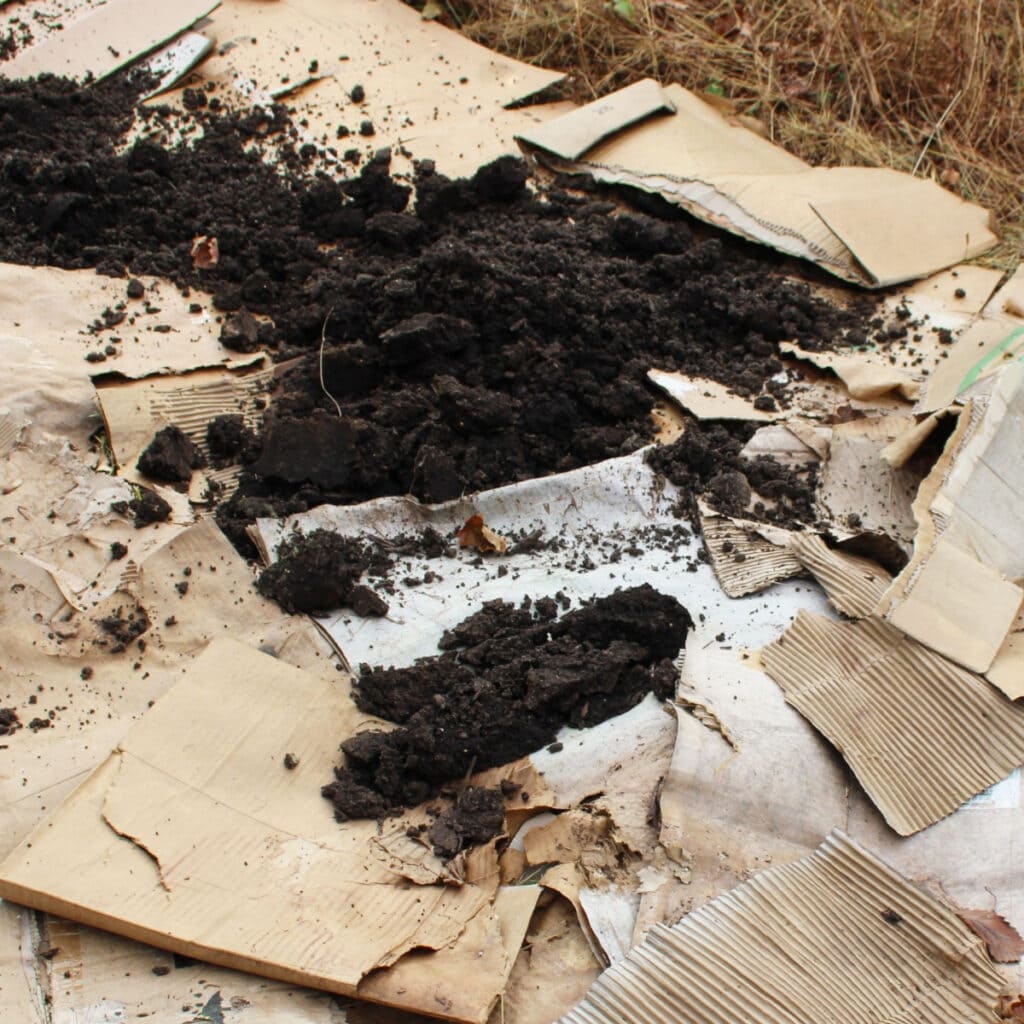
Reading Your Pile: Signs of Success and Failure
Healthy sawdust composting looks like:
- Steady temperature between 130-160°F in the first weeks
- Sweet, earthy smell (never ammonia or rotten egg odors)
- Visible moisture without standing water
- Gradual darkening of the sawdust
- Active insect and worm life around the edges
Warning signs that need immediate attention:
- Pile never heats up (insufficient nitrogen or moisture)
- Strong ammonia smell (too much nitrogen, needs more carbon)
- Rotten egg odor (anaerobic conditions, needs turning and aeration)
- Water pooling or running off (drainage or mixing problems)
- White or gray fuzzy growth (usually harmless fungi, but indicates moisture issues)
Species-Specific Considerations: Not All Wood Is Equal
The type of wood significantly affects decomposition speed and final compost quality. Understanding these differences helps set realistic expectations and adjust your approach.
Softwoods (Pine, Fir, Spruce):
- Decompose relatively quickly (6-12 months)
- Lower lignin content means faster breakdown
- May initially lower soil pH slightly
- Excellent for general garden use
Hardwoods (Oak, Maple, Cherry):
- Much slower decomposition (1-2 years)
- Higher lignin content creates more stable humus
- Often require additional nitrogen and longer composting
- Superior long-term soil improvement
Special Cases:
- Cedar: Contains natural preservatives that slow decomposition but aren’t harmful
- Black Walnut: Contains juglone, which inhibits some plants, but this compound breaks down during composting
- Exotic Woods: Generally safe but may have unique decomposition characteristics
Troubleshooting Guide: Solving Common Problems
Problem 1: The Stalled Pile (No Heat, No Decomposition)
- Symptoms: Pile stays cool, sawdust looks unchanged after months
- Root Causes: Usually insufficient nitrogen or improper moisture levels
Solutions:
- Add fresh nitrogen sources (grass clippings, manure, or diluted urine)
- Check moisture—should feel like a damp sponge throughout
- Consider rebuilding with better ratios if pile has been stalled for over 3 months
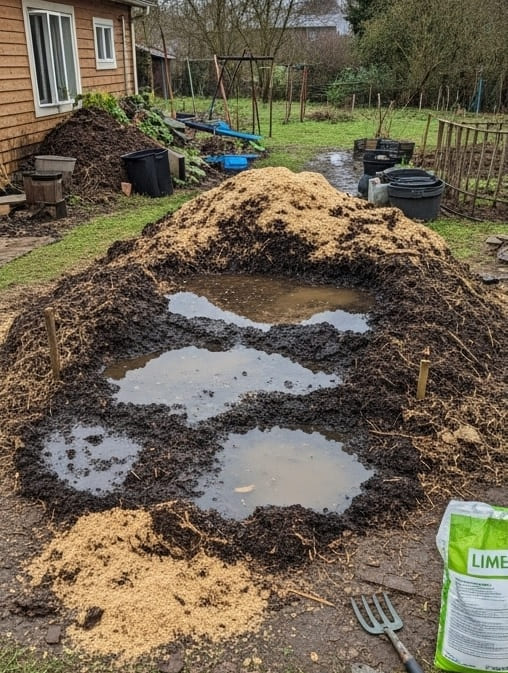
Problem 2: The Waterlogged Mess
- Symptoms: Pile smells like rotten eggs, feels slimy, attracts flies
- Root Causes: Too much moisture and insufficient aeration
Solutions:
- Add dry carbon materials (more sawdust, shredded paper, or leaves)
- Turn pile immediately and ensure good drainage
- Cover pile during heavy rains
- Rebuild pile with better structure if severely waterlogged
Problem 3: The Impenetrable Layer
- Symptoms: Water runs off pile surface instead of soaking in
- Root Causes: Sawdust has formed a hydrophobic crust
Solutions:
- Break up surface with garden fork before watering
- Add wetting agent (few drops of dish soap per gallon of water)
- Mix in moisture-holding materials like grass clippings
- Create depressions in pile surface to catch water
Problem 4: Incredibly Slow Progress
- Symptoms: After 6+ months, individual sawdust pieces still clearly visible
- Root Causes: This is actually normal, especially for hardwood sawdust
Management Strategy:
- Screen out unfinished material for use as mulch
- Use finished portions while continuing to compost the rest
- Consider this a long-term soil improvement project rather than quick compost
Seasonal Strategies for Year-Round Success
Spring: The Sweet Spot for Starting
Spring offers ideal conditions for launching sawdust composting projects. Warming temperatures activate microorganisms, spring yard cleanup provides abundant nitrogen sources, and increasing daylight hours support active decomposition.
Spring action plan: Build new piles using winter’s accumulated sawdust, spring grass clippings, and garden cleanup debris. The natural moisture from spring rains helps establish proper hydration without constant monitoring.
Summer: Managing Heat and Moisture
Summer’s heat can accelerate decomposition but also creates new challenges. High temperatures can dry out piles quickly, while intense heat may actually inhibit some beneficial microorganisms.
Summer strategies: Provide partial shade for compost bins during peak heat. Increase watering frequency but adjust timing—water in early morning or evening to minimize evaporation. Consider covering piles with shade cloth in extreme heat.
Fall: Building for Next Year’s Garden
Fall presents the perfect opportunity for large-scale sawdust composting. The combination of fallen leaves, final grass clippings, and garden cleanup creates abundant nitrogen sources to balance sawdust’s high carbon content.
Fall preparation: This is the ideal time to build large piles that will be ready for next growing season. Mix sawdust with raked leaves, spent garden plants, and late-season grass clippings for optimal ratios.
Winter: Patience and Planning
In cold climates, composting essentially stops when temperatures drop below freezing. Rather than fighting winter, use this time for planning and preparation.
Winter management: Don’t worry about turning frozen piles—just let them be. Use winter months to accumulate sawdust for spring projects and plan next year’s composting strategy.
Beyond Basic Composting: Advanced Applications
The Pathway Composting Method
One of my most successful sawdust applications came from necessity. I had more sawdust than my bins could handle, so I started creating composted pathways throughout my garden.
The process is elegantly simple: lay cardboard to suppress weeds, add 3-4 inches of sawdust, and let nature work. After two growing seasons, these pathways become incredibly rich, worm-filled soil that can be harvested for garden beds while new sawdust pathways are established.
This method provides multiple benefits: weed suppression, gradual soil improvement, easy maintenance, and a renewable source of finished compost. It’s particularly effective for larger properties where traditional composting bins can’t handle the volume of available sawdust.
Mushroom Cultivation Integration
Last year, I experimented with growing oyster mushrooms on sawdust before composting it. This creates a win-win situation: you get edible mushrooms and pre-decomposed substrate for faster composting.
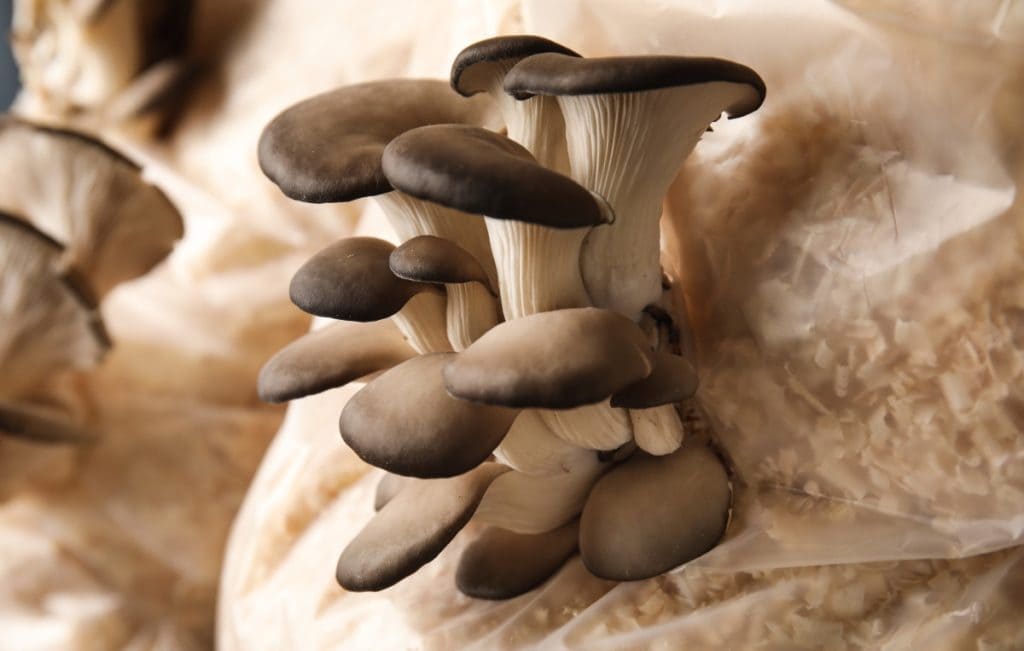
Oyster mushrooms are particularly well-suited to hardwood sawdust and can be established using spawn from mushroom supply companies. After harvest, the spent substrate is already partially broken down by fungal activity and composts much faster than fresh sawdust.
Specialized Applications
- Composting toilets: For off-grid or alternative waste management, sawdust provides excellent carbon coverage and absorption. The fine texture ensures good coverage while the high carbon content balances waste nitrogen.
- Spill cleanup: Keep bags of clean sawdust for workshop spills. It absorbs oil and other liquids better than commercial products and can then be composted in small quantities rather than sent to landfills.
- Animal bedding integration: If you have chickens, rabbits, or other small livestock, sawdust makes excellent bedding that can be composted directly with the manure for optimal nitrogen content.
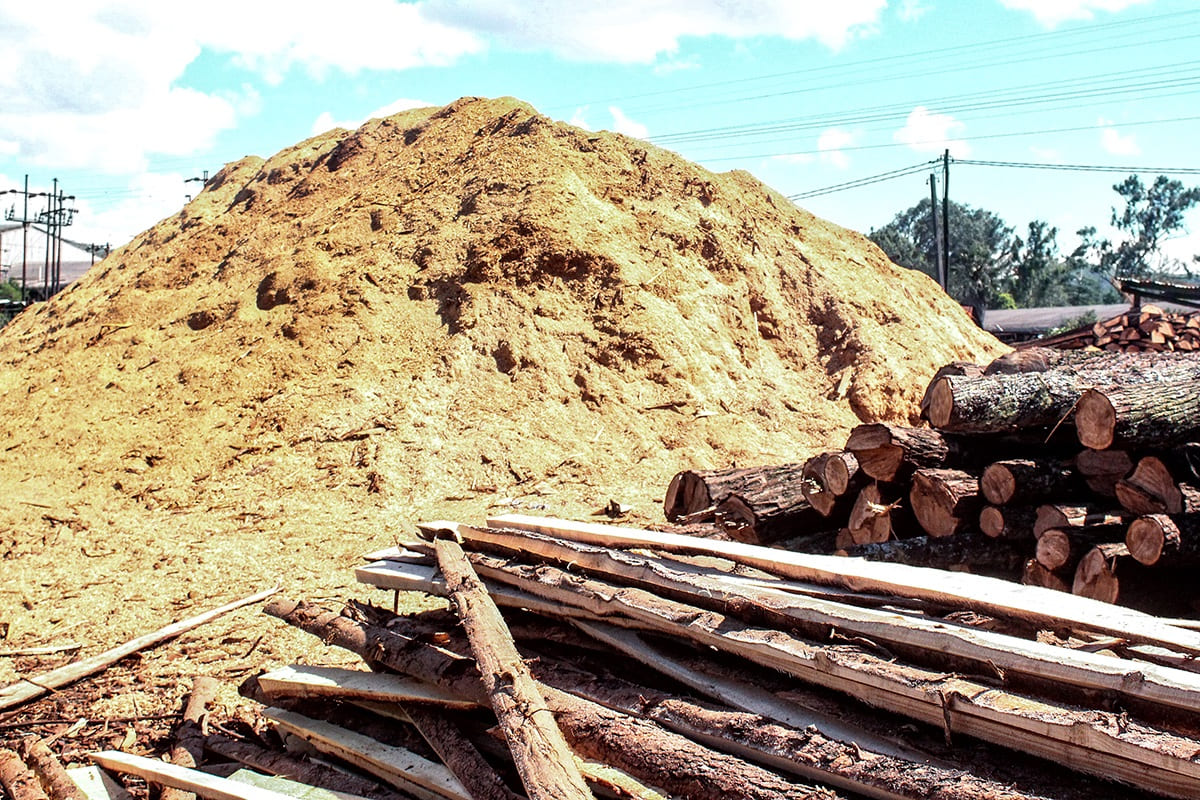
Finding Reliable Sawdust Sources
Securing a steady supply of clean sawdust often requires building relationships with local sources. Here’s how to identify and cultivate these connections:
- Local sawmills often have large quantities of clean sawdust from processing logs. Many mills are happy to sell or give away sawdust to avoid disposal costs.
- Woodworking shops can be excellent sources, but verify they work primarily with solid wood rather than engineered products. Building relationships with local woodworkers often leads to consistent, high-quality sawdust supplies.
- Tree service companies generate sawdust from stump grinding and log processing. This source provides freshly created sawdust from known tree species.
- Lumber yards sometimes have sawdust from cutting boards to customer specifications. This is usually clean, solid wood sawdust suitable for composting.
Integration with Existing Compost Systems
If you already have established composting systems, integrating sawdust requires careful planning to avoid disrupting successful processes.
- Gradual introduction: Start by adding small amounts of sawdust to existing piles while increasing nitrogen inputs proportionally. Monitor temperature and decomposition rates to ensure the addition doesn’t slow your process.
- Separate sawdust piles: Consider maintaining dedicated sawdust composting areas while continuing regular composting operations. This allows you to perfect sawdust techniques without risking your primary compost production.
- Seasonal integration: Use sawdust primarily during seasons when nitrogen-rich materials are abundant, such as fall (with leaves and garden cleanup) or late spring (with grass clippings).
Frequently Asked Questions
- How long does sawdust actually take to decompose in compost?
Decomposition time varies dramatically based on wood species, particle size, nitrogen availability, and climate. Softwood sawdust in optimal conditions may decompose in 6-8 months, while hardwood sawdust can take 18-24 months.
Fine sawdust decomposes faster than coarse shavings, and maintaining proper moisture and nitrogen levels significantly accelerates the process.
- Can I use sawdust from my chainsaw, and what about the bar oil?
Chainsaw sawdust can be used, but bar oil type matters significantly. Petroleum-based bar oils should be avoided as they can contaminate compost. However, many composters successfully use small amounts of petroleum oil-contaminated sawdust without problems. Vegetable-based or biodegradable bar oils are ideal if you plan to compost regularly.
- How much sawdust can I add to my regular compost pile without causing problems?
As a general rule, sawdust shouldn’t exceed 25% of your total pile volume when mixing with other materials. For dedicated sawdust composting, you can go higher, but you’ll need proportionally more nitrogen sources. Start conservatively and increase gradually as you gain experience with your specific conditions.
- Is sawdust from cedar, pine, or other aromatic woods safe for vegetable gardens?
Aromatic woods like cedar and pine are generally safe for composting and vegetable gardens. Cedar takes longer to decompose due to natural preservatives, but these compounds aren’t harmful to plants or soil. Pine sawdust may initially lower soil pH slightly, but this effect neutralizes as the material composts.
- What’s the difference between sawdust and wood chips for composting?
Sawdust has much smaller particle size, creating more surface area for decomposition but also greater risk of compaction. Wood chips provide better air spaces but decompose more slowly.
Sawdust requires more careful moisture and nitrogen management but produces finer finished compost. Many composters use both, with wood chips for structure and sawdust for faster decomposition.
Your Action Plan: Getting Started with Sawdust Composting
Ready to transform your sawdust from waste to garden gold? Here’s your step-by-step startup plan:
Week 1: Source and Safety
- Identify your sawdust source and verify it’s from untreated, solid wood
- Gather nitrogen-rich materials (grass clippings, kitchen scraps, or manure)
- Set up your composting area with proper drainage
Week 2: Build Your First Pile
- Start with coarse materials for drainage
- Layer sawdust thinly with generous nitrogen sources
- Monitor temperature and moisture daily
Month 1: Establish Routine
- Turn pile every 3-4 days
- Maintain moisture levels
- Track temperature to ensure active decomposition
Months 2-6: Patience and Management
- Reduce turning frequency to weekly or bi-weekly
- Continue moisture monitoring
- Begin planning your next pile with lessons learned
Remember, sawdust composting is a long-term soil improvement strategy, not a quick fix. Every pile teaches you something new about the process, and even apparent failures provide valuable learning experiences.
The transformation from workshop waste to garden gold isn’t just about decomposition—it’s about understanding natural processes and working with them rather than against them. Start small, be patient with the learning curve, and celebrate the small victories along the way.
Your garden will thank you with richer soil, better water retention, and the deep satisfaction that comes from closing the loop on organic waste. Because there’s something profoundly satisfying about watching yesterday’s sawdust become tomorrow’s soil.
What questions do you have about getting started with sawdust composting? Share your plans or concerns in the comments—every composting journey is unique, and we can all learn from each other’s experiences.
can you use softwood pellets? I was wondering if I can just buy a bag and spray them down with water, as they break down pretty easy, into saw dust. On the bag it indicates there are no additives.