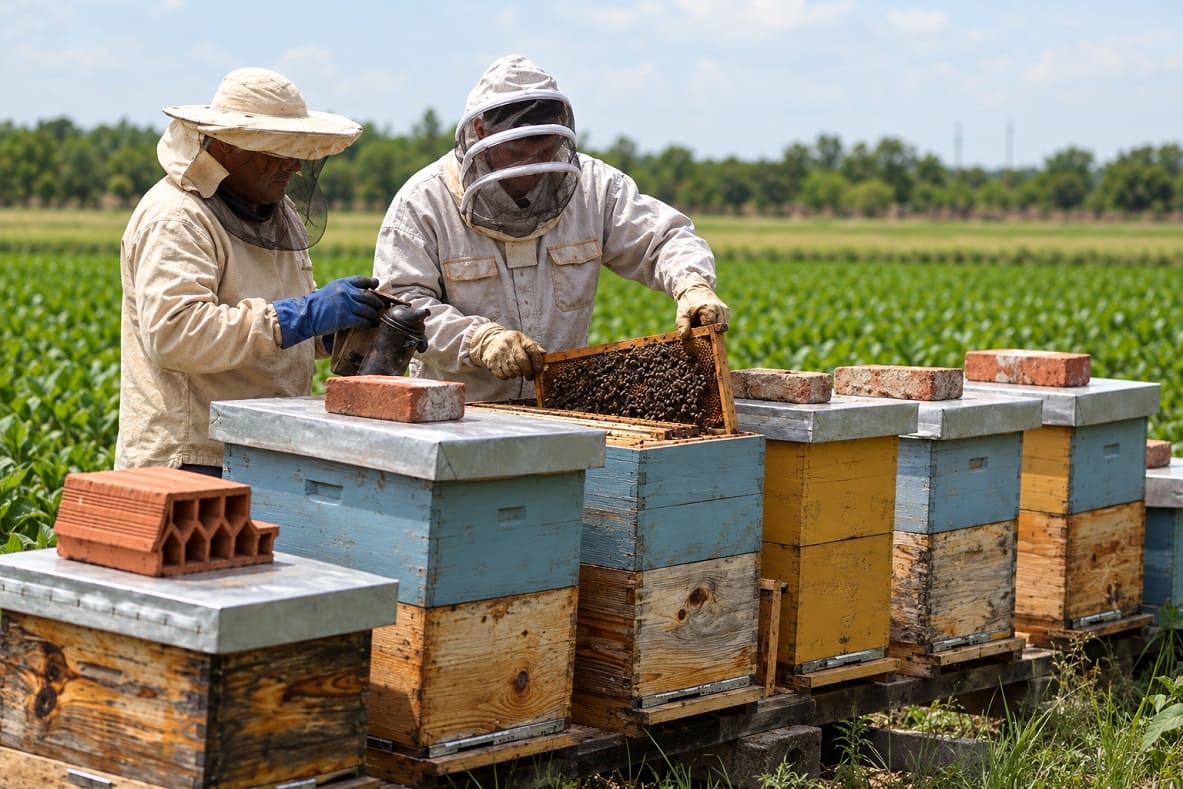
When a first colony dies, it’s rarely because the beekeeper got stung or bought the wrong hive.
It usually dies over its first winter, from varroa mites nobody counted or from honey stores that ran out in late winter.
Both problems are predictable, and both are preventable.
This guide takes you through starting beekeeping in the order you’ll actually do it: deciding whether it suits you, budgeting, checking the rules, picking a site, buying gear and bees, and then managing your colony from install day to its first spring.
Your goal for year one is simple. Have live bees next spring. Honey comes after that.
Beginner Beekeeping at a Glance
- When to start: learn in the fall and order bees by January or February for spring delivery.
- Time: 30 to 60 minutes per hive every week or two from spring through summer, very little in winter.
- First-year cost: roughly $650 to $1,000 for one hive with bees, gear and mite supplies (US prices, 2026).
- How many colonies: two if you can manage it.
- Honey in year one: little or none. Plan on your first real harvest in year two.
- The biggest threat: varroa mites. Test for them monthly from spring to fall.
Is Beekeeping Right for You?
Keeping bees is closer to keeping livestock than to gardening. The colony depends on you for space, health checks and parasite control, and some of that work can’t wait for a convenient weekend.
Time
Through spring and early summer, plan to open each hive about once a week. A routine inspection takes 20 to 45 minutes once you know what you’re doing; your first ones will take longer.
From late fall to late winter there’s almost nothing to do inside the hive.
Stings
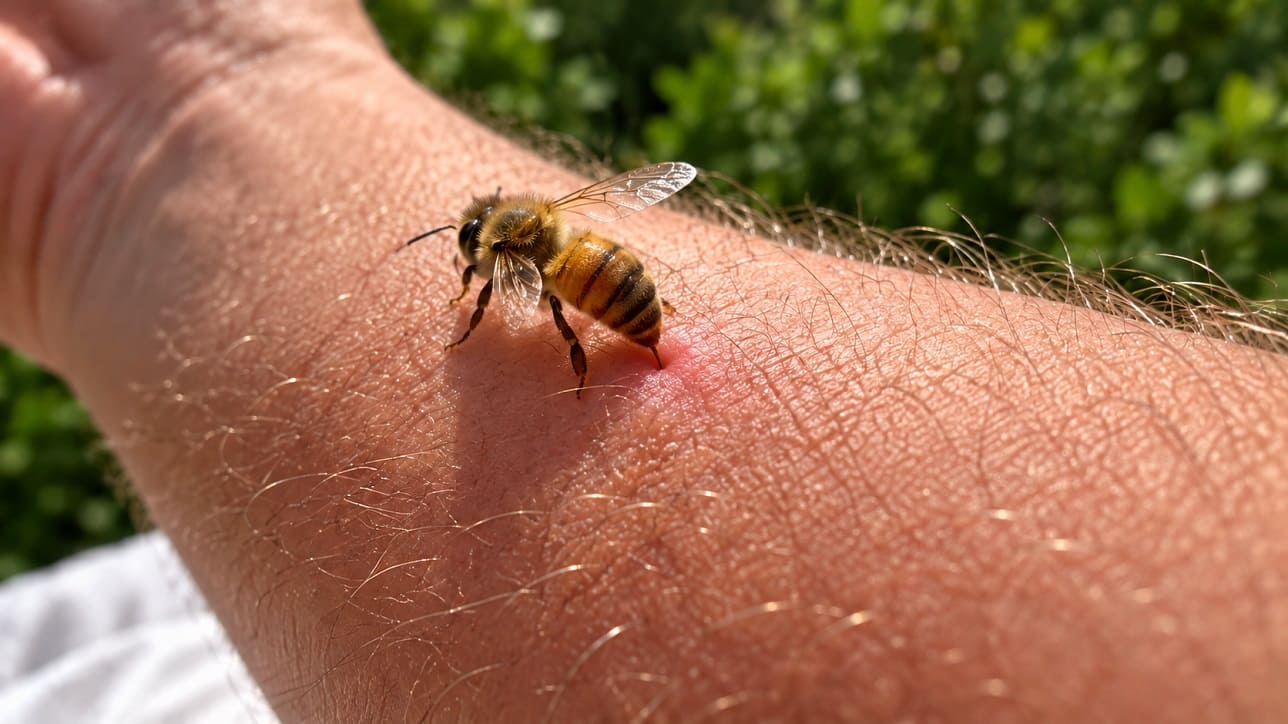
You will get stung, usually because a bee got trapped in a fold of clothing or you rushed.
For most people that means sharp pain, then redness and swelling that fade over a day or two. Scrape or pull the stinger out right away; the venom sac keeps pumping, so speed matters more than technique.
A systemic reaction is different: hives or itching away from the sting, swelling of the lips or throat, wheezing, dizziness or trouble breathing.
Treat that as an emergency: use epinephrine if it’s been prescribed and call 911 or your local emergency number.
If anyone in your household has reacted that way to any insect sting, see a doctor before you get bees; in the US an epinephrine auto-injector needs a prescription. Until you know how your own body responds, don’t work a hive alone.
Lifting
A deep box full of honey can weigh up to 90 pounds (41 kg), and a full medium box up to about 60 pounds (27 kg).
You don’t need to be strong, but you do need a plan: lighter boxes, a helper on heavy days, or both.
Your reasons
Honey bees aren’t endangered; they’re managed like chickens or goats. As Lisa Mason of Colorado State University Extension puts it, “raising honey bees to save the bees is like raising chickens to save the birds.”
Planting flowers does more for wild bees. Keep honey bees because the bees themselves fascinate you.
What It Costs to Start
Here’s what one hive’s first year typically costs in the US at current supplier prices:
- Hive: a 10-frame Langstroth setup with bottom board, two deep boxes, one or two medium honey supers, frames with foundation and covers, $250 to $400.
- Protective gear: a veiled jacket or suit plus gloves, $80 to $200.
- Tools: smoker, hive tool and feeder, $60 to $110.
- Bees: a package or nucleus colony, about $160 to $250.
- Mite supplies: a testing kit and a season of treatments, $50 to $80.
That’s roughly $650 to $1,000 for one hive. A second colony adds about $450 to $650, since you share the gear. Skip the honey extractor; many clubs lend one. After year one, budget $100 to $200 a year per hive.
Be wary of used equipment: old comb can carry American foulbrood spores that stay infectious for decades, so never reuse someone else’s comb unless a state apiary inspector has checked it.
Check the Rules Before You Buy Anything
Start with city or county ordinances and any homeowners’ association covenants.
Local rules may cap hives by lot size, set distances from property lines, or require a flyway barrier, such as a solid fence or hedge about 6 feet (1.8 m) tall, that makes bees climb above head height.
- Some US states require you to register every hive and others don’t; your state’s apiary program will tell you.
- Registration is mandatory in Australia, New Zealand and several Canadian provinces, including Ontario.
- In England and Wales, registering on BeeBase is voluntary but free, and it means you’re warned when a notifiable disease turns up nearby.
Ask your insurer, too, whether your liability coverage includes a hive. Then talk to your neighbors before the bees arrive, especially anyone with small children, a pool or an allergy. A conversation now heads off most complaints later.
👉 Read the Urban Beekeeping Guide: How to Start Your Hive in the City
Learn First: Club, Class and Mentor
The best move you can make is to join a local beekeeping club in the fall; your state beekeepers’ association or county extension office can point you to one.
Clubs run winter courses, know which suppliers sell healthy local bees, and can usually pair you with a mentor. Local knowledge matters, because nectar flows, mite pressure and winter length all depend on where you live.
If you can, help a mentor open hives a few times before you commit, and choose one who uses the hive type you plan to buy so your equipment is interchangeable.
👉 Learn How Joining Farming Organizations Can Benefit Your Farm & Community
Read one solid beginner book cover to cover, such as The Beekeeper’s Handbook by Diana Sammataro and Alphonse Avitabile.
Online advice is plentiful and contradictory, and what works in Georgia can be wrong in Minnesota. Here’s how the first year usually runs in the temperate Northern Hemisphere:
- Fall: join a club, start reading and ask who sells local nucs.
- December to February: order bees before suppliers sell out, and order equipment.
- Late winter: assemble and paint boxes, and set up the stand and a water source.
- Early spring: install bees once early trees and flowers bloom, often March or April in the southern US and April or May farther north.
- Spring and summer: inspect, add boxes as the colony grows, and test for mites monthly.
- Late summer and fall: bring mite levels down, top up winter stores and shrink the entrance.
Time your start to local bloom rather than the calendar. In the Southern Hemisphere, nucs usually appear around September and October; in the tropics you can start whenever colonies and forage are available.
Choosing a Spot for Your Hive
Bees forage 2 to 3 miles (3 to 5 km) from home, so you don’t need acreage. What matters is the ground under the hive and the space in front of it:
- Morning sun: face the entrance east or southeast (northeast in the Southern Hemisphere), with afternoon shade where summers are hot.
- Shelter: a fence, hedge or building against the prevailing wind, away from exposed hilltops and damp low spots.
- A clear flight path: point the entrance away from doors, walkways, play areas and pools.
- Water close by: a shallow dish with stones or corks, set up before the bees arrive. They settle on their first reliable source, and a neighbor’s hot tub is hard to compete with later.
- Firm, level footing: a stand 12 to 18 inches (30 to 45 cm) high, tipped slightly forward so rain drains out, with about 3 feet (1 m) of working room beside it.
- Easy access: you’ll be carrying heavy boxes, and a hive you pass every day gets better care.
In bear country, put up an electric fence before the bees arrive. A raised stand discourages skunks, and stand legs set in containers of water keep ants out. Avoid sites next to fields or orchards that are sprayed often.
Equipment: What You Need on Day One
Choosing a Hive
Start with a Langstroth hive, the stacked rectangular boxes with removable frames. Nearly every book, course and mentor in North America assumes it, parts are easy to find, and nucs are sold on Langstroth frames.
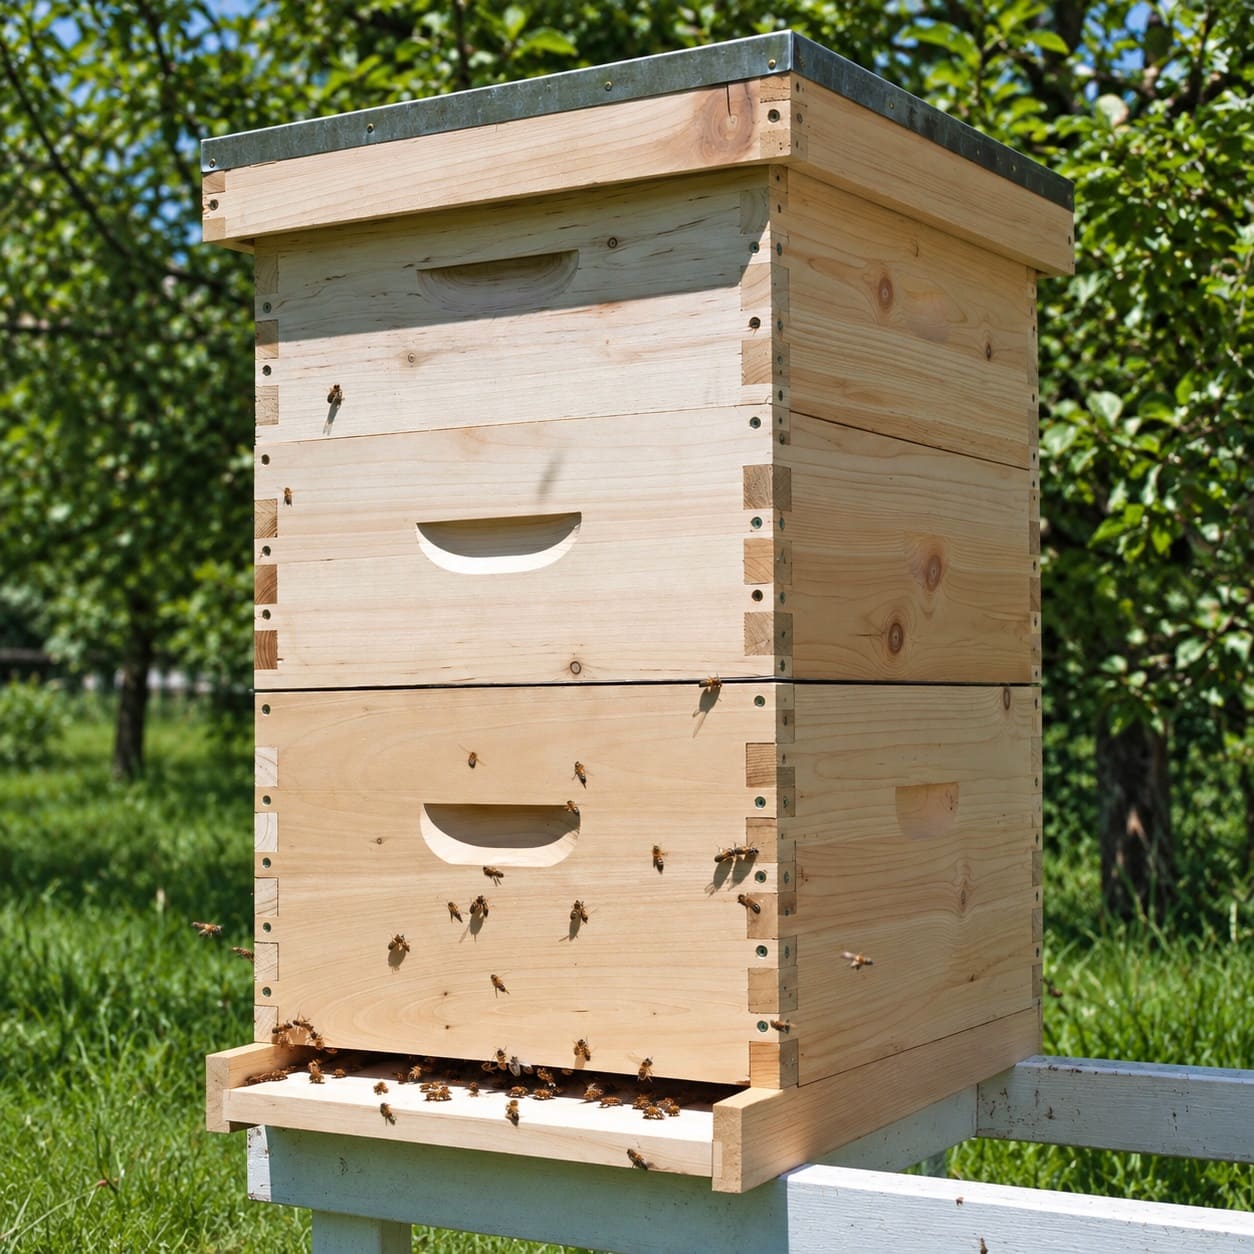
Top-bar and Warré hives work, but they’re harder to buy bees for, so they make better second hives. In the UK and Ireland the National hive is standard, so follow your club there.
Box size comes down to weight. The classic setup is two deep boxes for brood and medium boxes for honey.
If lifting worries you, choose narrower 8-frame boxes or run all mediums so every frame fits everywhere. Stick to one or two box sizes.
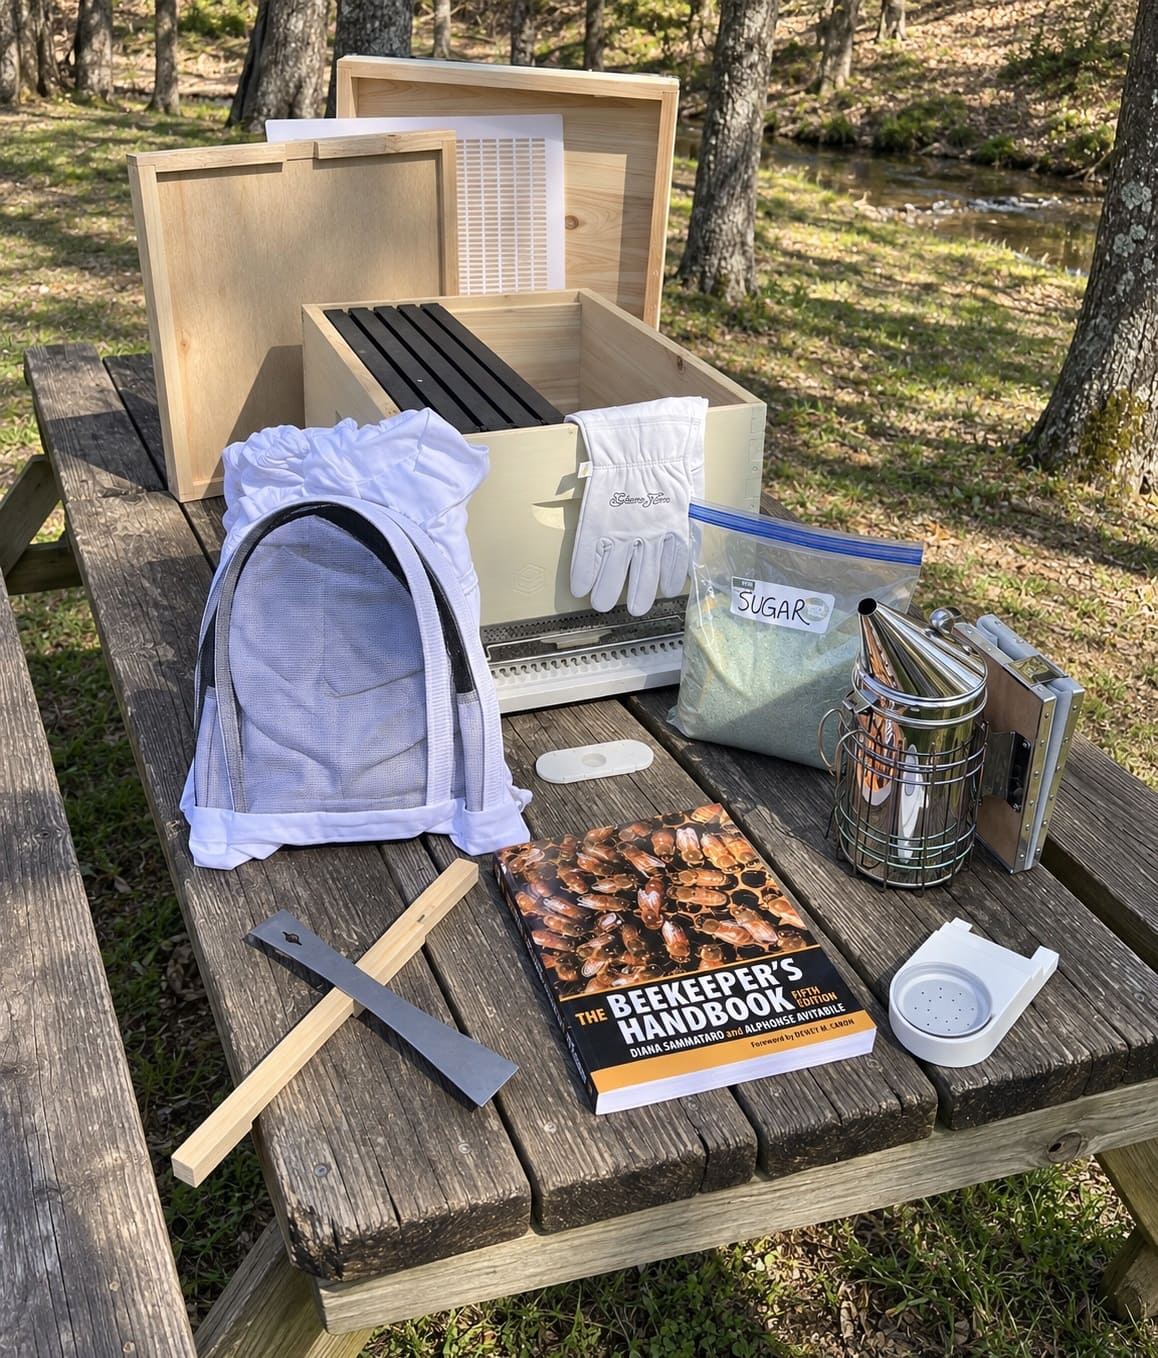
For each colony you’ll need:
- A bottom board with an entrance reducer.
- Two deep boxes for brood (or three mediums), with frames and wax-coated foundation.
- Two medium supers with frames for honey.
- An inner cover and a telescoping outer cover.
- A feeder that sits inside or on top of the hive, since entrance feeders invite robbing.
Protective Gear and Tools
Always wear a veil; bees defend the head first. As a beginner you’ll want a veiled jacket or suit and gloves too, and thin nitrile or snug goatskin gloves let you handle frames more gently than thick gauntlets.
Choose light, smooth fabrics, tuck your pants into boots, and wash your suit regularly, because stingers left in the fabric keep releasing alarm scent.
Buy a medium or large smoker with a heat shield, two hive tools, a mite-testing kit and a notebook. Everything else can wait.
Getting Your Bees: Nuc, Package or Swarm
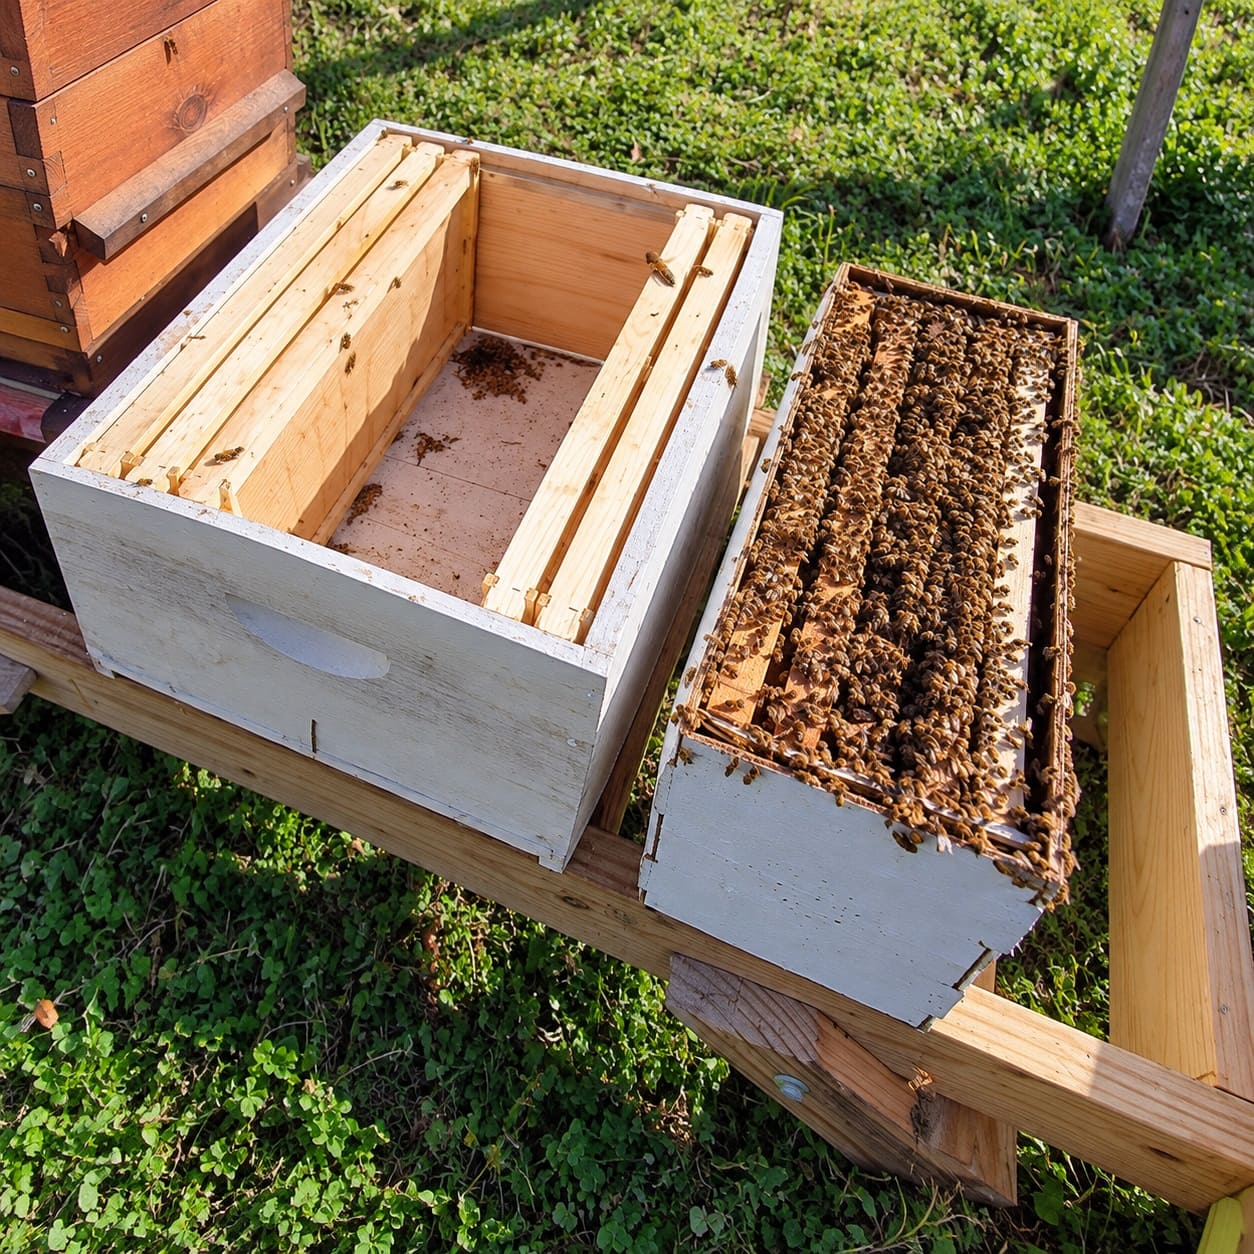
If you can find one, buy a nuc. It’s a small working colony with a laying queen the bees have already accepted, which gives you a head start on comb and brood.
| Option | What you get | Strengths | Drawbacks |
| Nuc (nucleus colony) | 4 to 5 frames of comb, brood, food, bees and a laying queen; about $200 to $250 | Fastest, most reliable start for beginners | Costs more, sells out early, frames must fit your boxes |
| Package | About 3 pounds (1.4 kg), roughly 10,000 bees, plus a caged queen; about $160 to $200 | Widely available, can be shipped, cheaper | No comb or brood, slower start, queen must be accepted |
| Swarm | A cluster that left another colony with its queen; free | Vigorous comb builders | Unknown health and temper, unpredictable timing |
Buy locally if you can. Local bees suit your climate, and picking them up spares them a trip through the mail.
Ask when the queen was mated, whether the colony has been tested or treated for mites, and whether the queen can be marked with a paint dot so she’s easier to spot.
Start with two colonies if your budget allows. With two, you can tell whether a brood pattern is normal for the season, and if one loses its queen you can give it a frame of eggs from the other so it can raise a new one.
Where Africanized bees are established, including parts of the southern and southwestern US, buy from a supplier who requeens with gentle stock.
Install Day
Have the hive set up, the water filled, and a feeder of 1:1 sugar syrup ready: equal parts white granulated sugar and water, by weight or volume.
To light the smoker, start crumpled paper or dry grass in the bottom, pump until it catches, add loosely packed pine needles, burlap or wood pellets, and keep pumping until the smoke runs cool and white.
Installing a Nuc
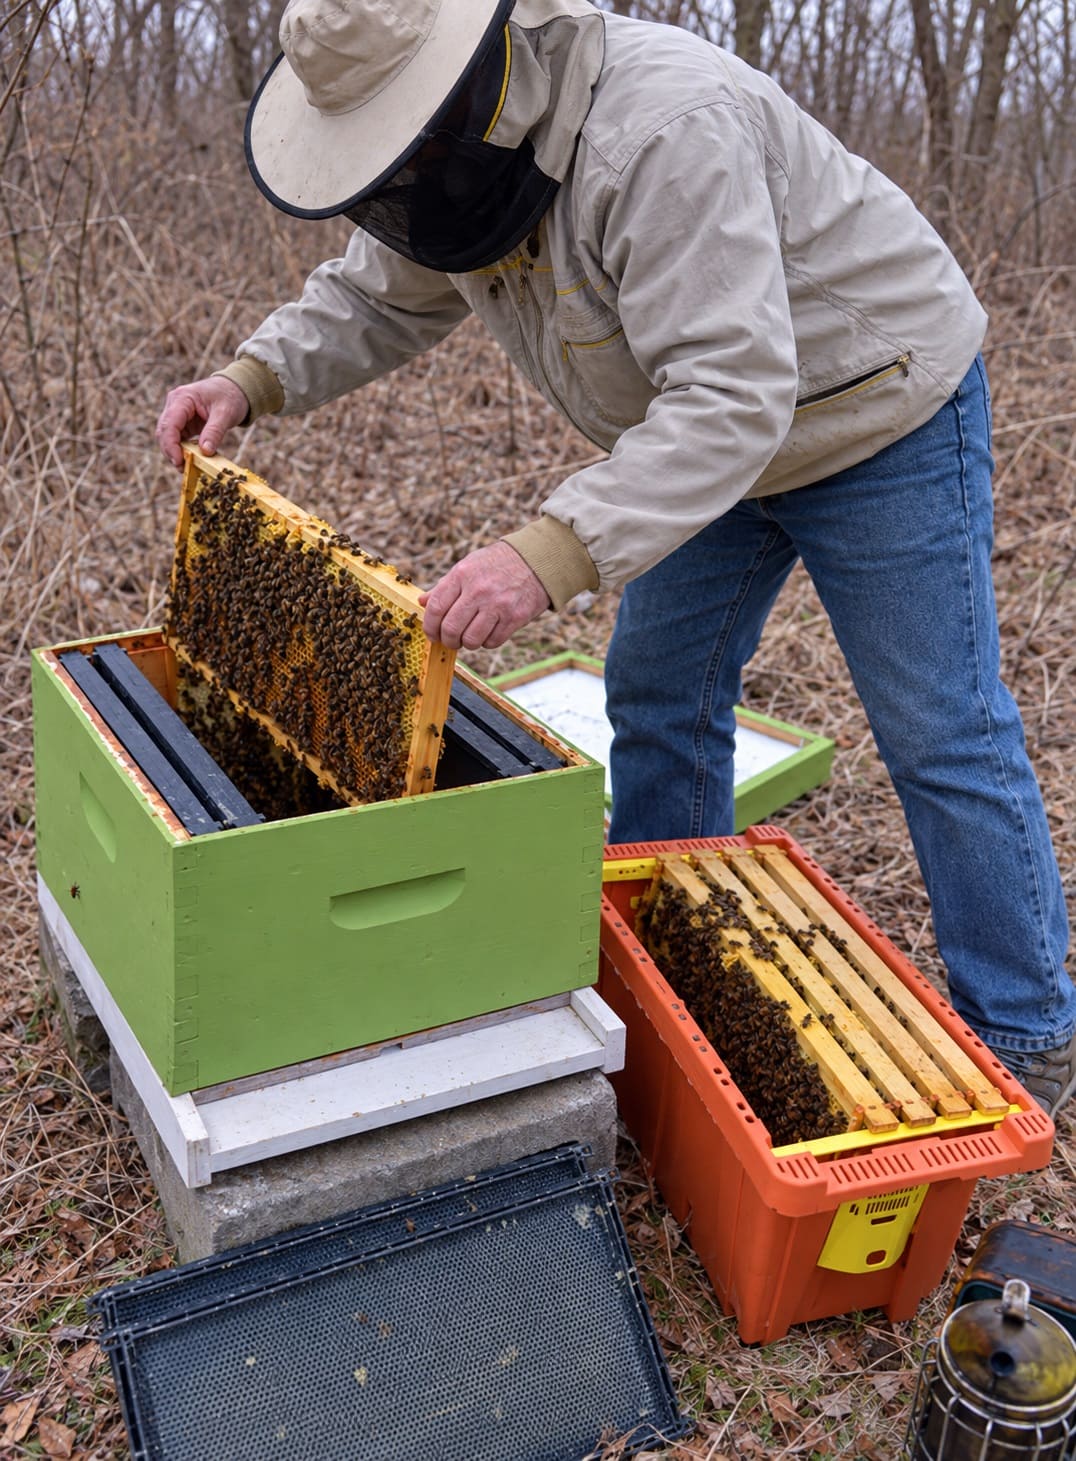
- Puff a little smoke into the nuc entrance and wait a minute.
- Lift four or five empty frames out of the middle of your deep box.
- Move the nuc frames one at a time into the gap, keeping their order and facing. Go slowly; beginners crush queens during this step more often than at any other.
- Slide the empty frames back in on either side, push everything snugly together and center it.
- Shake leftover bees in front of the entrance, close the hive, add the feeder and set the entrance reducer to a small opening.
Installing a Package
- Mist the bees lightly through the screen with 1:1 syrup.
- Remove four or five frames from the middle of the box.
- Tap the package down, pry off the lid, and lift out the feeder can and queen cage.
- Check the queen is moving, remove the cork from the candy end only, and hang the cage between two center frames with the screen exposed.
- Shake the bees into the gap, ease the frames back in, close the hive and add the feeder.
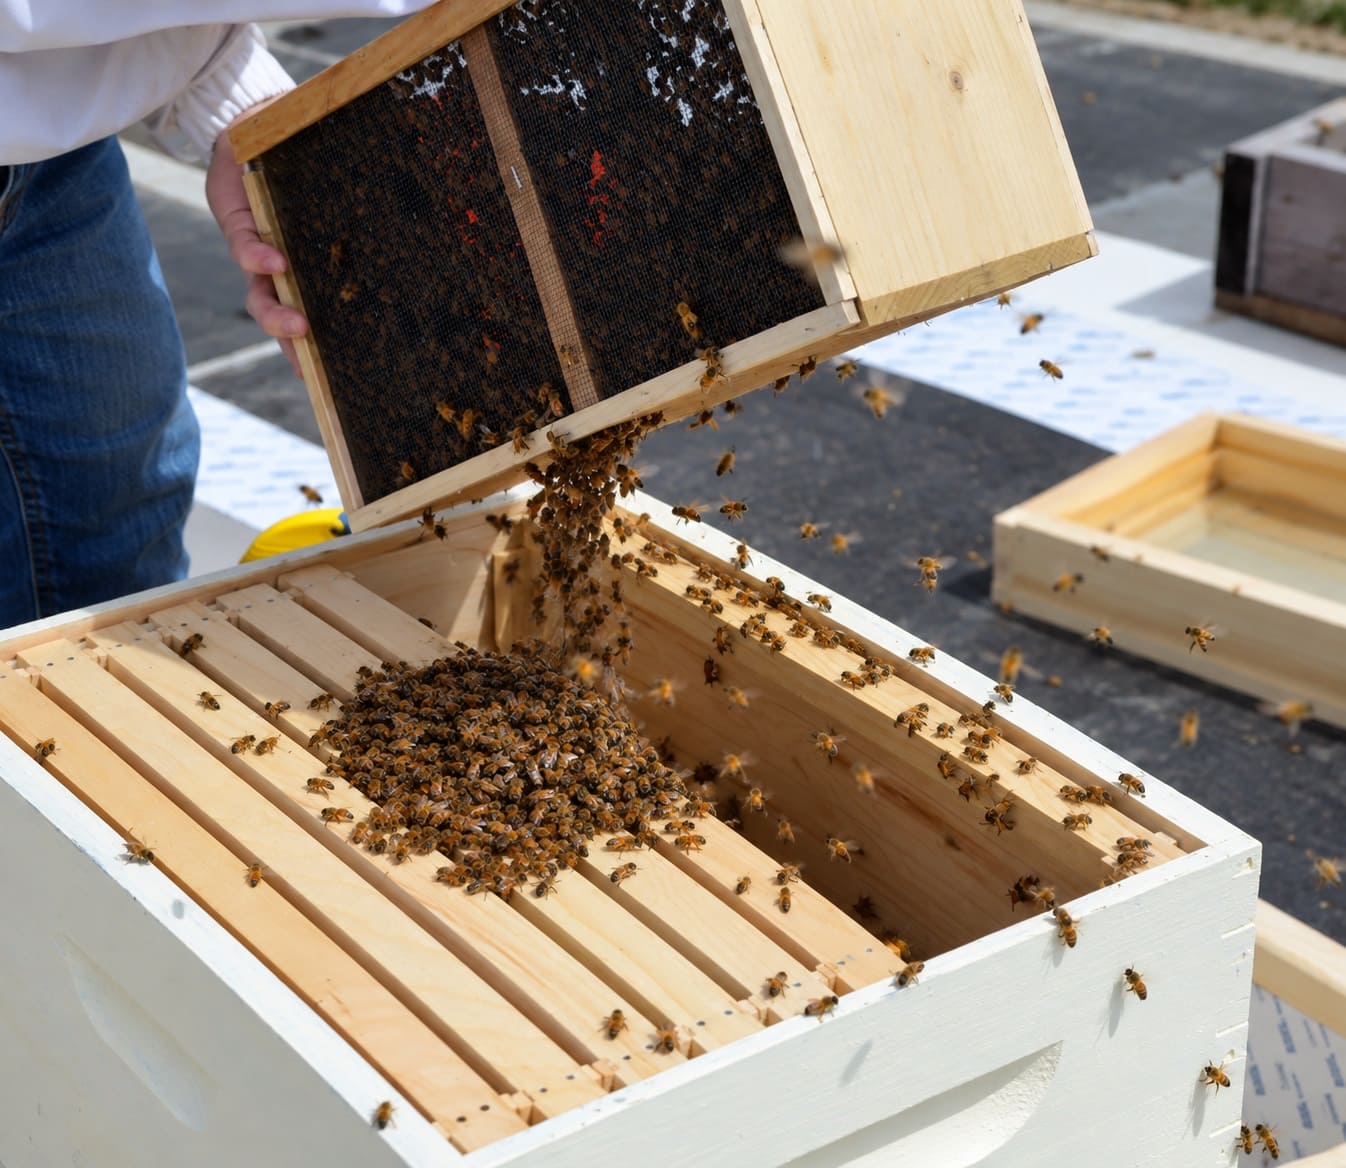
Leave them alone for a few days except to refill the feeder. After three to five days, check that a package queen is out of her cage and free her gently if not.
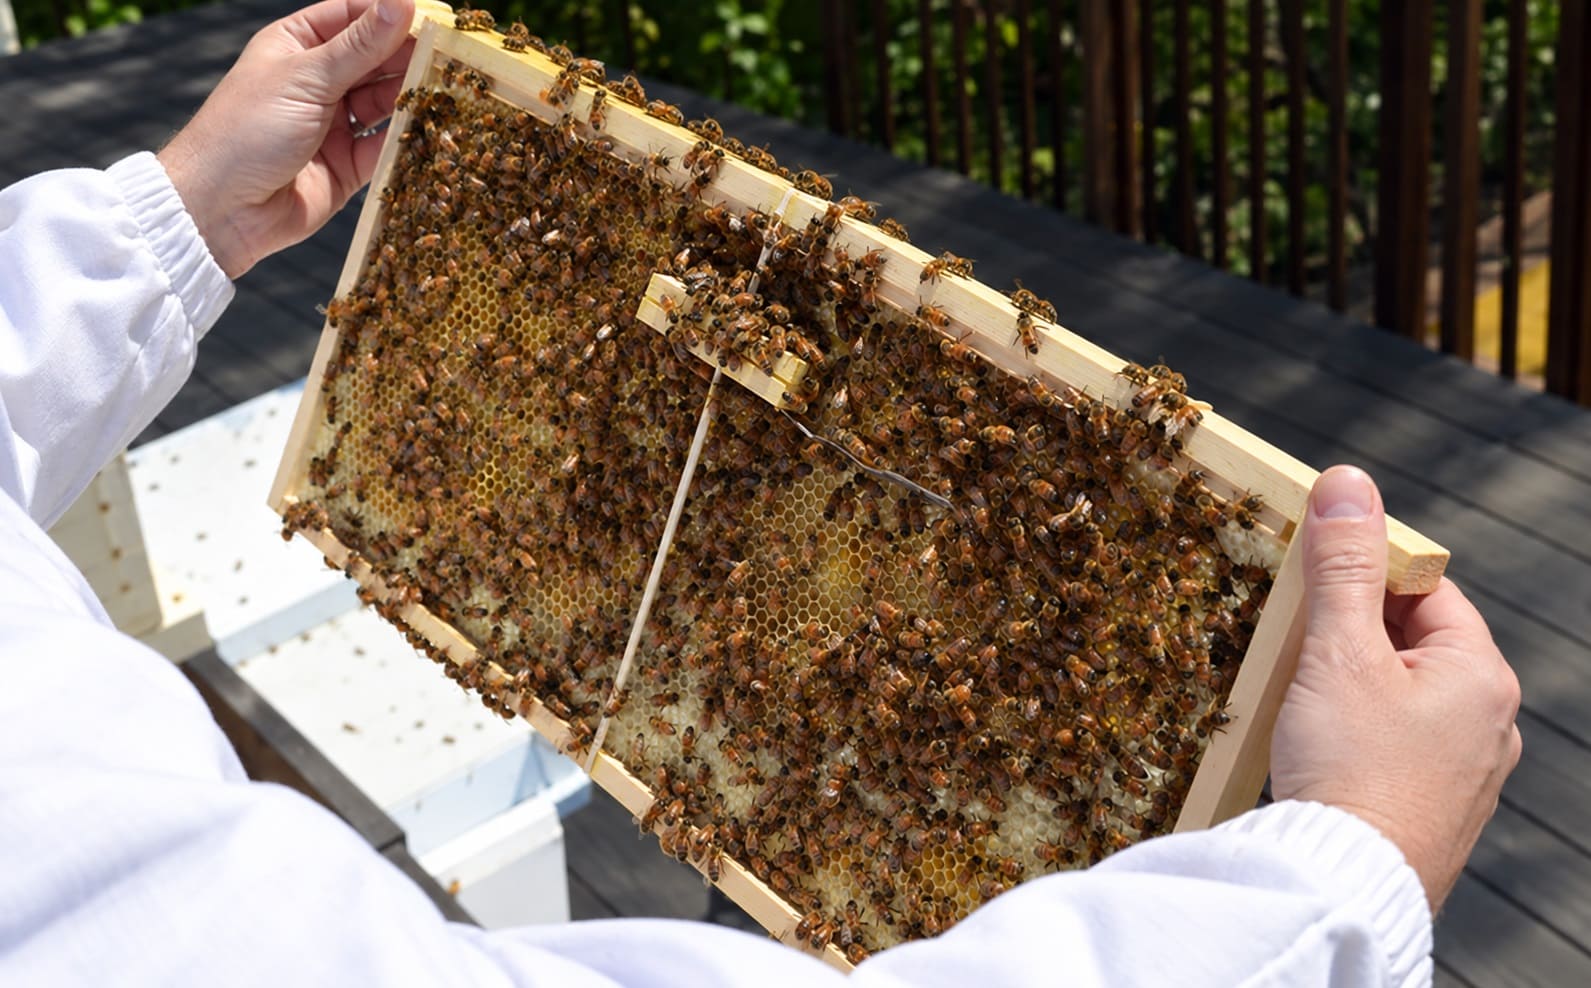
At about a week, look for eggs. Keep feeding until the bees have built comb on most of the frames in the first box or a strong nectar flow takes over.
Inspecting Your Hive in the First Season
Through your first spring and early summer, inspect about once a week; it’s swarm season, and you’re learning what normal looks like. After that, every two weeks is enough.
Pick a calm, sunny midday, ideally above 60°F (16°C), so you don’t chill the brood. Each visit answers four questions.
- Is there a laying queen?
- Do the bees have room?
- Do they have food?
- Are there signs of disease or swarming?
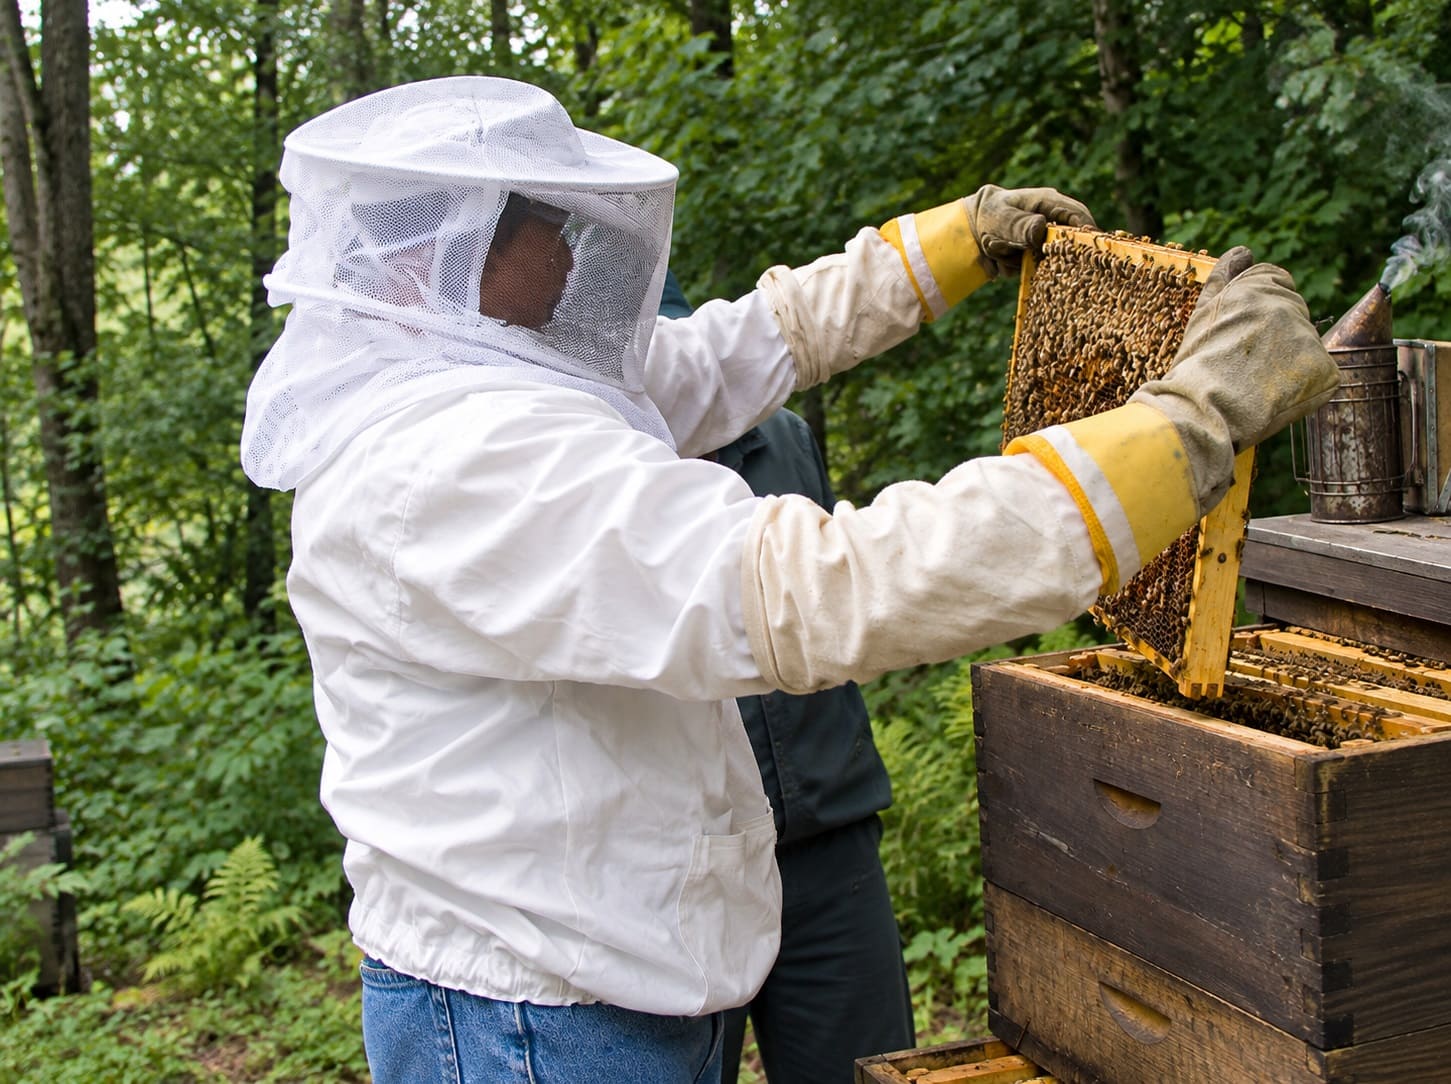
Approach from the side, puff smoke into the entrance, and wait 30 seconds. Lift the cover, puff across the top bars, and take out an outer frame first to make room.
Hold each frame over the box so a dropped queen lands inside, view it with the sun over your shoulder, and put frames back in the same order, squeezed tight.
If bees line up facing you or bump your veil, smoke and slow down; if they stay agitated, close up and come back another day.
What You’re Looking For
Eggs are the key sign. They look like tiny grains of rice standing on end in the cells, and they hatch in three days, so seeing them means a queen was laying within the last three days. You don’t need to find her.
Then look at the capped brood, the tan, slightly domed cells in the middle of the frame: a good queen lays a solid patch with few gaps. Around it you should see an arc of pollen and honey along the top corners and outer frames.
Note how many frames the bees cover each visit; it’s your best measure of growth.
Adding Space
When bees cover about seven of the 10 frames in a box, or six of eight, add the next one: your second deep, then medium honey supers. Too early and they struggle to warm and defend it; too late and a crowded colony prepares to swarm.
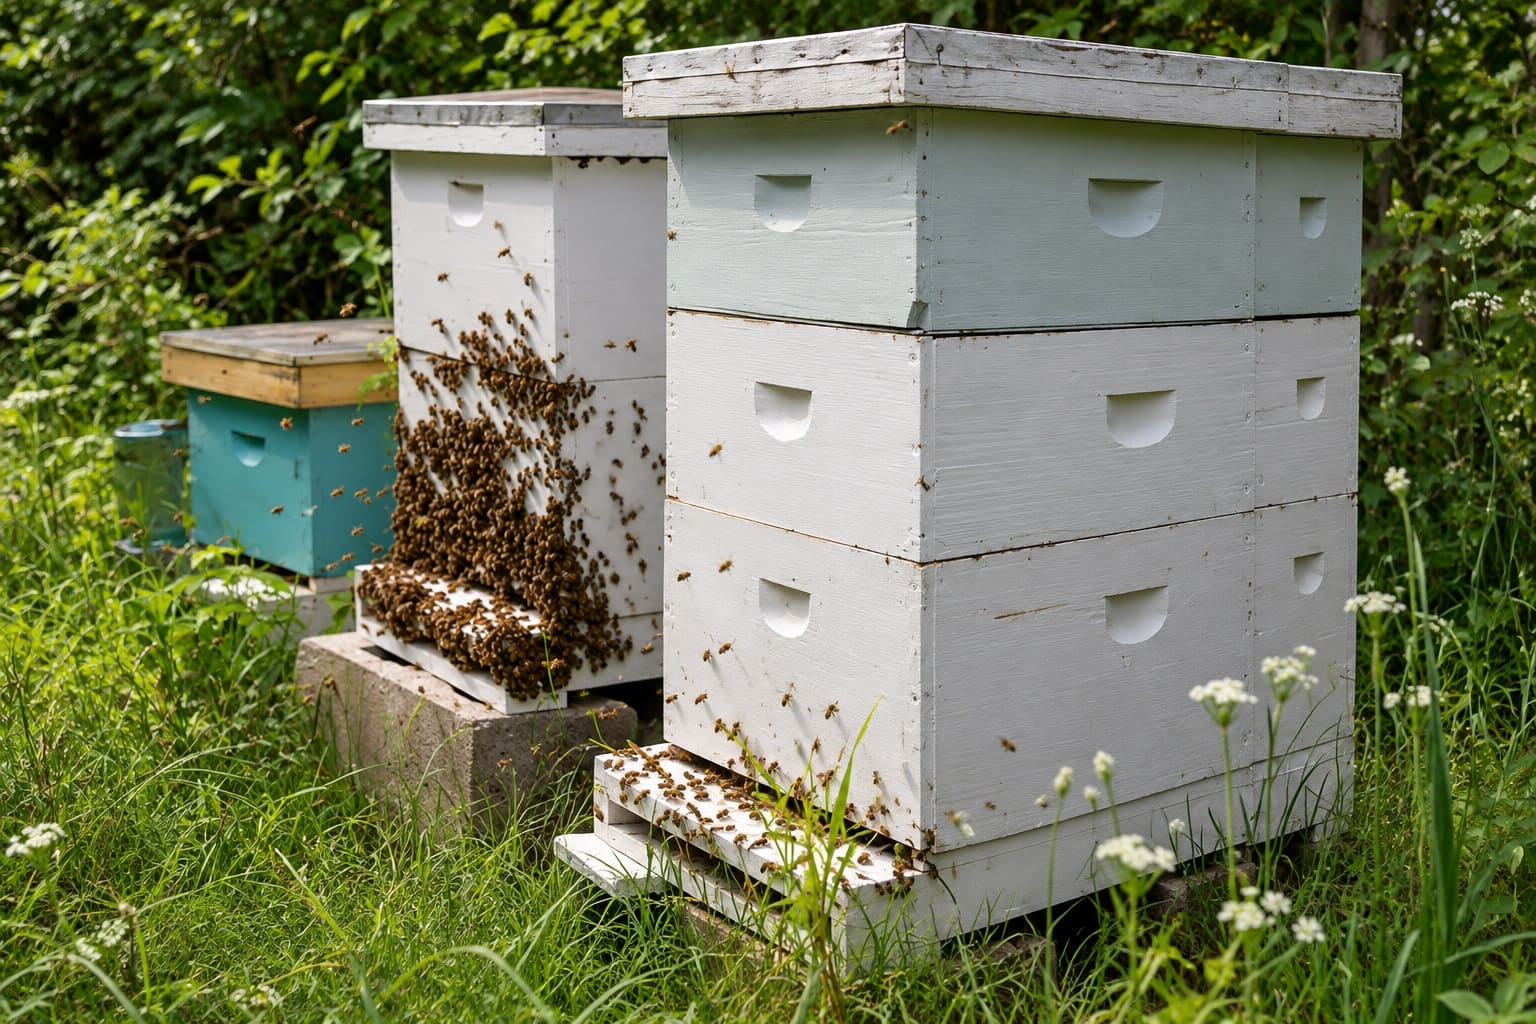
Bees build new comb, which shows as bright white wax at the frame edges, only when nectar is flowing or you’re feeding. Once honey supers go on, stop feeding syrup so it doesn’t end up in your honey.
Reading Queen Cells
Queen cells look like peanut shells hanging off the comb, and their position tells you the colony’s plan. Empty cups are normal.
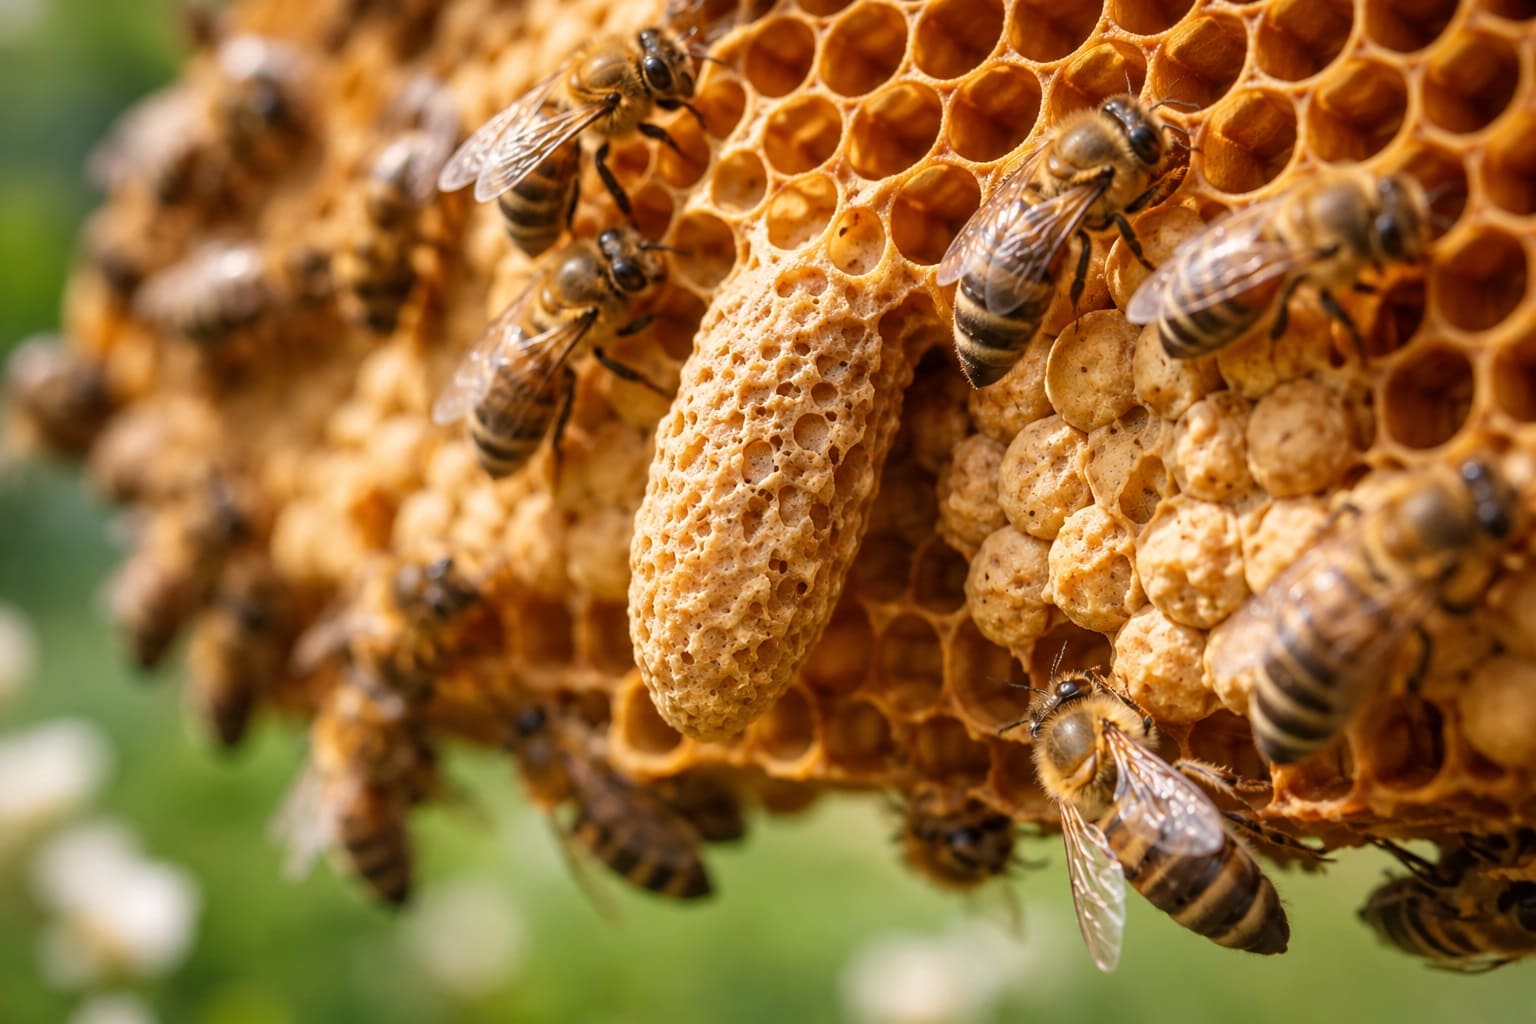
Several cells along the bottom edges of frames usually mean swarm preparations. One or two in the middle of a comb face usually mean the bees are replacing a failing queen, which you should allow.
Cells scattered across the comb after a stretch with no eggs mean an emergency replacement. Don’t scrape them all off, because they may be the colony’s only way to get a new queen.
When you find swarm cells, call your mentor about making a split.
A split moves the old queen, a few frames of brood and food, and some bees into a separate box, leaving the queen cells behind, so the colony gets the fresh start it’s after without half of it flying over the fence.
Keep a spare box, bottom board and cover on hand for exactly this.
Varroa Mites: Test, Then Treat
Varroa mites feed on bees and their brood and spread viruses such as deformed wing virus. Every colony has them, and their numbers climb all season, so a colony that looks busy in August can collapse by late fall.
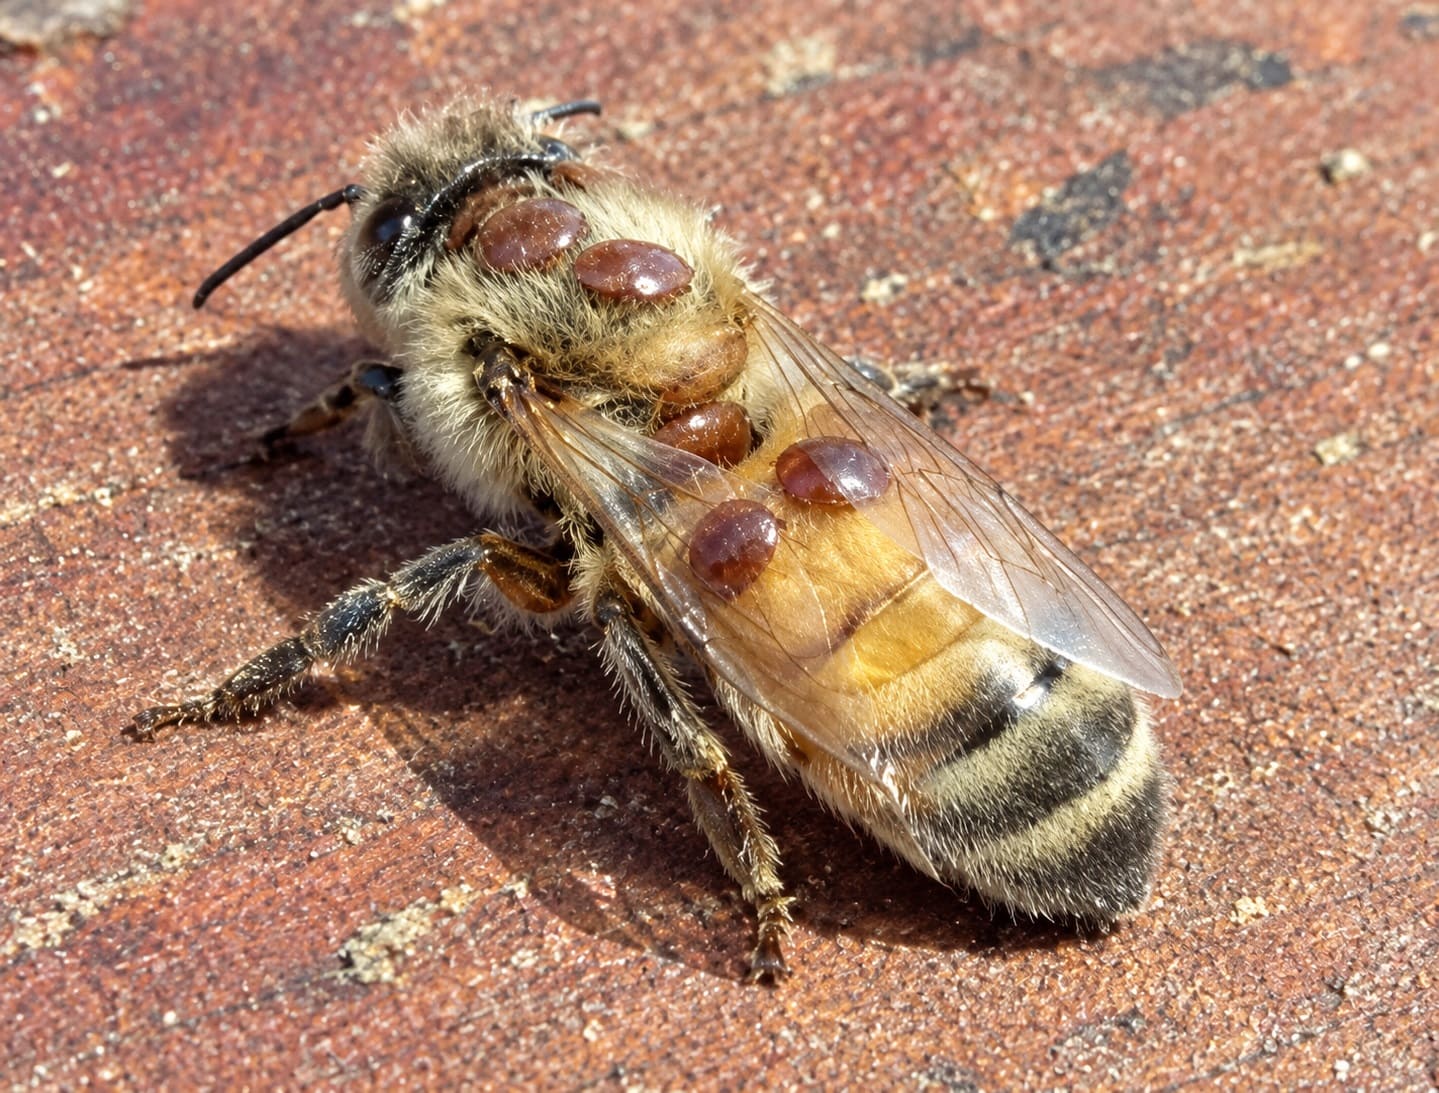
The Honey Bee Health Coalition, whose varroa guide is the standard North American reference, warns that the overwhelming majority of colonies can’t survive unless the beekeeper controls mites.
Losses run high even with care: the Auburn University-led US Beekeeping Survey found beekeepers lost 39.9% of colonies from April 2025 to April 2026, after losses above 55% in each of the two previous years.
How to Do an Alcohol Wash
You’ll need a mite-wash cup, or a wide-mouth jar with a mesh insert that lets mites through but not bees, plus rubbing alcohol and a white pan.
- Pick a frame of open brood, where nurse bees carry the most mites, and check that the queen isn’t on it.
- Shake the bees into a tub and scoop a level half cup, which is about 300 bees.
- Pour them into the jar with enough alcohol to cover them and close the lid.
- Swirl hard for a full minute, pour the liquid through the mesh into the pan, then repeat once.
- Count the mites, reddish-brown ovals about the size of a pinhead, and divide by three to get mites per 100 bees.
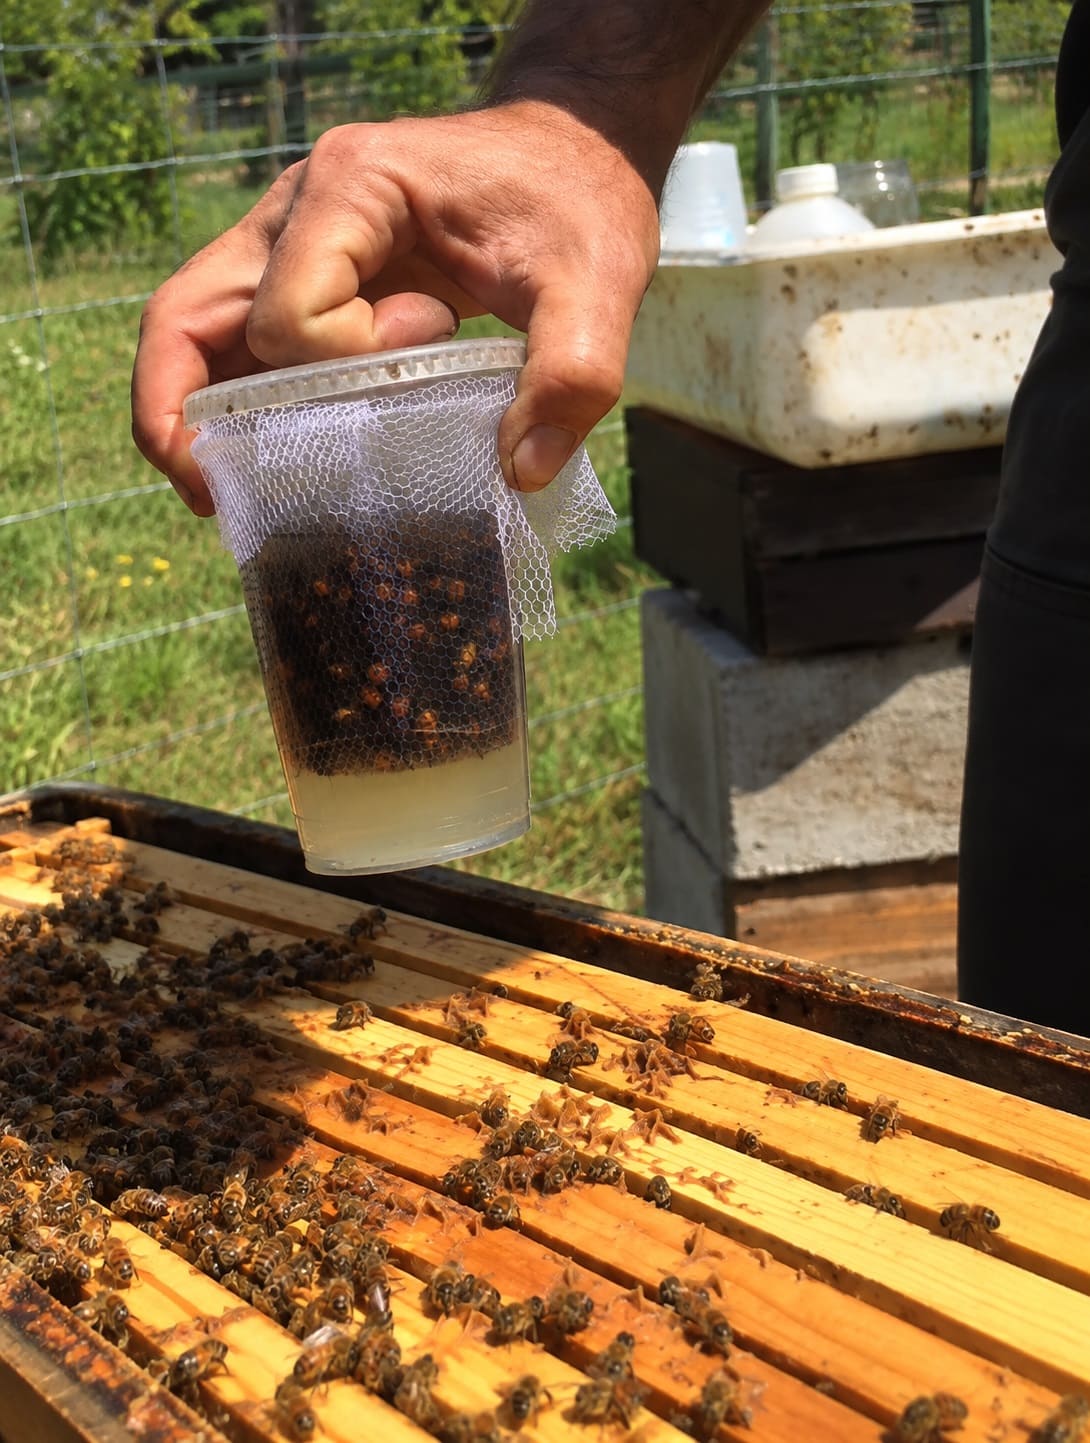
The coalition’s thresholds are straightforward.
In spring and summer, a count under 2 mites per 100 bees (fewer than six in your sample) means you don’t need to treat yet. Once counts reach 2 to 3 per 100 (six to nine mites), treat promptly.
Going into winter, more than 1 per 100 (over three mites) is too many.
Test monthly from spring to fall and after every treatment. A sugar roll returns the bees alive but is less accurate in humid weather.
Choosing a Treatment
The right product depends on the season, whether honey supers are on, and the temperature. This summary follows the coalition’s guide, but the label is the legal instruction, so read it every time.
| Treatment | Works best | Honey supers on? | Temperature limits |
| Formic Pro or MAQS (formic acid) | Spring through fall; reaches mites under brood cappings | Yes | Daytime highs 50 to 85°F (10 to 29.5°C) |
| HopGuard 3 (hop beta acids) | When little capped brood is present | Yes | Above 50°F (10°C) |
| Oxalic acid dribble or vapor (Api-Bioxal) | Broodless periods: early winter, new packages, splits | Only if your product’s label allows it | Vapor requires an acid-rated respirator |
| Apiguard (thymol gel) | Late summer, after harvest | No | 59 to 105°F (15 to 40°C) |
| Apivar (amitraz strips) | Spring before supers, or after harvest; stays in 42 to 56 days | No | Slow-acting, so start early |
A simple plan suits most beginners. Test in spring and treat before supers go on if counts are high.
After the summer harvest, usually August in much of the US, bring mites down hard so the colony raises healthy winter bees, then follow up with oxalic acid in early winter when there’s little brood.
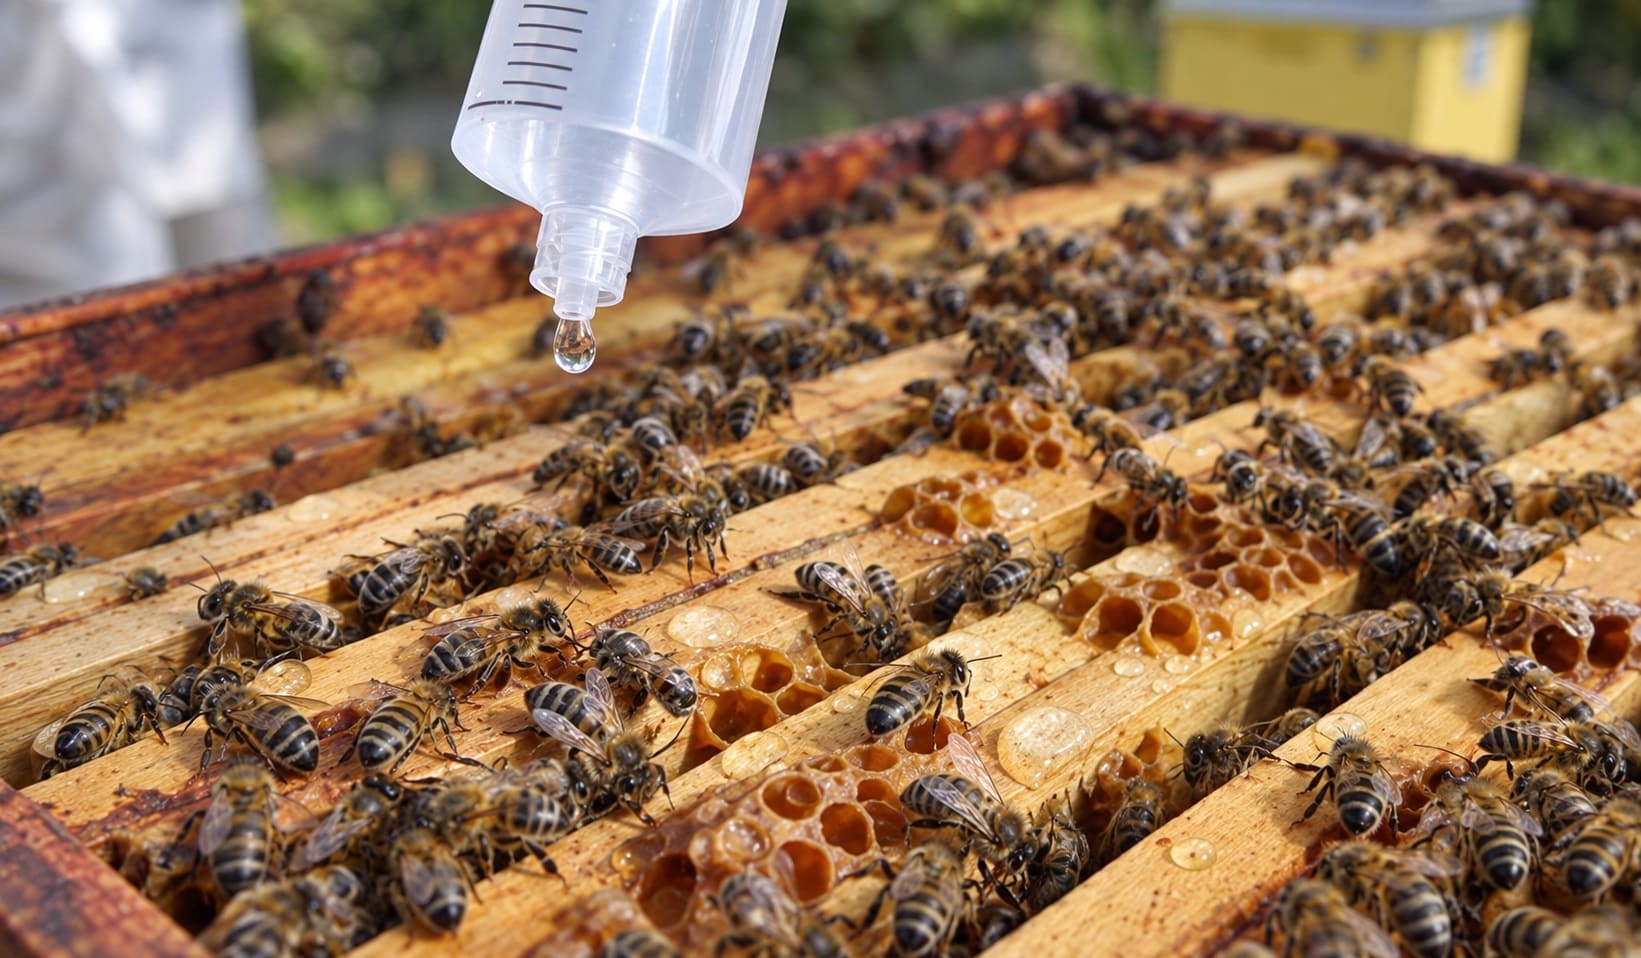
Wear the protective gear the label specifies, since formic and oxalic acids are corrosive, and rotate products over the years so mites don’t build resistance.
Treatment-free beekeeping is a reasonable goal for experienced keepers with mite-resistant stock, but for a beginner it usually means a dead colony and mites spread to every hive nearby.
Don’t confuse mite treatments with antibiotics, either: since 2017, US beekeepers need a veterinarian’s prescription or feed directive for bee antibiotics, which are for diagnosed disease.
Older guides recommending routine medication are out of date.
Getting Through the First Winter
As a rough guide, a colony needs about 90 pounds (41 kg) of honey to get through winter in the northern US, around 60 pounds (27 kg) in the middle states and about 40 pounds (18 kg) in the South.
Ask local beekeepers what works in your area. Learn to judge stores by hefting: tip the hive back an inch from behind and feel the weight. It means little the first time and a lot by the tenth, especially with a second hive to compare.
If a colony feels light in early fall, feed thick 2:1 syrup (two parts sugar to one part water) while days are still above about 50°F (10°C), so the bees can store it.
After that, use fondant or a sugar board placed right above the cluster. Feed only white granulated sugar; brown or raw sugar can cause dysentery, and honey from another source can carry foulbrood spores.
Before the first cold nights, reduce the entrance and fit a mouse guard.
In cold climates, add a windbreak, insulate the top of the hive so moisture doesn’t condense and drip onto the cluster, and give moist air a way out through a small upper entrance.
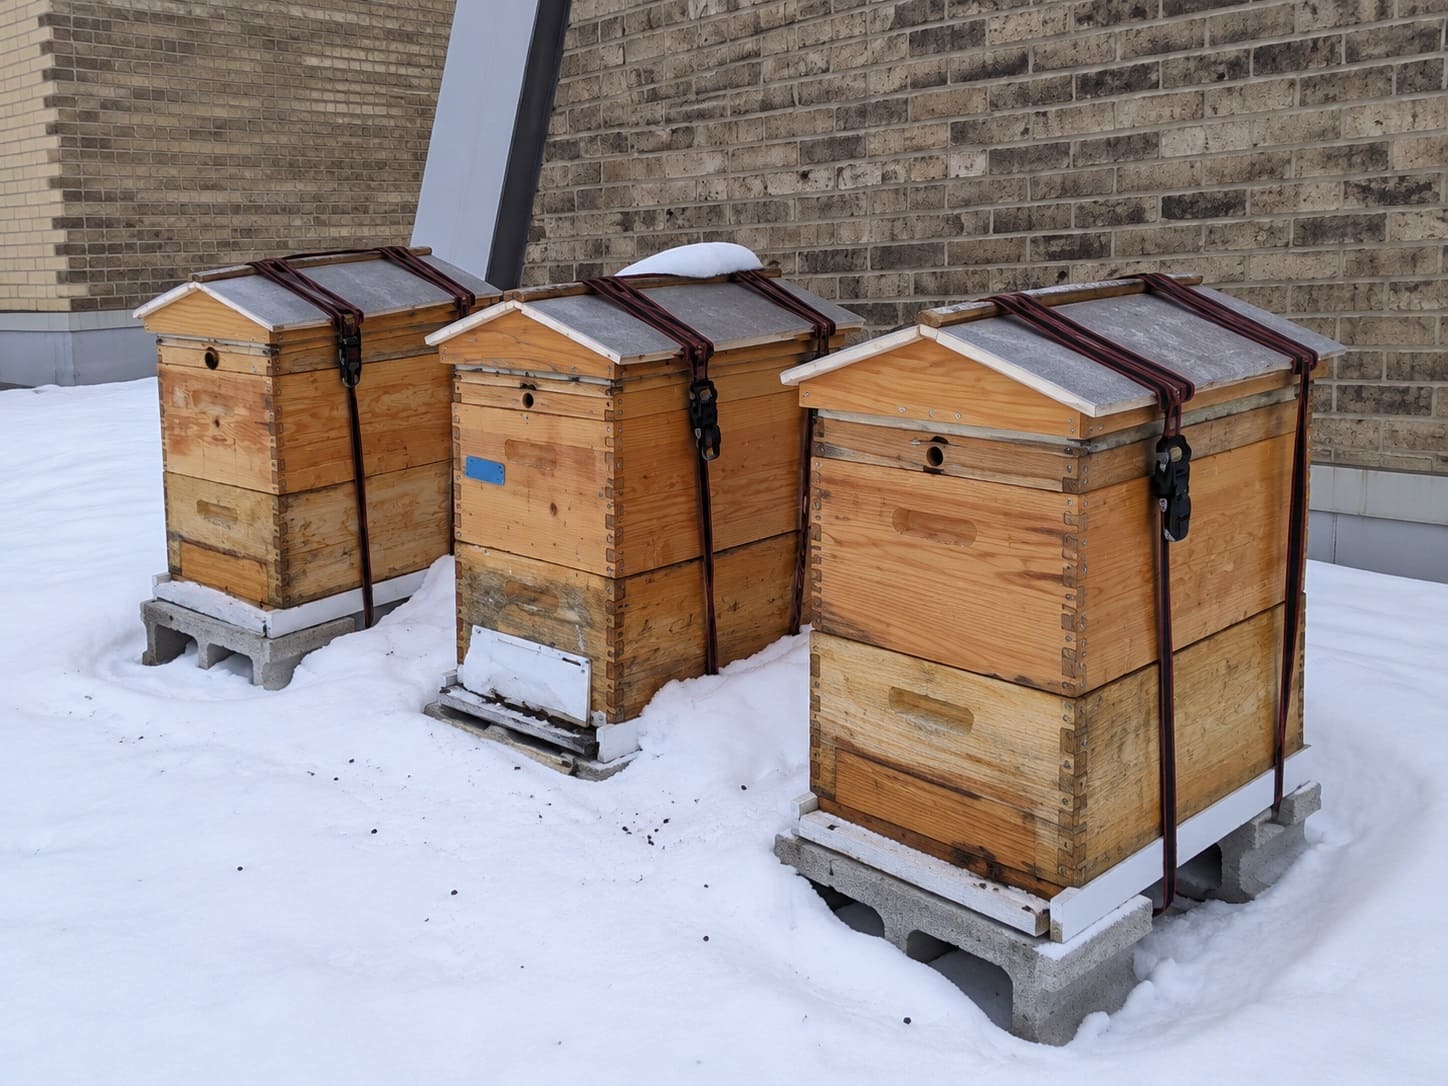
Late summer and fall bring nectar shortages and robbing, so keep entrances small and never spill syrup near the hives.
Keep the hive closed through winter, clear snow and dead bees from the entrance, and heft it again in late winter. That’s when starvation catches most beginners, because the colony starts raising brood and burns through food fast.
If a colony dies, look for the cause before cleaning up: white mite droppings stuck in brood cells point to varroa, while bees head-first in empty cells point to starvation.
Honey: What to Expect in Year One
A new colony spends most of its first year building comb, so there’s often little or no surplus. Take honey only from supers above the brood boxes, never from the brood nest, and only after the colony has its winter stores.
Wait until frames are at least 80% capped, which means the honey is dry enough not to ferment. For a few frames, you can crush the comb and strain it through a fine mesh bag instead of using an extractor.
In year two, a healthy colony in a decent season might give 30 to 60 pounds (14 to 27 kg), though weather and forage swing that widely.
Troubleshooting Your First Year
- No eggs or young larvae for two inspections:
The queen is lost or failing, or a new queen hasn’t started laying, which can take two to three weeks. If there’s no sign of a new queen, give the colony a frame of eggs from your other hive or buy a mated queen.
- Several eggs per cell or bulging drone cappings on worker comb:
Laying workers in a long-queenless colony. Combine it with a healthy colony, using newspaper between the boxes.
- Bees wrestling at the entrance and wax flakes on the landing board:
Shrink the entrance, close gaps and clean up spilled syrup.
- Patchy brood with sunken, darkened or perforated cappings and a foul smell:
Possible American foulbrood. Close the hive, keep its equipment separate and call your state apiary inspector.
- Bees with shriveled, crumpled wings:
Heavy mites spreading deformed wing virus. Do an alcohol wash and treat.
- Webbing in comb or small black beetles running from the light
Wax moths or small hive beetles in a weak colony. Don’t give bees more space than they can cover, and freeze stored frames for 48 hours.
Frequently Asked Questions
Is it too late to start beekeeping this year?
If local suppliers are sold out, probably, and that’s fine. Use the season to help a mentor, assemble equipment and put your name on a swarm list.
A colony started in early summer has far less time to store honey for winter, so a prepared start next spring usually beats a rushed one now.
What kind of honey bees should a beginner buy?
Italians are gentle and build up fast but eat through stores quickly. Carniolans are gentle and thrifty in winter but quick to swarm.
Russian and other mite-resistant lines handle varroa better but can be more defensive. A healthy, locally adapted colony matters more than the label.
Will a backyard hive get my family or neighbors stung?
A well-placed hive with a barrier in front rarely causes trouble away from the hive itself.
Most stings happen to the beekeeper during inspections, and Colorado State University Extension notes that many stings blamed on honey bees actually come from yellowjackets.
Can I keep bees at a second home?
It’s hard for a beginner. In spring you need to check about weekly to catch swarm preparations, and you’ll miss the everyday signs you’d notice at home. If a monthly visit is all you can manage, spend a season helping a mentor first.
Where to Start
The beekeepers whose first colonies survive aren’t the ones with the fanciest gear. They’re the ones who joined a club early, started with a nuc and counted mites before the bees looked sick.
If you take one habit from this guide, make it the monthly alcohol wash and a note after every inspection.
This week, find your nearest beekeeping club and ask when its next beginner course starts and who sells local nucs. Then save this guide for install day.

